|
A behind-the-scenes look at the creative process 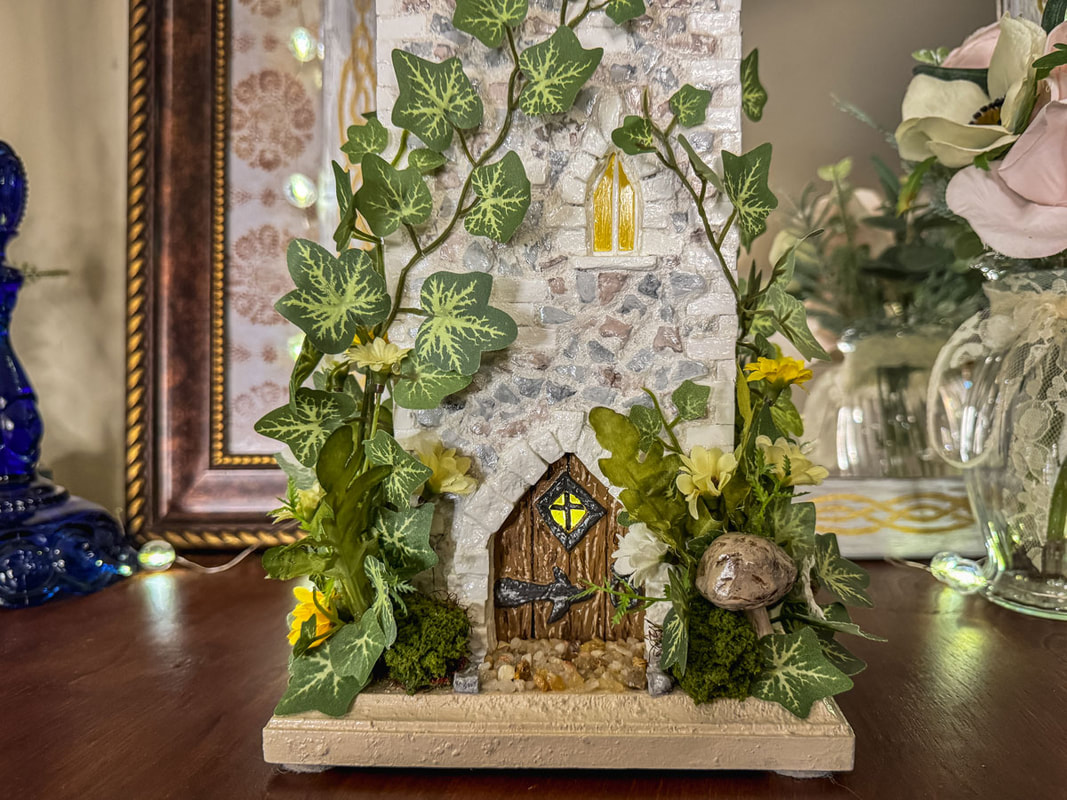 It all started fifty years ago with a Fisher-Price bi-fold castle, complete with a drawbridge, dungeon, and a moat featuring a menacing painted alligator. The seeds of fascination were planted, and the love affair with castles began. If only my four-year-old self could see me now! Of course, I was going to build my very own enchanted castle…That was always in the cards. Certain things are simply inevitable! So, call this one a passion project. Today’s blog post is for those who share this passion (or for the merely curious). Are you ready for a behind-the-scenes look at the design concept and materials used to create this whimsical fairy castle tower? Hang onto your dragon…Here we go! Affiliate Disclaimer: I am an affiliate associate of Amazon, Factory Direct Craft, and Blick Art Materials, so some of the posts in this article contain affiliate links. If you click on the link and purchase the item, I will receive an affiliate commission at no extra cost to you. I will only recommend products or services I use personally and/or believe will add value to my readers, so there is no conflict of interest. Design concept: The vision for this project began as a drawing a few years ago, though so much changed during the design process. Some aspects of that original drawing disappeared completely, while others were enhanced to stay true to a castle aesthetic. In fact, in the early stages, the tower was not the main event! There was a one-story rectangular building in the front with a tower attached at the back. And for some reason I thought a thatched roof would work! Long story short, this design went through a process of elimination…and then I started creating the real details! 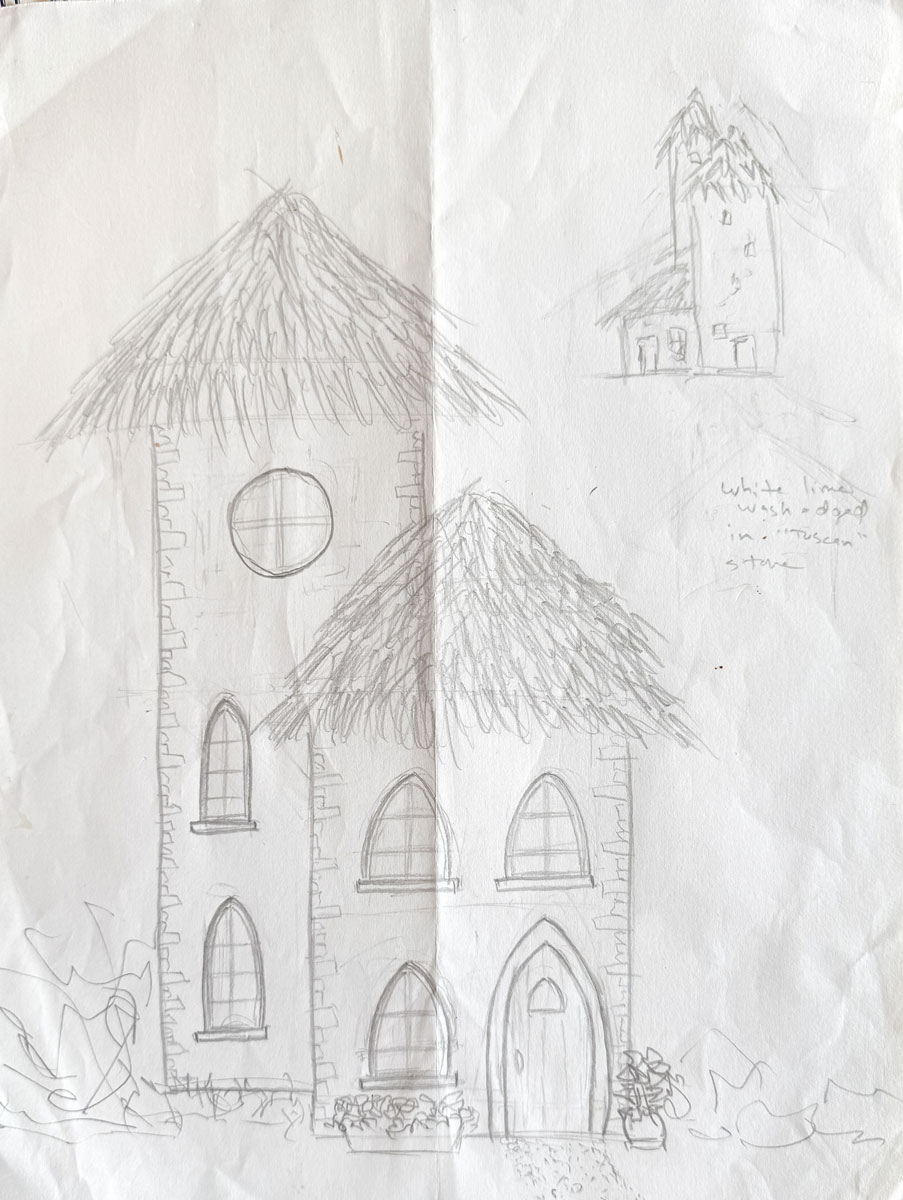 For these new details, I drew my inspiration from real life. I studied details in castle stonework, such as the stone edging on the White Tower in London. In fact, “The White Tower” was my nickname for this piece! I became fascinated with that style of edging in medieval buildings, and my goal became to mimic that design detail in my castle tower. Another real-life detail was the use of climbing ivy, which I envisioned wrapping itself up the sides and around the building. 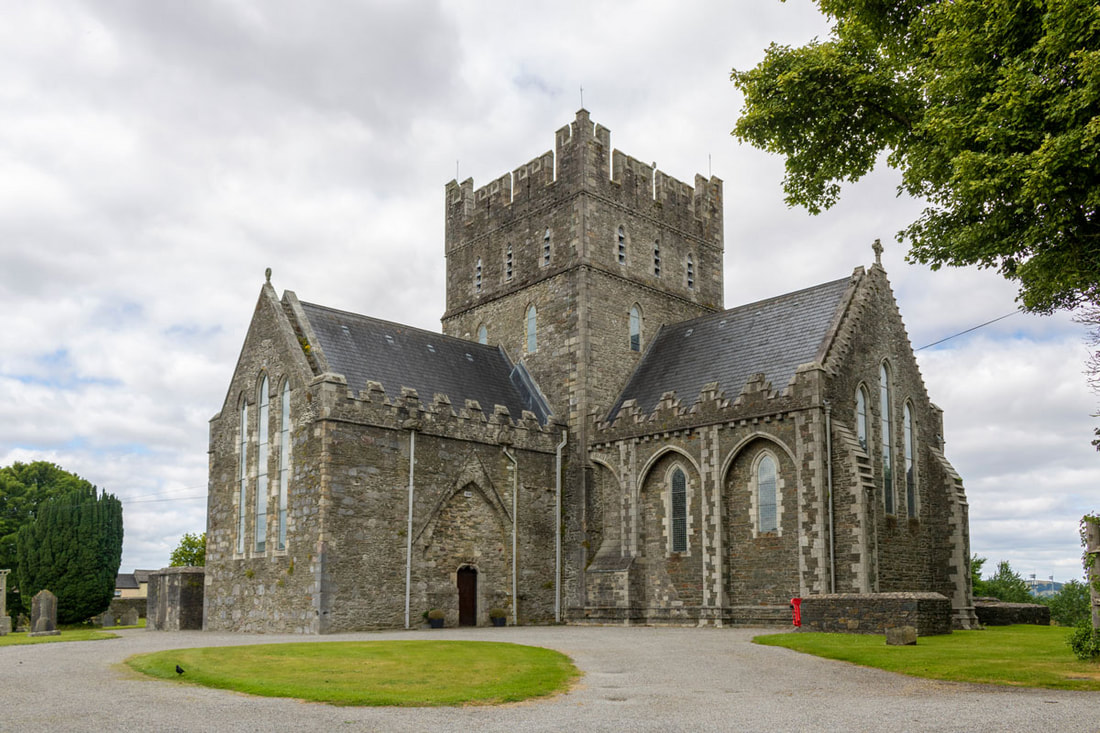 Church of St Brigid, Ireland by Irina on Adobe Stock. 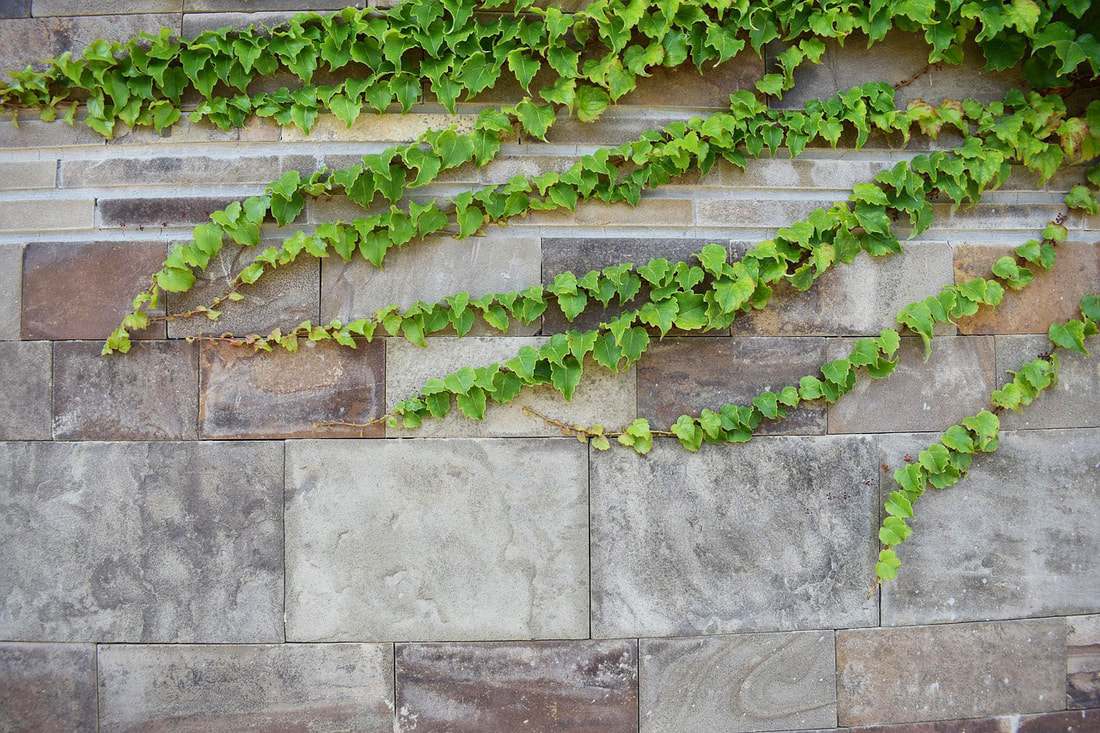 Image by skorchanov on Pixabay. One of the major choices to be made in the design phase of this project was the overall color scheme. At one point, I was set on a deep red wine color for the roof, and I still think that color would’ve been amazing, but a cooler color palette seemed to fit the design better. And I do love that deep, dark blue! 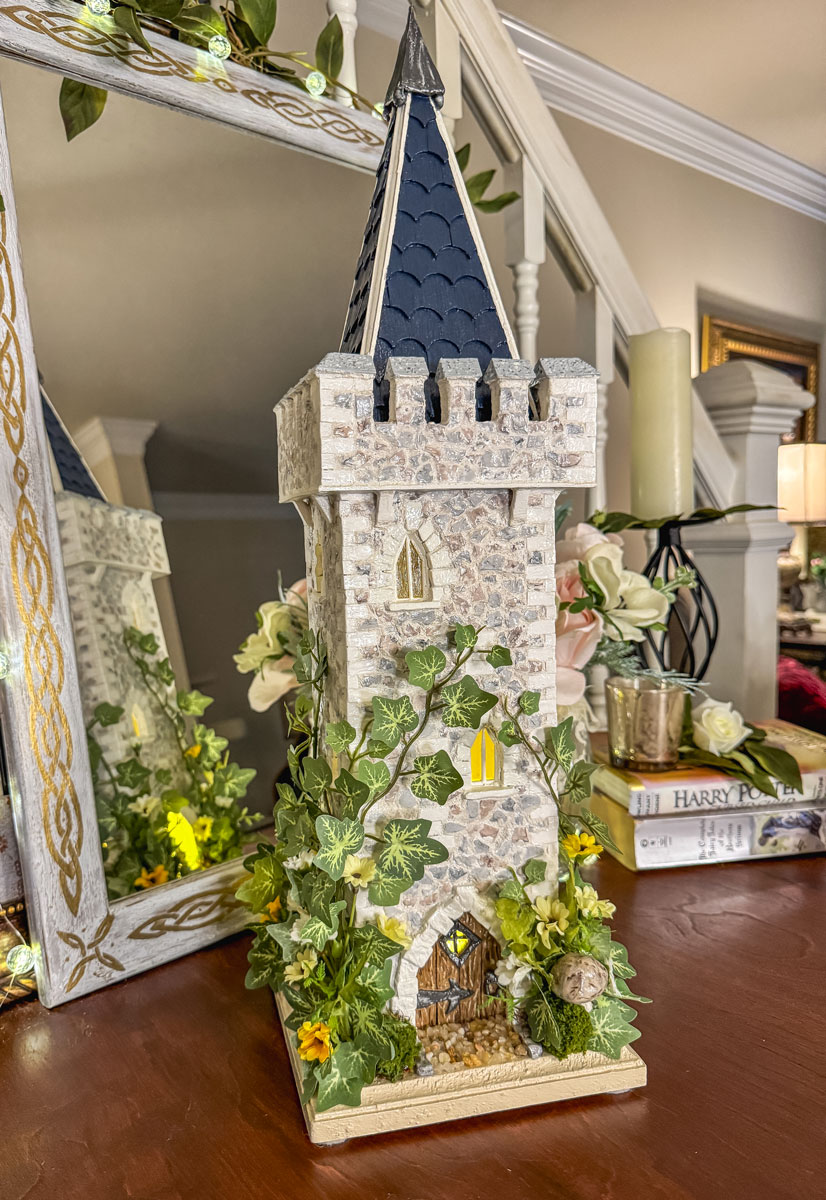 Roof construction: One of the sticking points in this project (and the stage that took the longest) was the roof design. I experimented with multiple renditions in shape, material, and size before finally finding something I liked. First, I tried a simple birchwood pyramid with smooth sides. Then I went down the rabbit hole and found myself creating a clay conical-shaped roof. I finally settled on a more complex, more engineered design made with wood in a pyramidal shape that offered just the right amount of dramatic height and texture for my project. The last hurdle for the roof was whether to place it inside or on top of the crenelations. It took me quite a while to make up my mind! 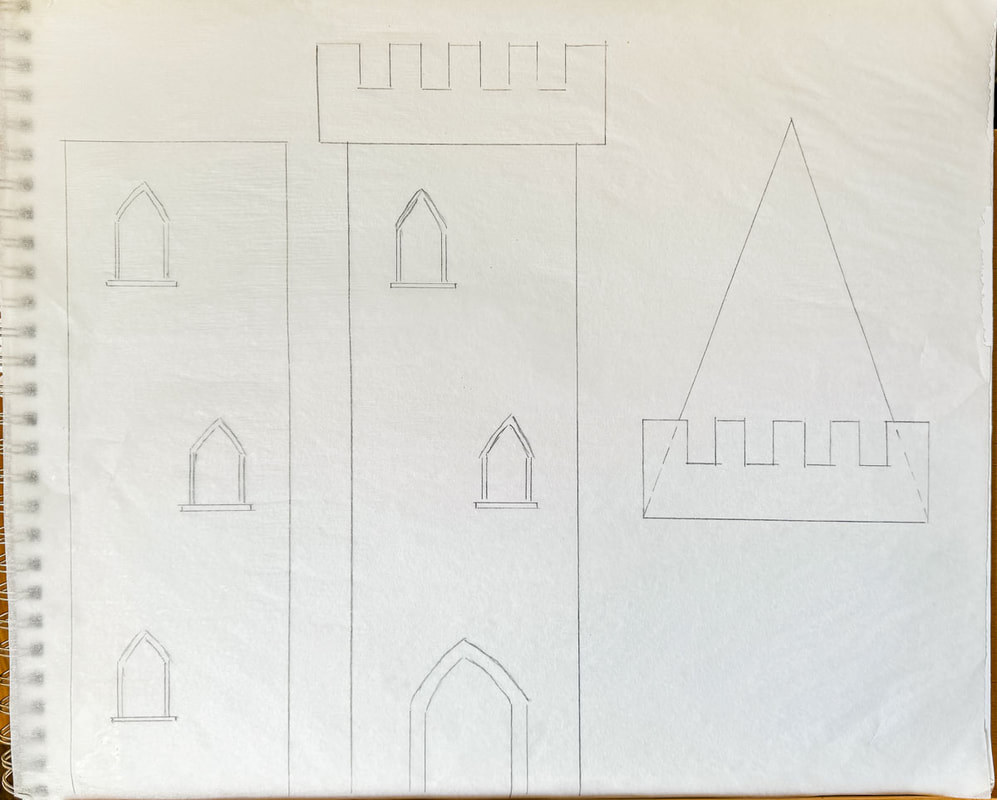 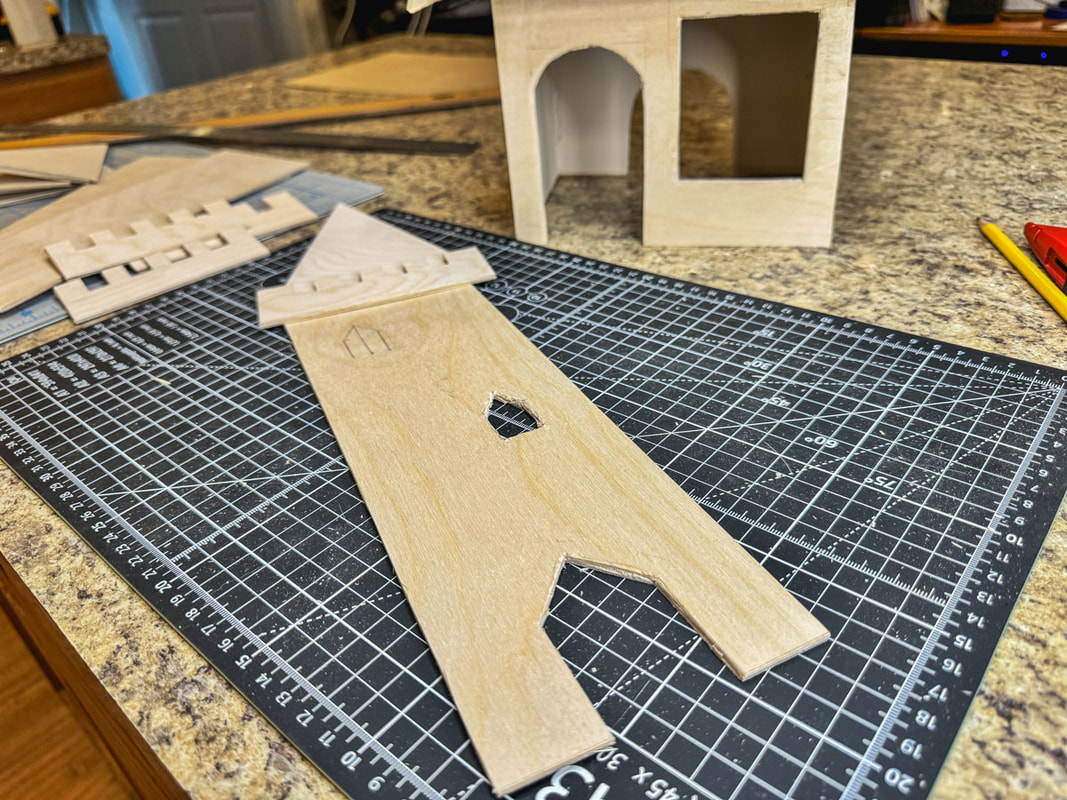 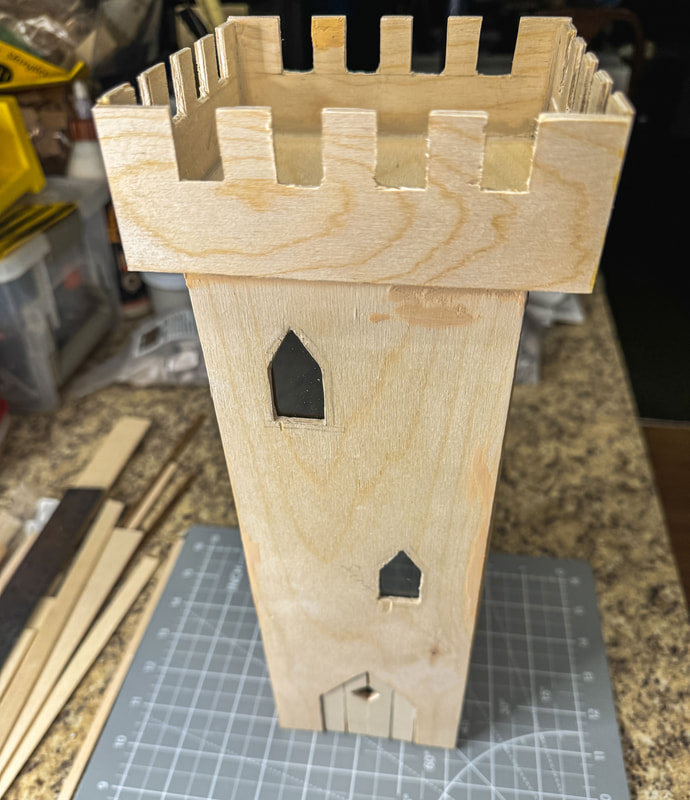 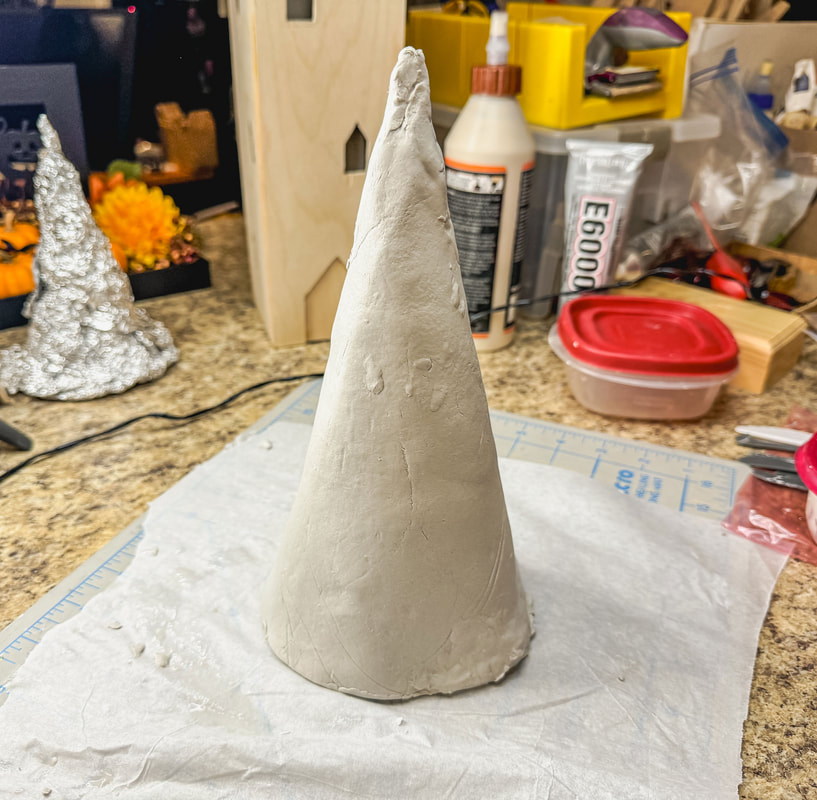 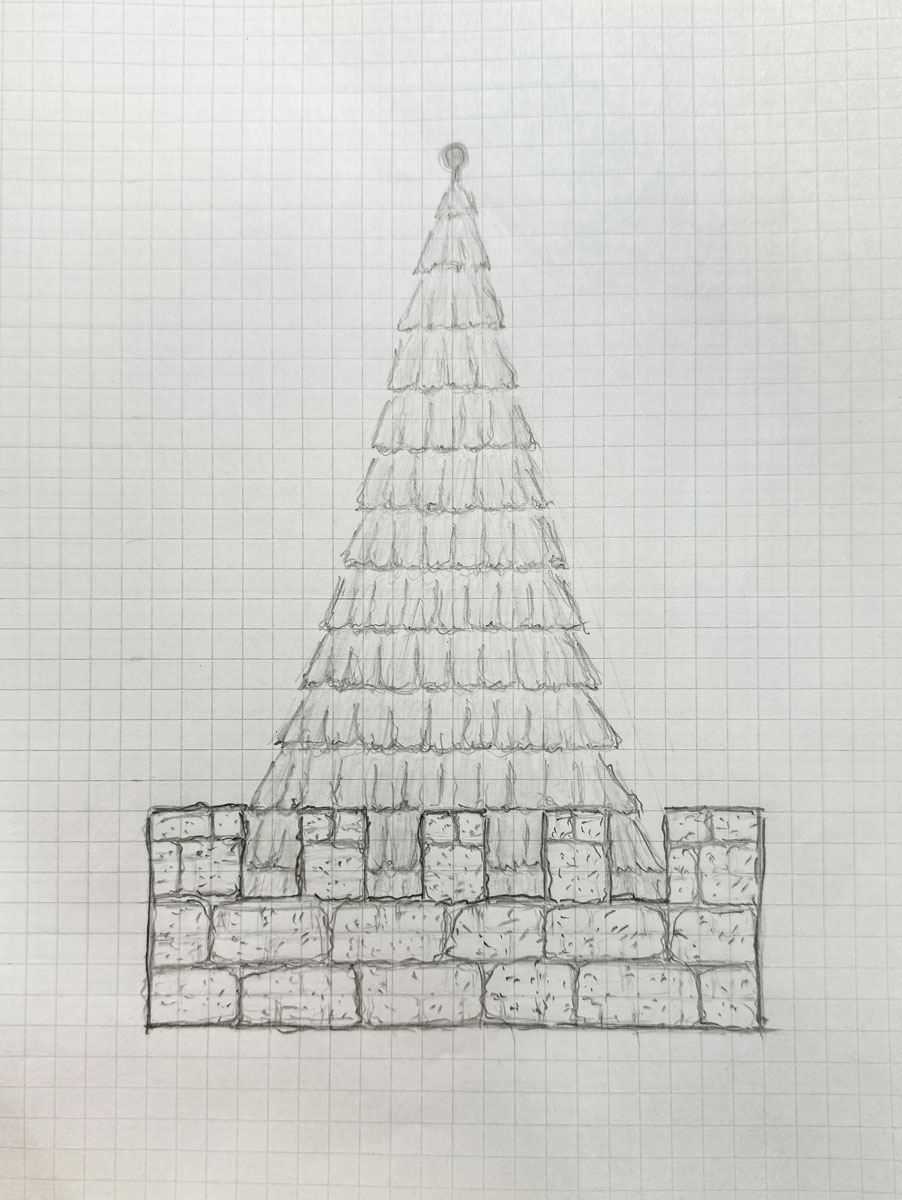 But once my mind was made up, the magic started to materialize! The complex roof base was built, and fish scale shingles were applied, painted in a luscious deep midnight blue acrylic. The trim was painted in Warm White for contrast, and a roof topper was made with air-dry clay, painted deep grey and silver to mimic the look of metal. 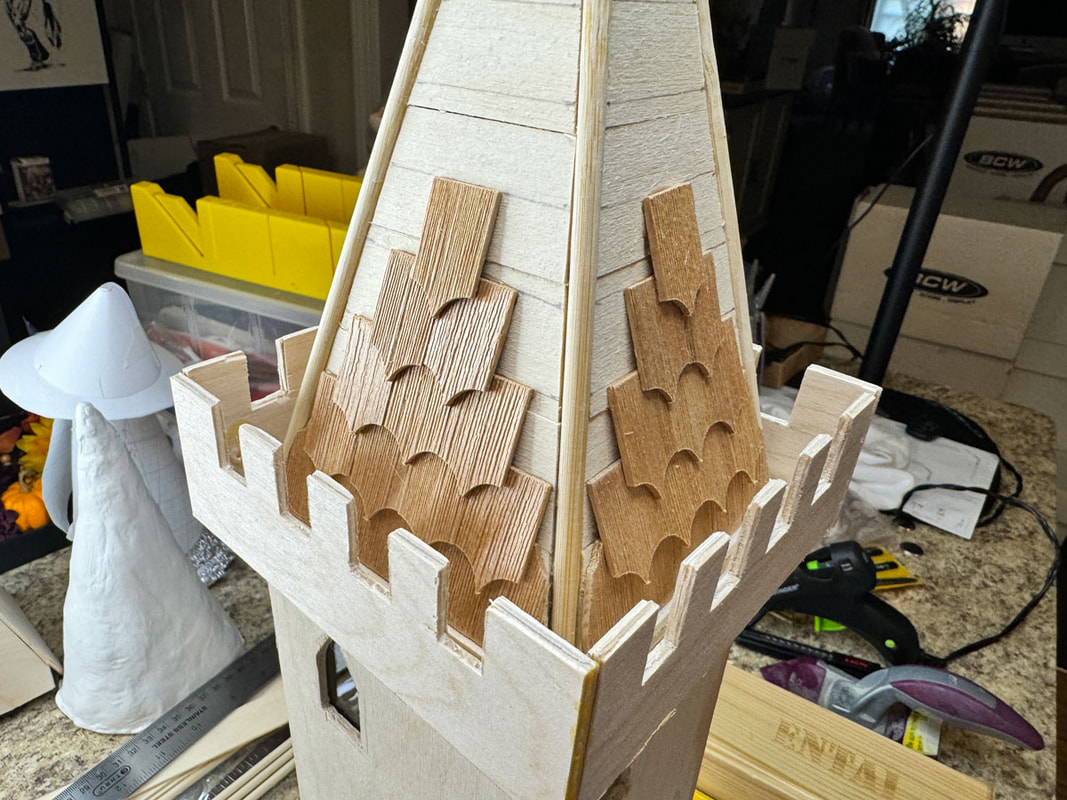 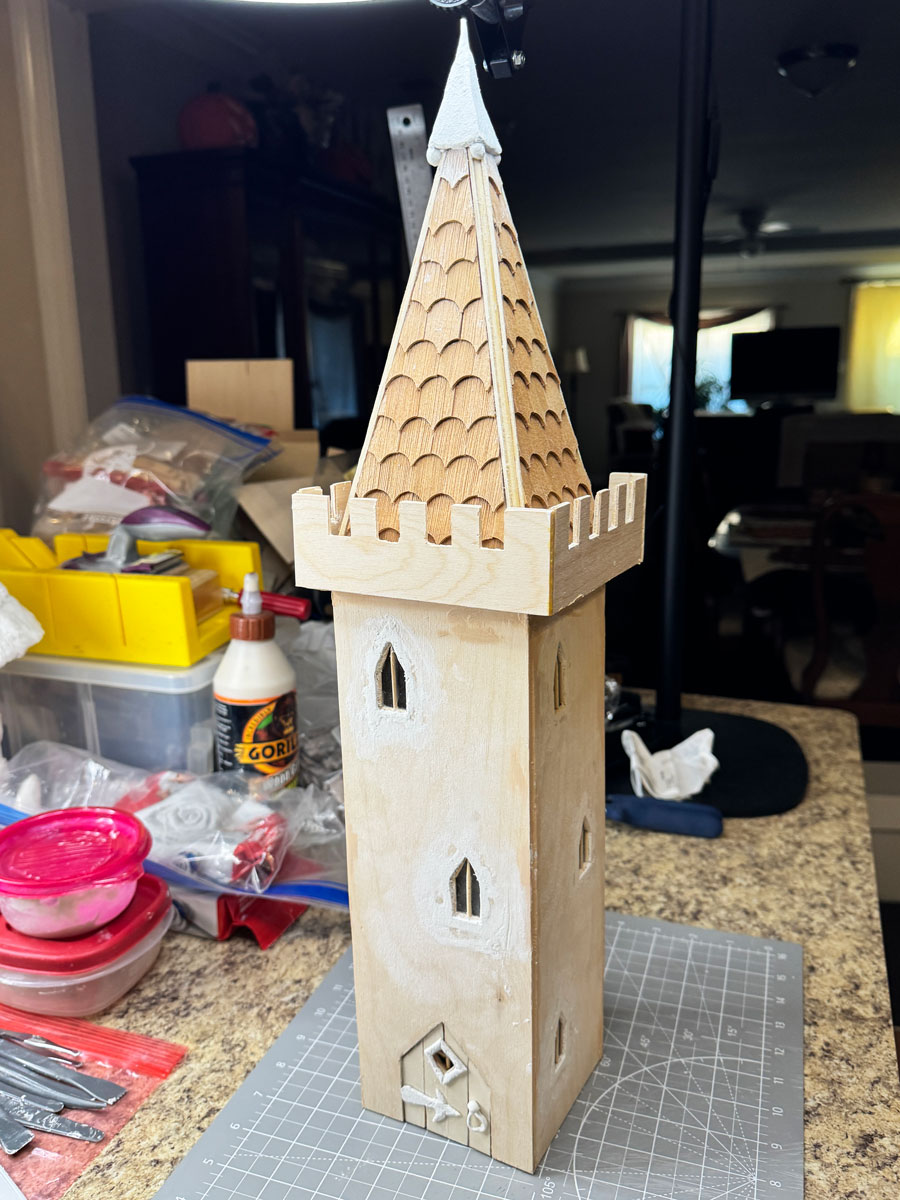 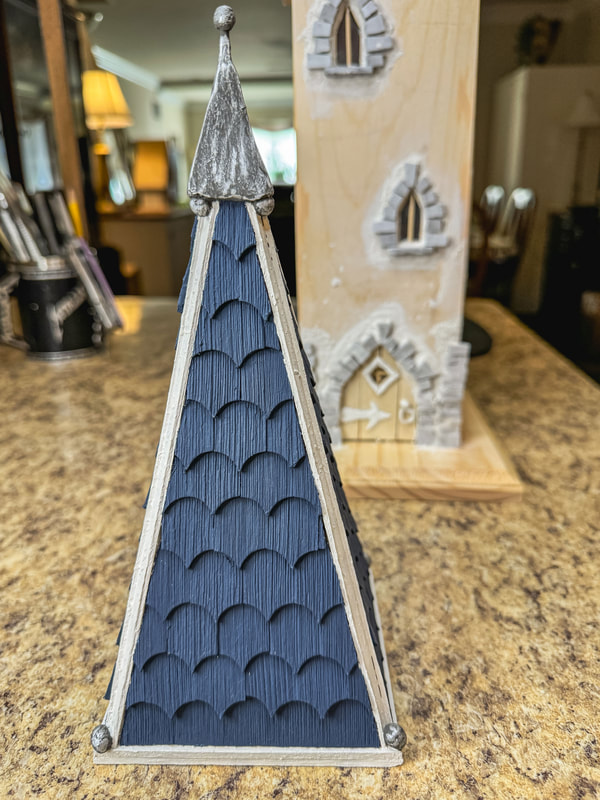 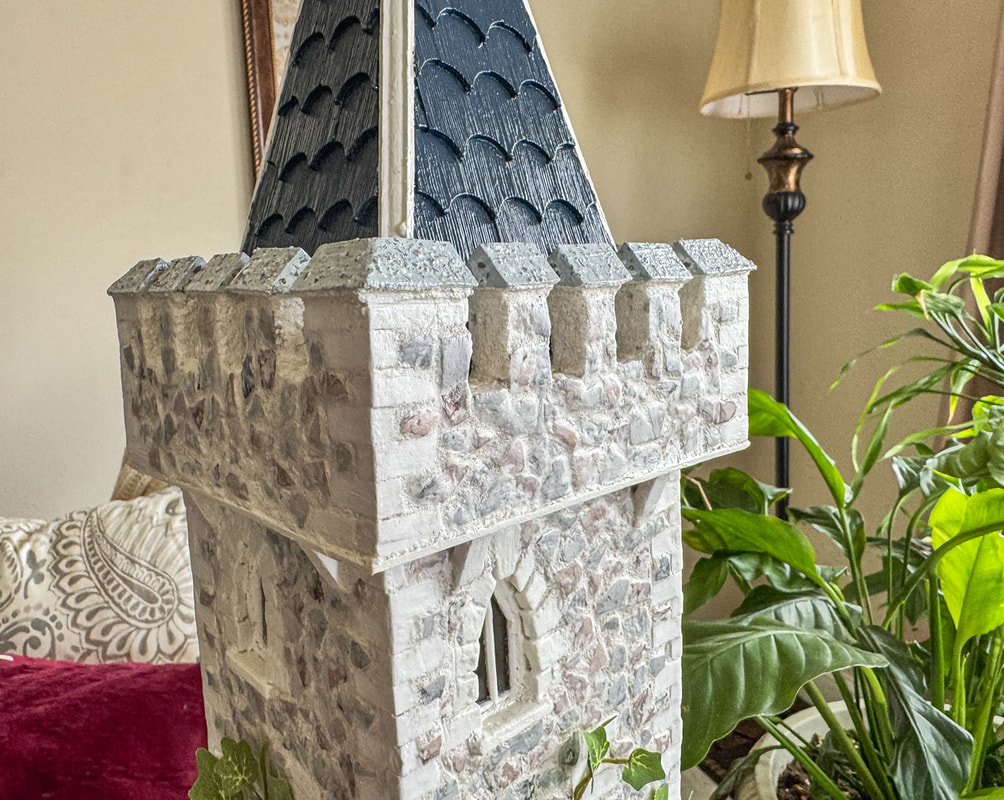 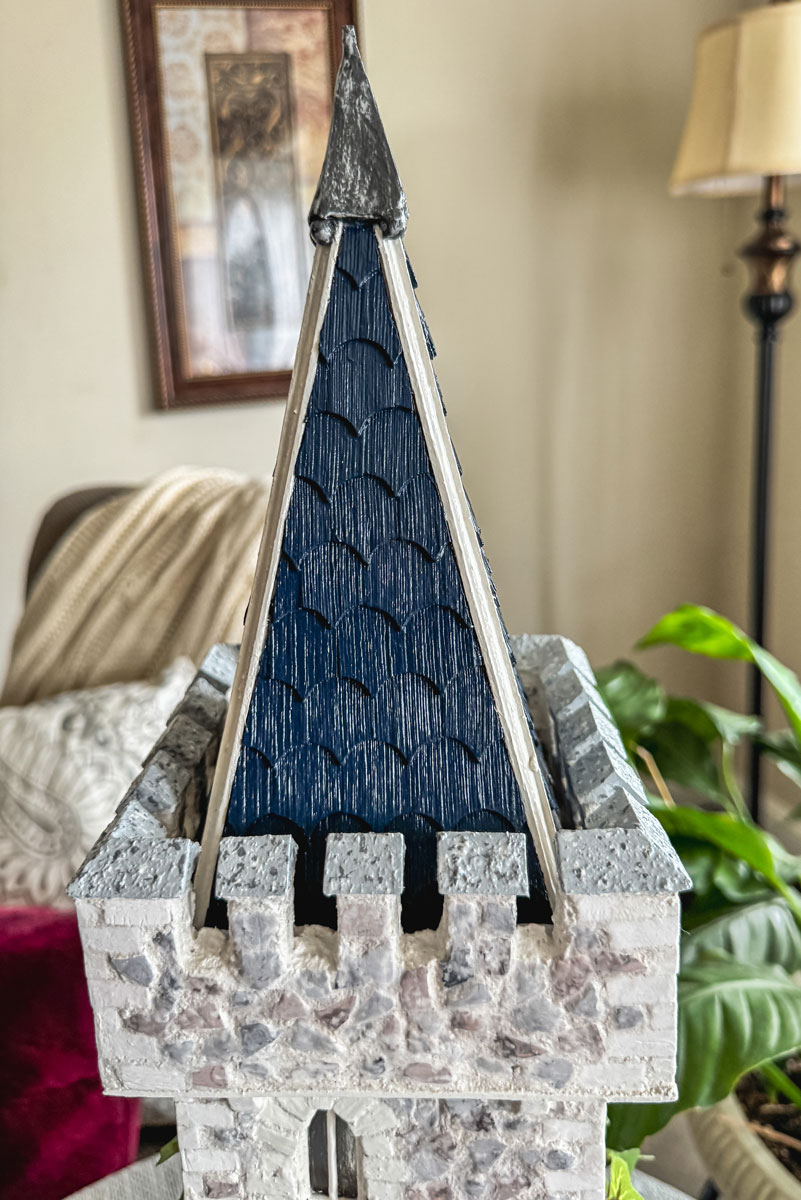 Windows and door designs: The window and door designs are a simplified version of those found in real medieval castles and stone buildings. I wanted the windows to be tall and thin to emphasize height…Plus. I love the way they mimic those thin window slats in real castles! A stone border—painted white to match the tower’s white corner stones—was created around these windows to enhance the sense of balance and drama. The windows themselves are made with plexiglass painted with ModPodge for a slightly frosted look (which looks amazing when it’s lit up with LED lights!). The door is a simple affair, crafted from basswood, with a hole cut out to let a bit of light shine through. The rustic air-dry clay elements are painted to imitate worn metal. 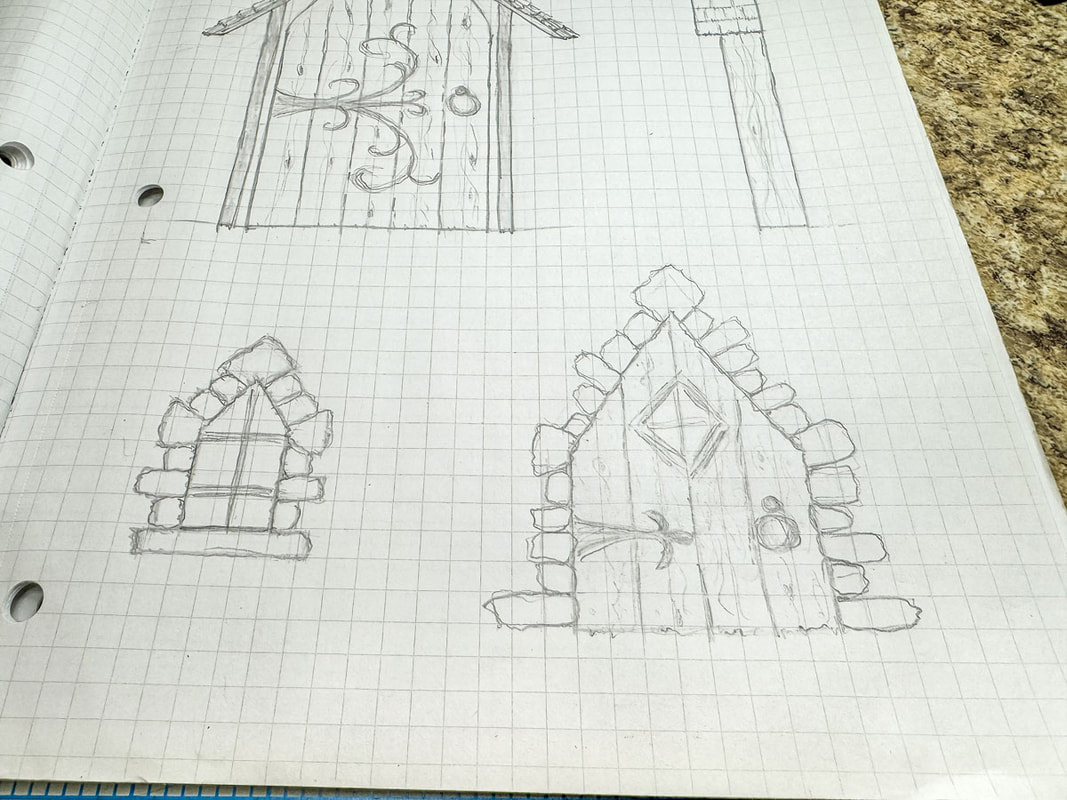 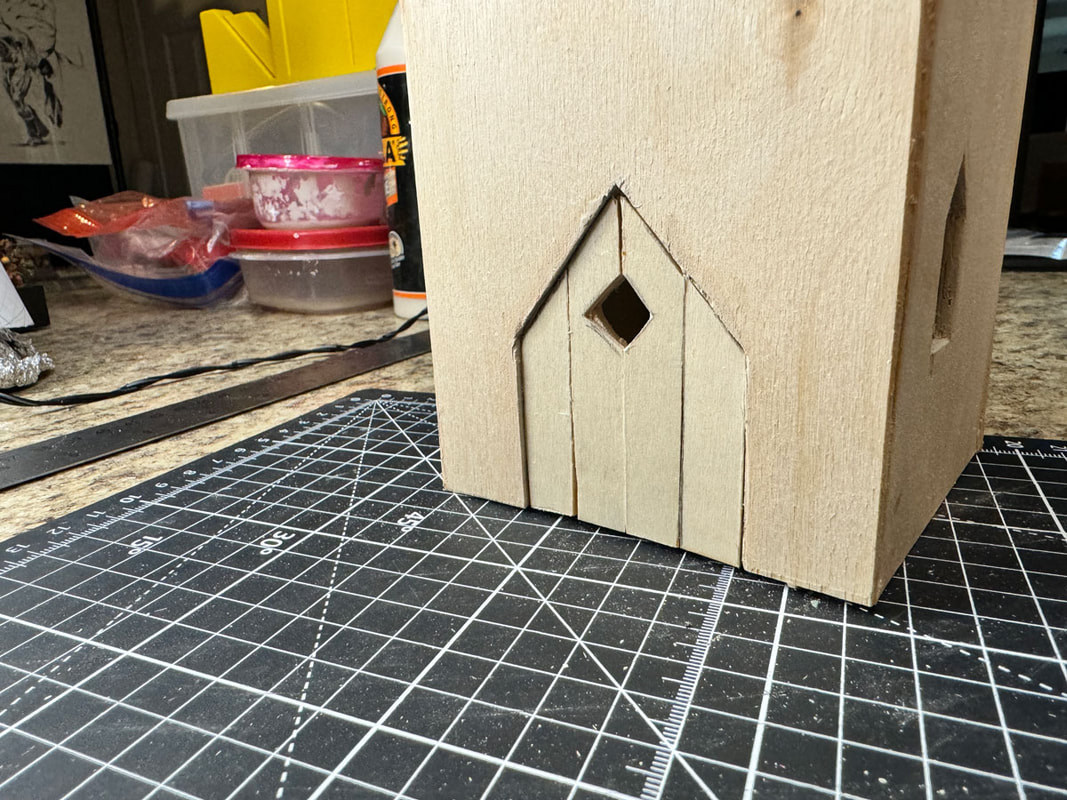 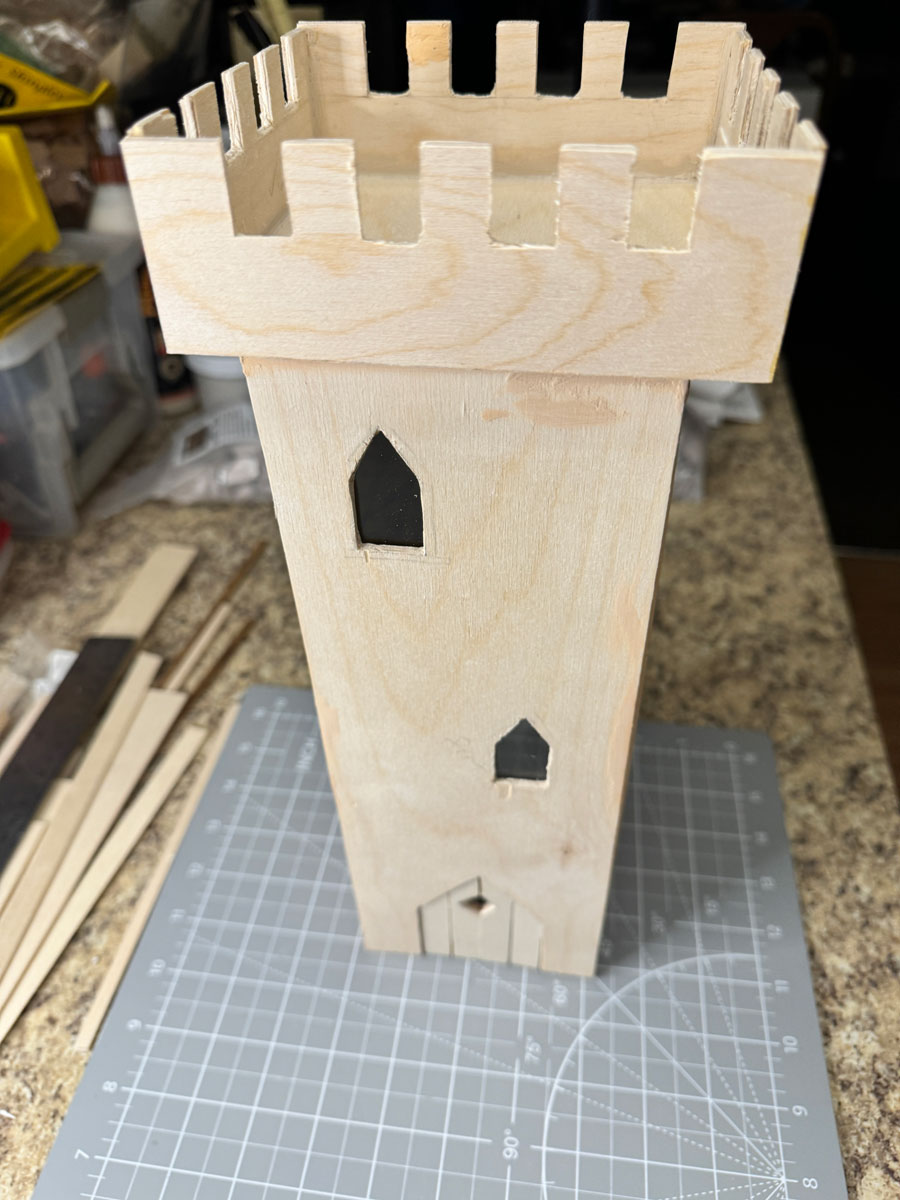 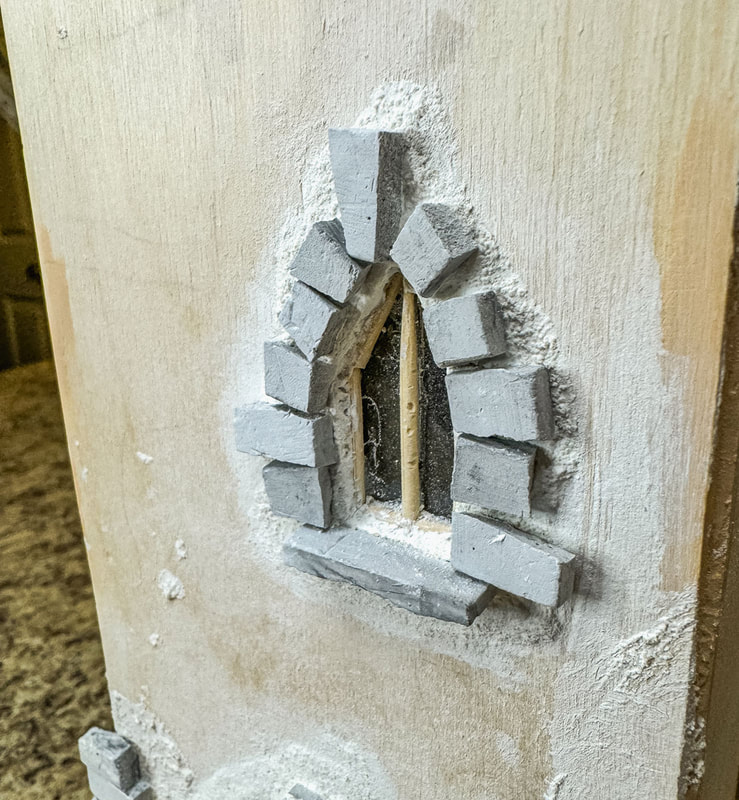 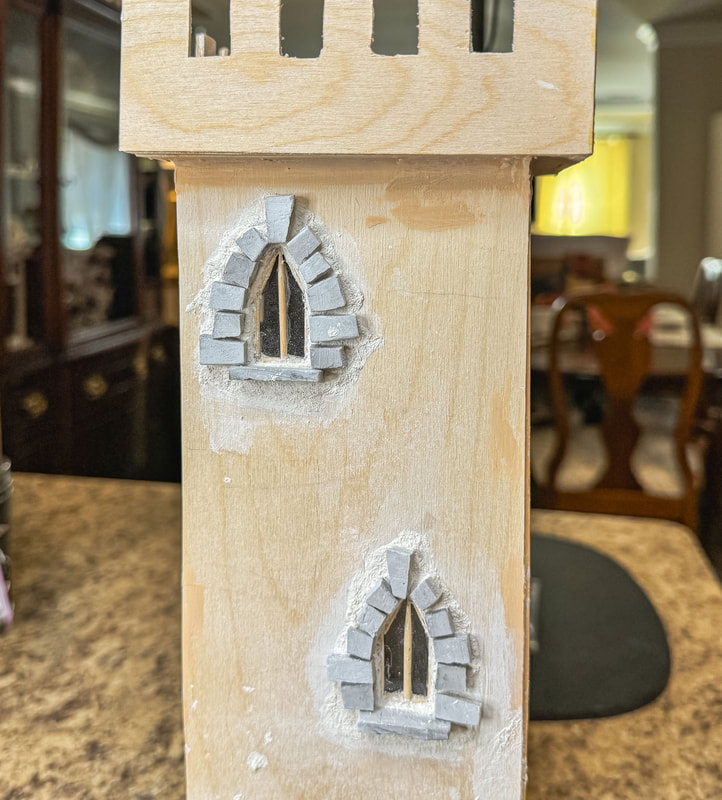 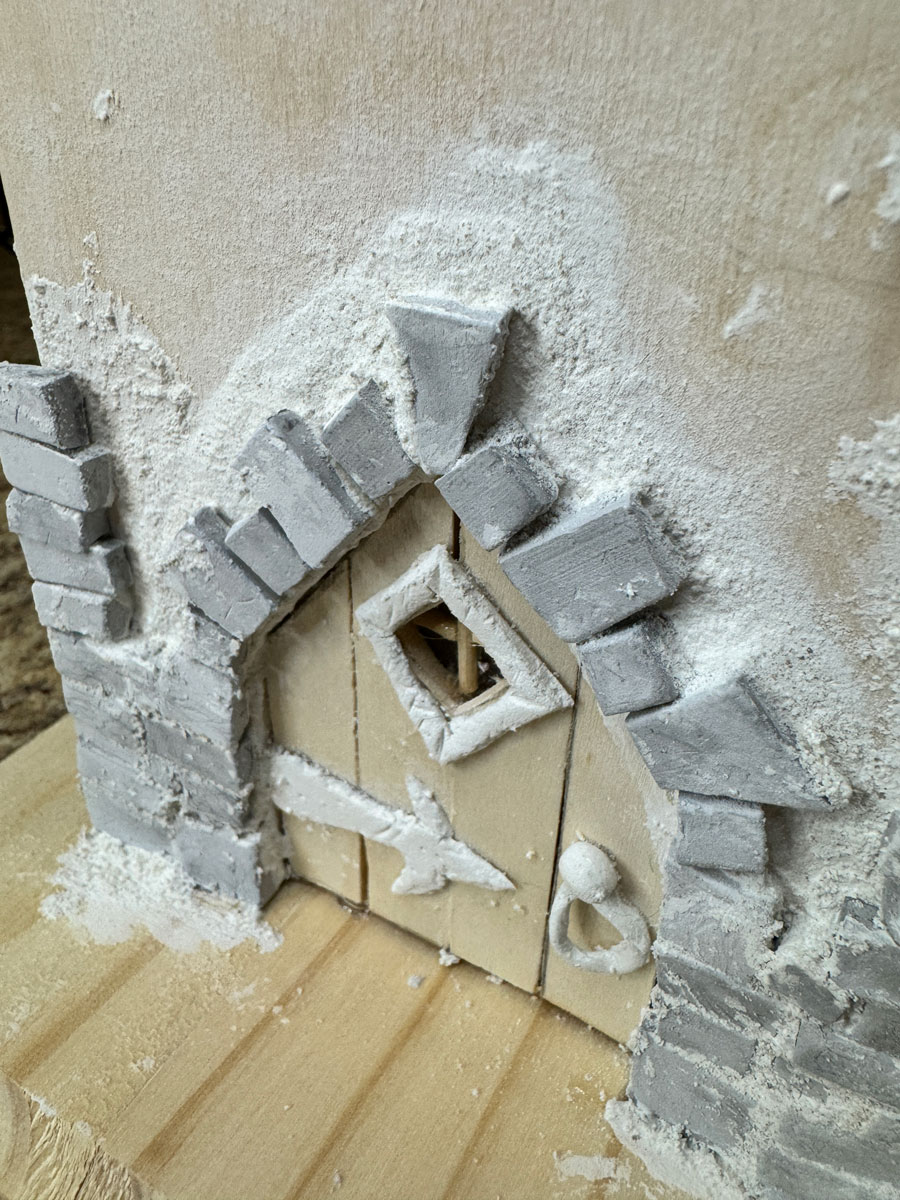  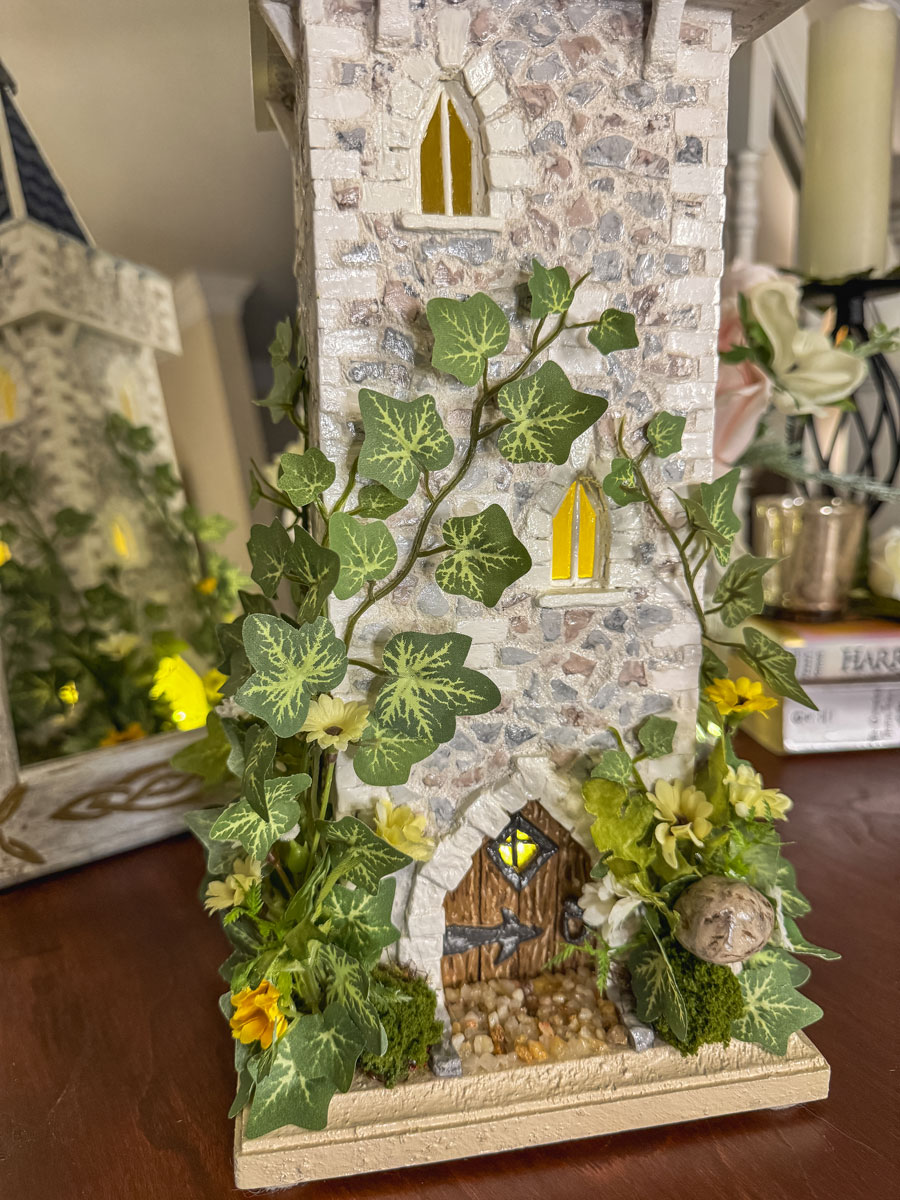 Stonework: One of the key design elements of this piece is the scale and color of the stonework, which was achieved with various styles of dollhouse stone veneers. Grey fieldstones and brown fieldstones were broken into small pieces to be set into the main body of the tower. The doors and windows were bordered with grey paving stones painted white to match the white brick stones used to edge the tower. This conglomeration of stones was set in place using white mortar. In some cases (like with the tops of the crenelations), sand was added to acrylic paint to create the illusion of stone. 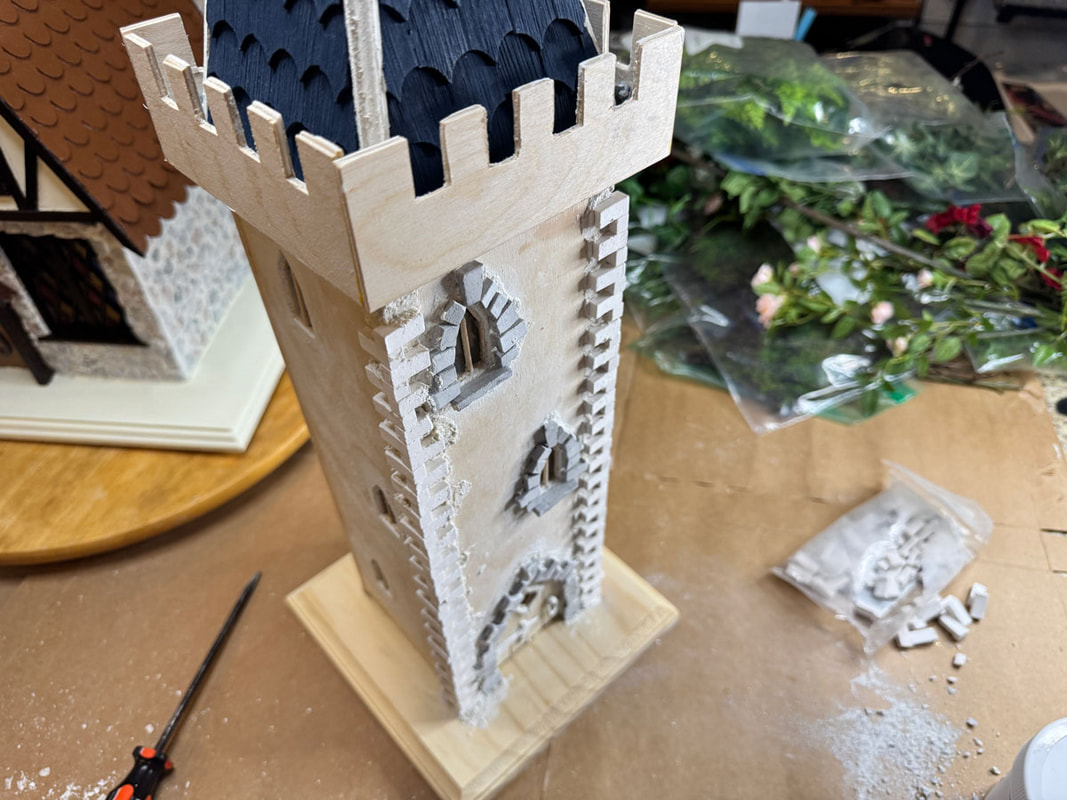 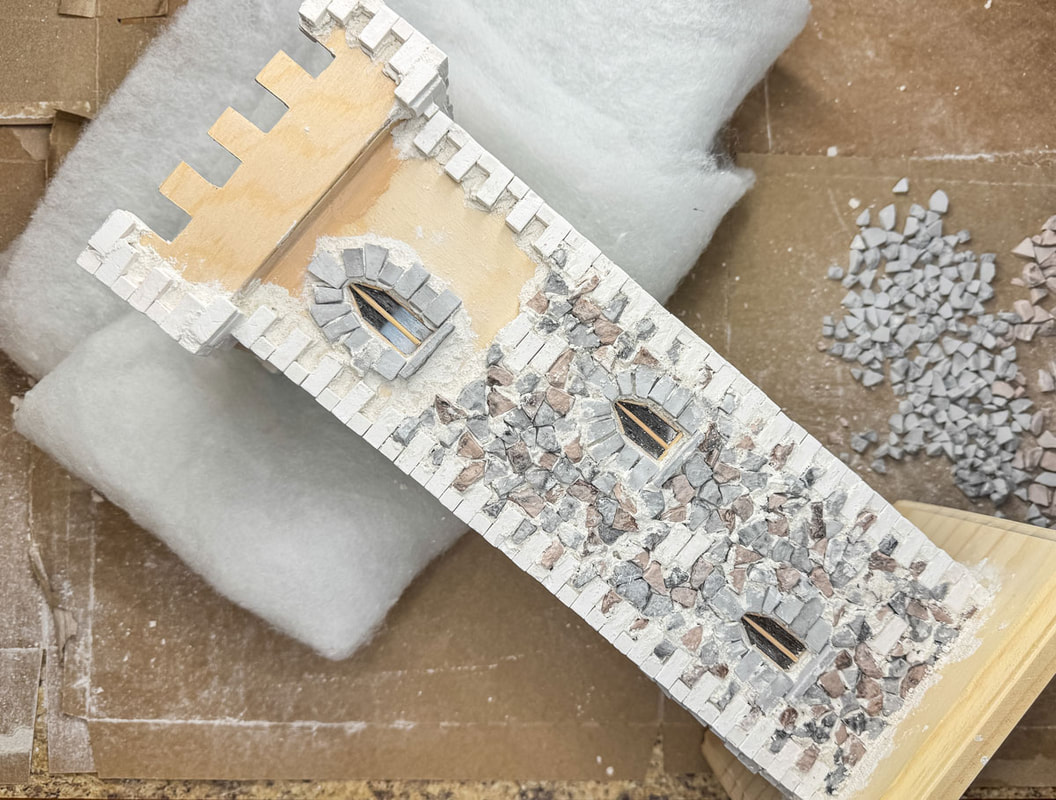 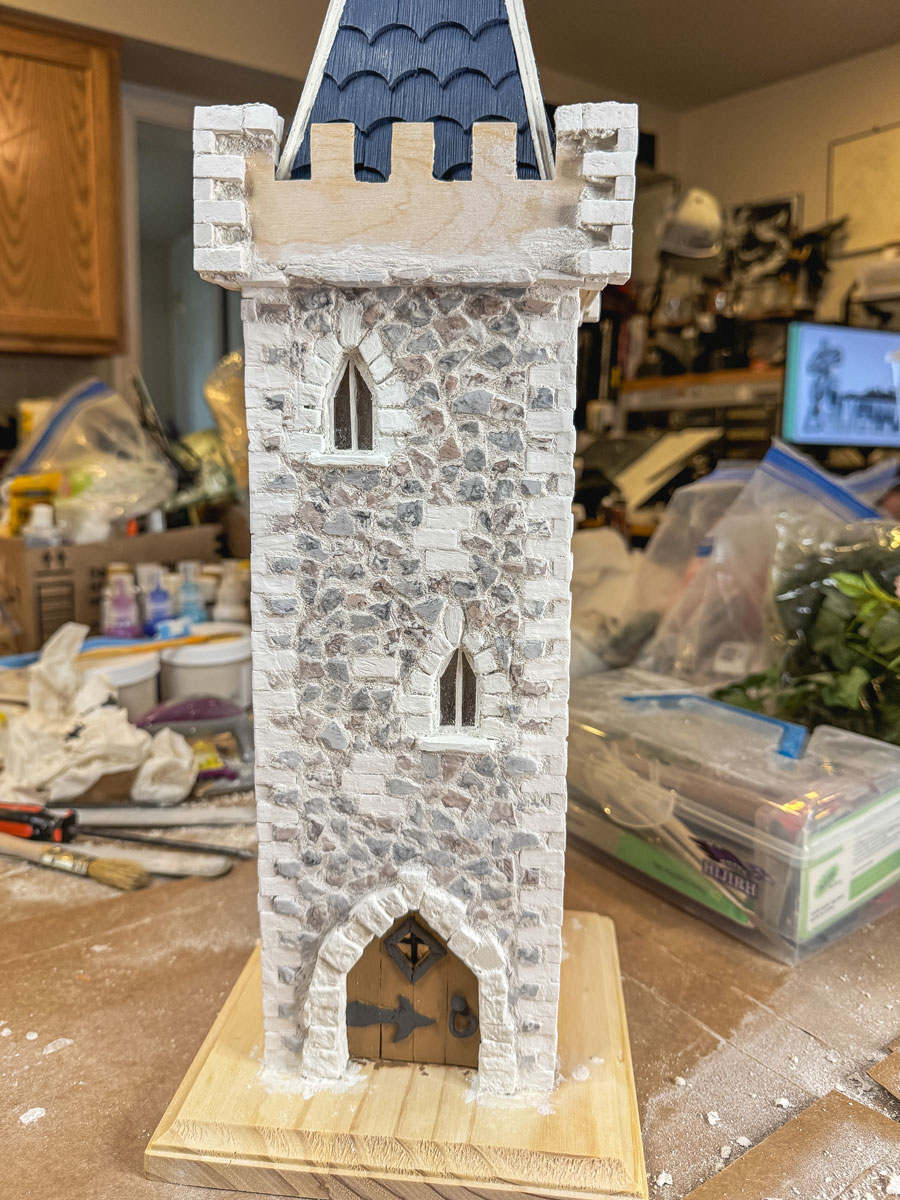 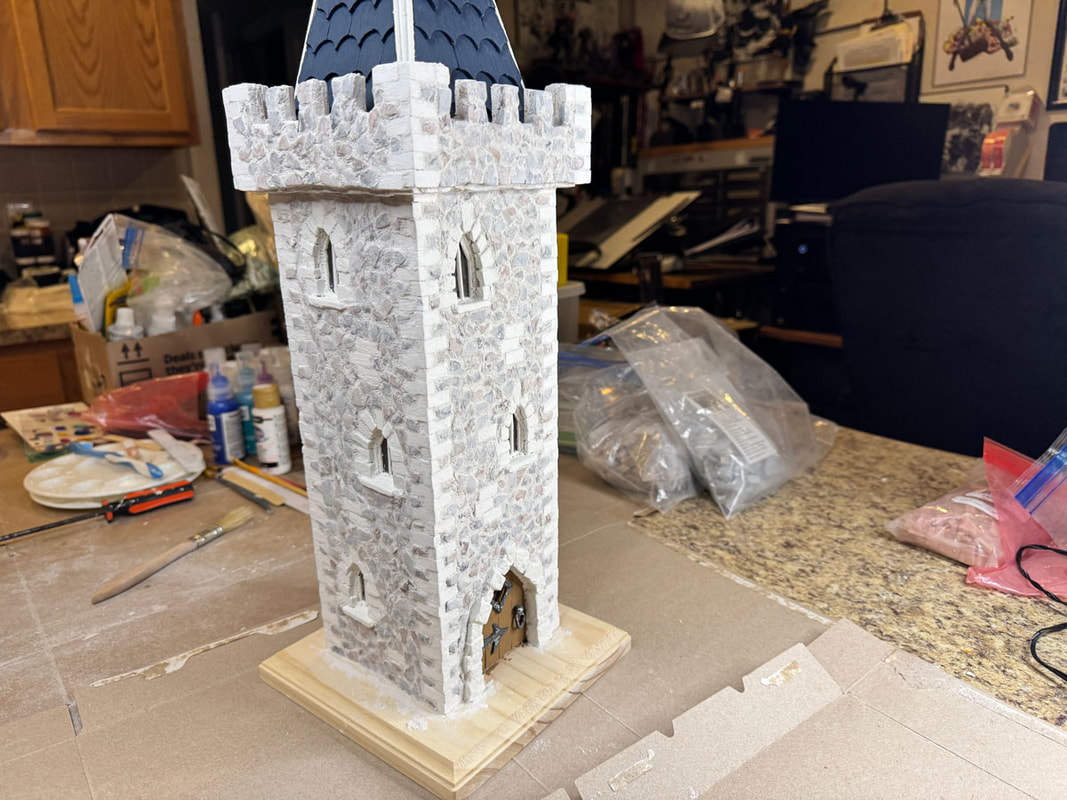 Clay elements: One of the materials I experimented with during the design process is air-dry clay. You’ll see the results of those experiments in decorative details on the door, the roof topper, and a handmade miniature mushroom by the entrance. The clay allowed me to expand my repertoire of skills and create another layer of texture and interest. I’m particularly proud of the clay mushrooms! (I discuss that process and project in a separate blog and video!) 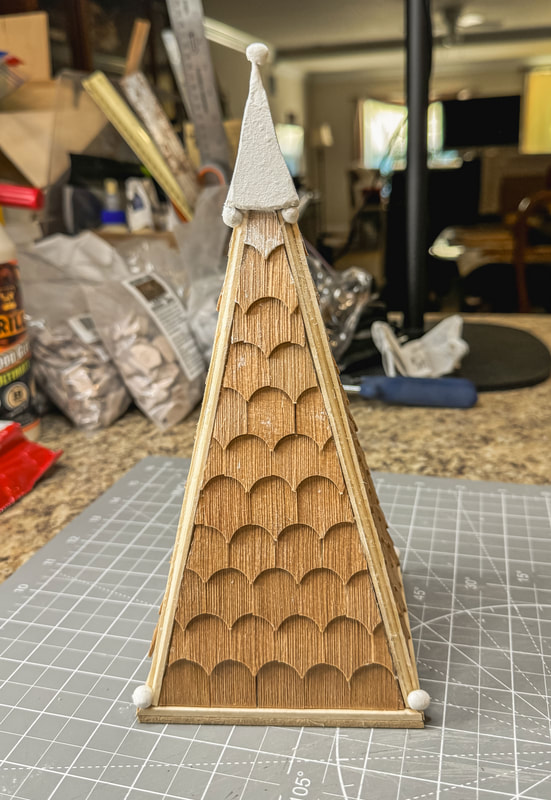 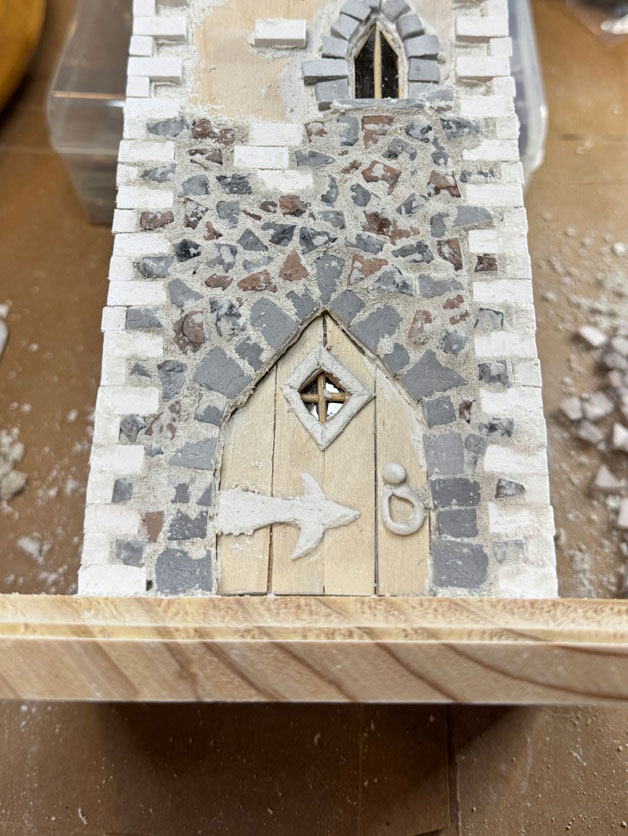 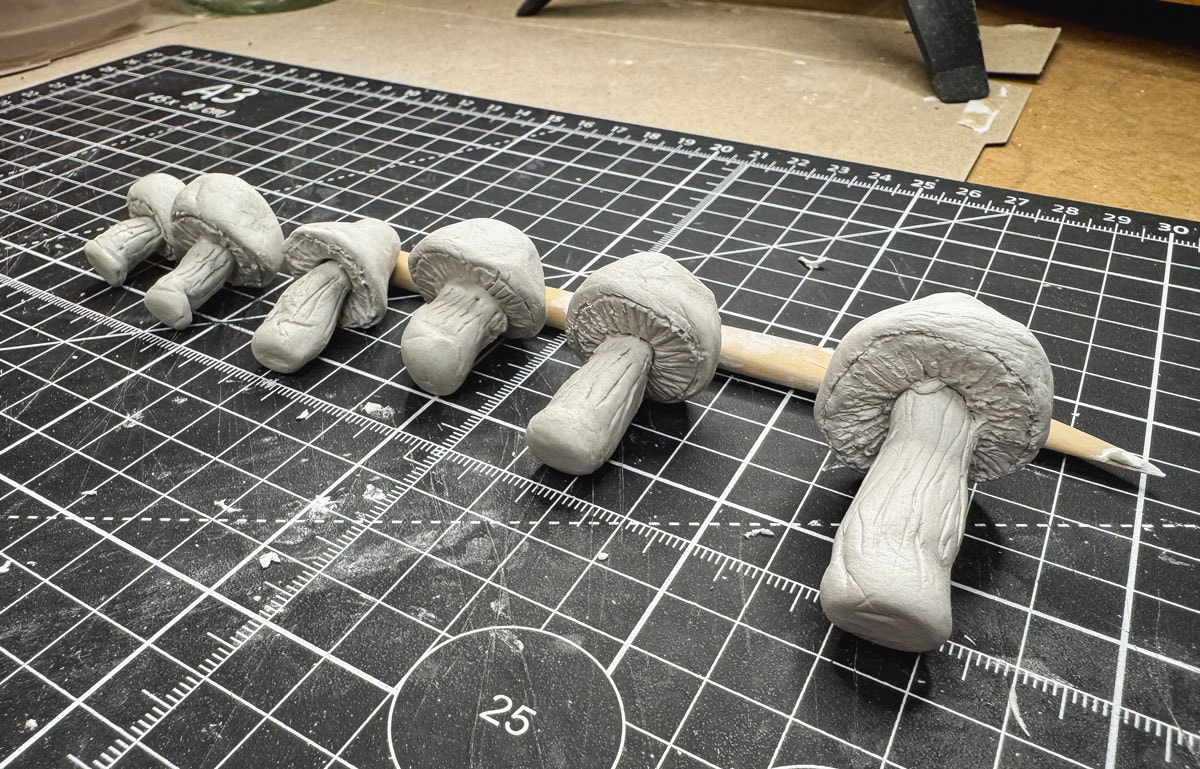 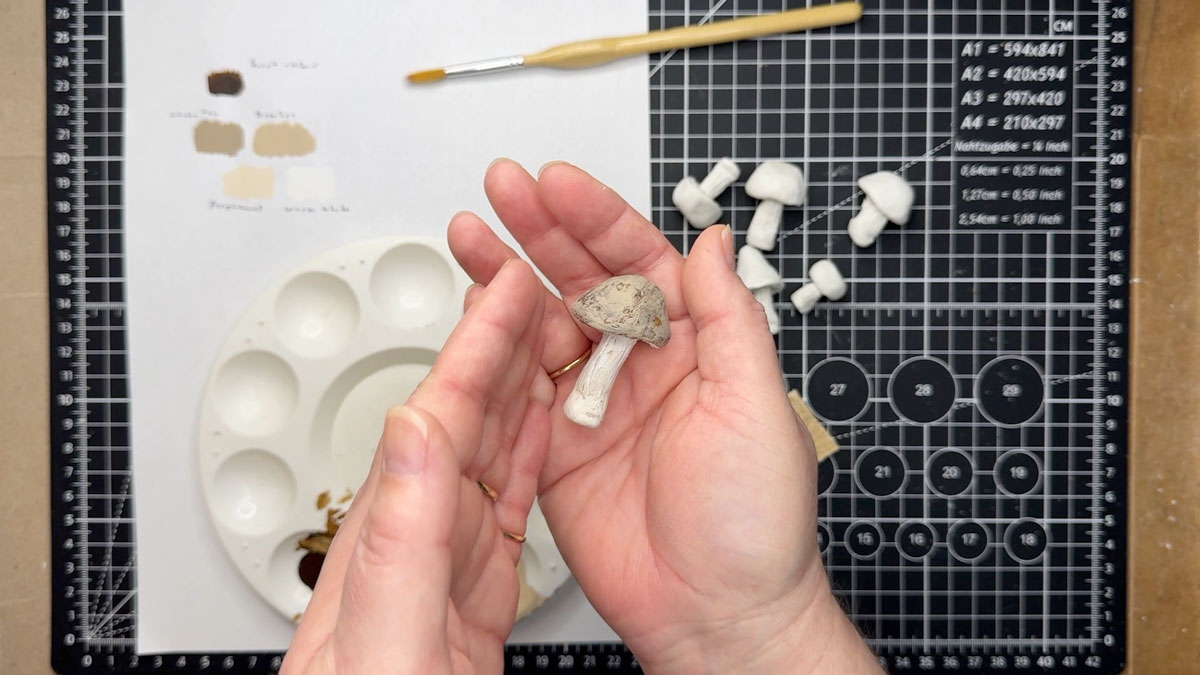 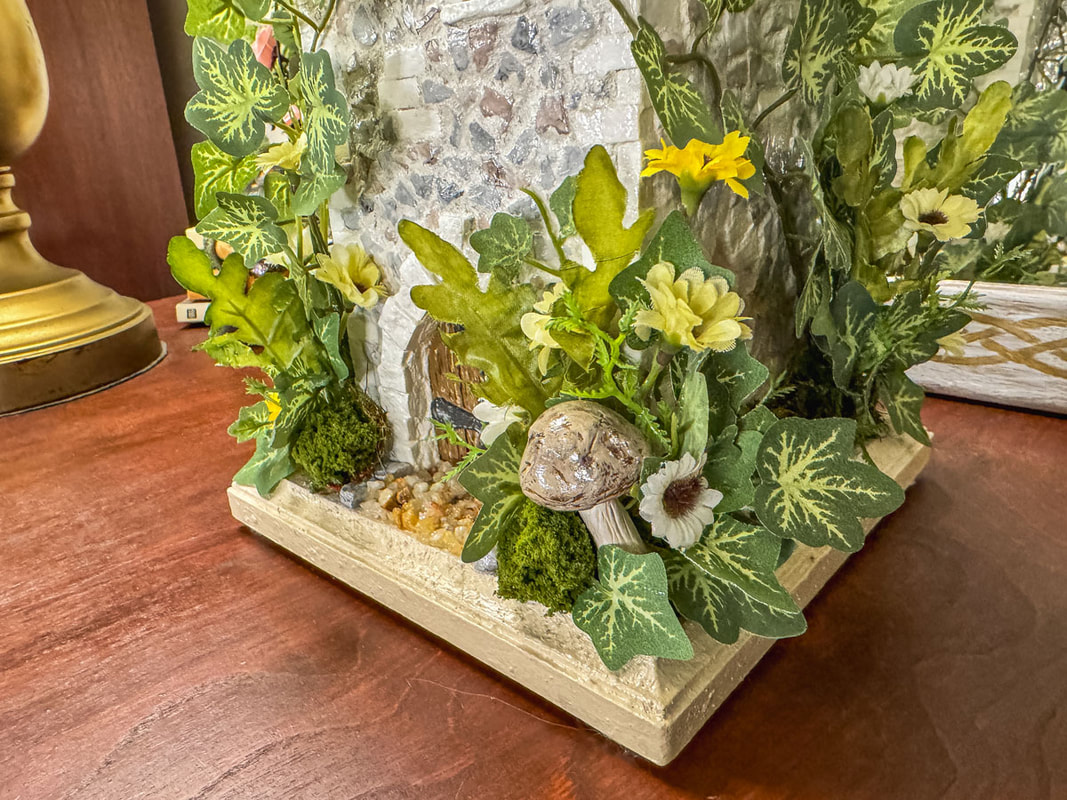 Finishing touches: The final look for this enchanted fairy castle comes together with whimsical decorative elements: moss lines the base, climbing ivy vines (from Hobby Lobby) wrap the tower in an entangling embrace, and clusters of dainty daisies cling to the tower corners. The tower sits on a sturdy base made from a pre-cut wood plaque, and the structure was sealed with my favorite low-VOC varnish to preserve the surface and help protect the piece from damage. Note: This is an INDOOR piece of decor, so the varnish will not protect it from outside weather. Light it up with LED candles or fairy lights to create a warm, magical glow in a room or use as a nightlight. It would look simply magical on a fireplace mantle or side table! 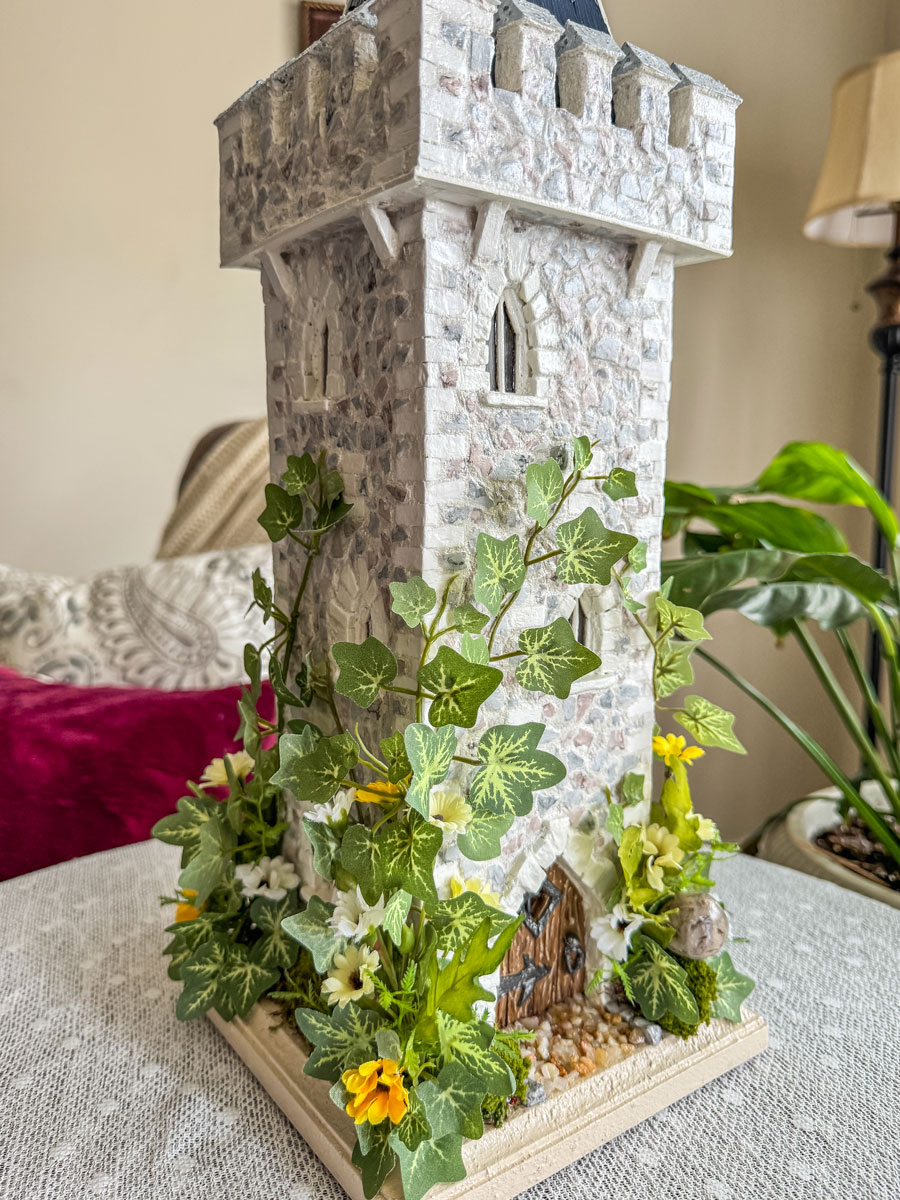 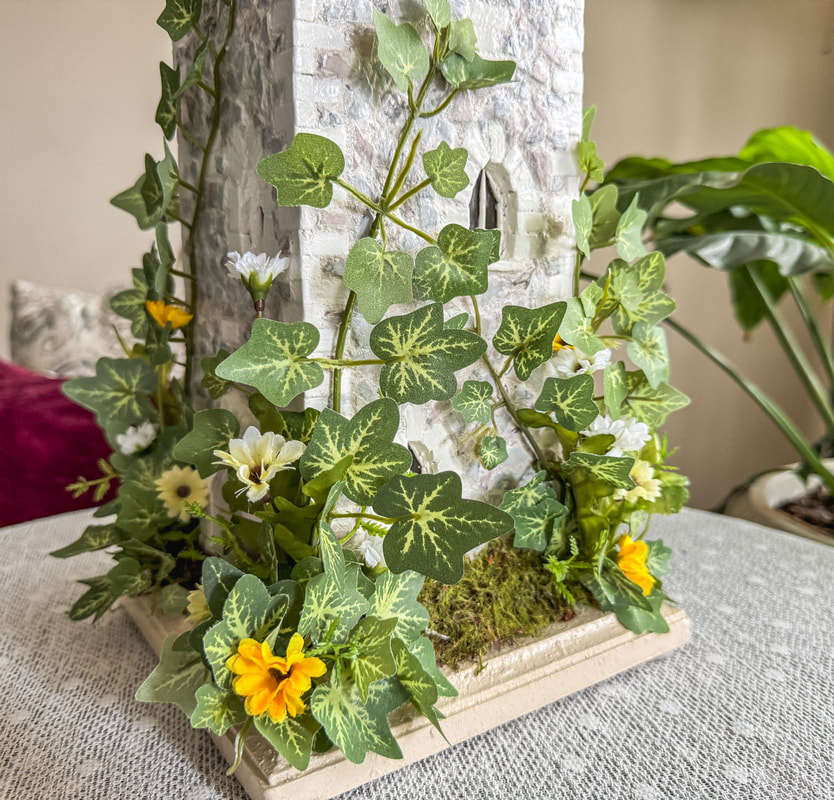  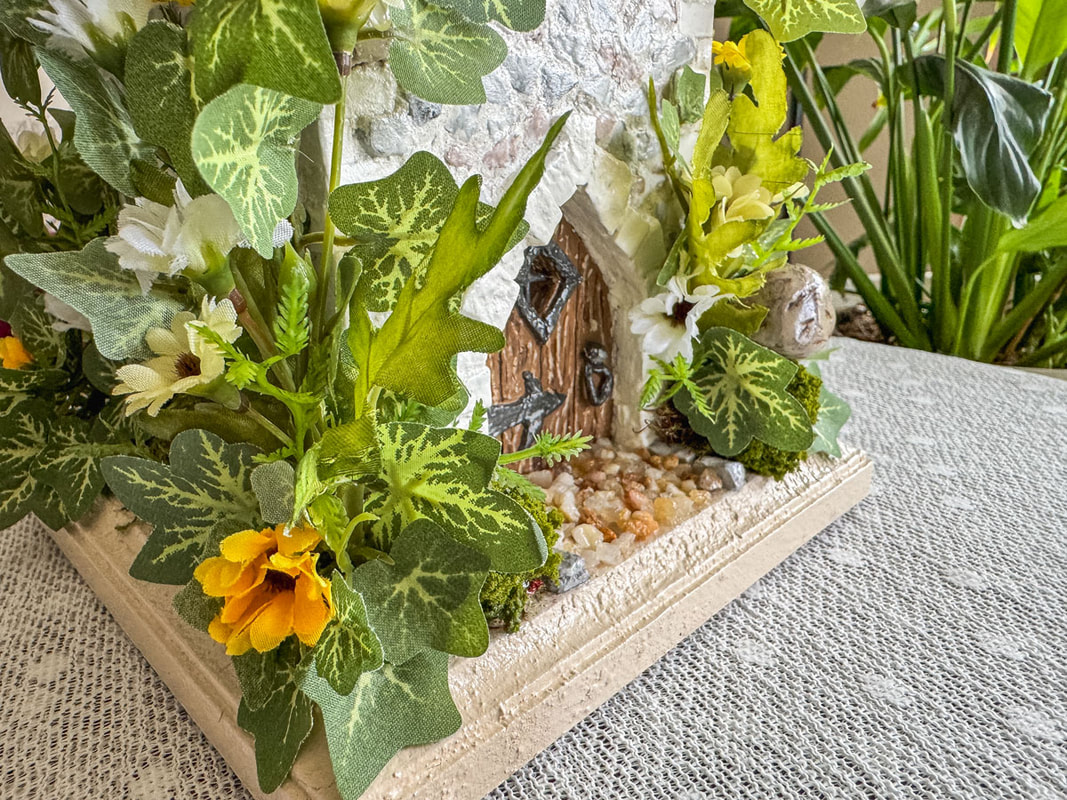 Additional tools and materials used in this project: This last part is for those of you who are crafty (or adventurous). If you’d like to build your own wood creations, you’ll need a few basic tools for cutting, sawing, filing, sanding, sculpting, and painting. A few cutting tools I would recommend would be the X-Acto Snap-Off Blade Cutter, the WorkPro utility knife, a coping saw, the Midwest Hobby & Craft Super Easy Cutter, and a Craftsman knife set. A T-square and a metal ruler help with drawing and cutting straight lines, and a variety of specialty files, nail files, and sandpaper will allow you to smooth and shape wood, stone, and clay. And speaking of clay, a set of clay molding tools would come in handy for creating intricate details. None of this could come together without a variety of adhesives, including E6000 glue, hot glue, and wood glue. And, of course, you’ll need paint brushes to add that gorgeous color to your final piece! So if getting crafty is your thing, those tools might come in handy! I hope you enjoyed that behind-the-scenes look at my creative craziness! As you can see, a lot of work and attention to detail go into a project like this, but the result is so worth it! My four-year-old self would be enamored with this piece! The result is more grown-up than that plastic folding Weeble-Wobble castle, but I can imagine my eyes fixated on every detail, imagining who lives there and what they are doing inside. Certain strings run through our lives connecting us to our past and future selves in strange and beautiful ways, and this was the impetus behind this project. It was a passion project, to be sure! 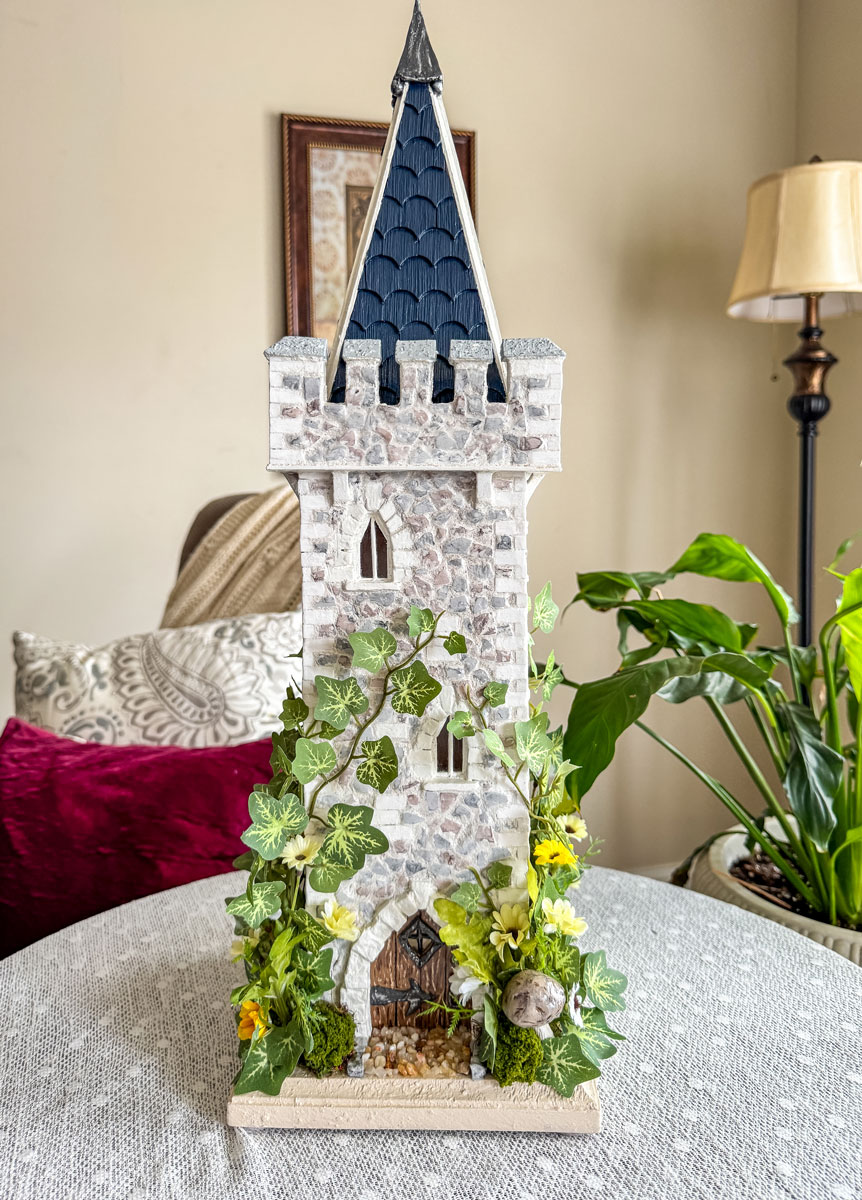 Follow me on my YouTube channel to see the video view of this piece, or join me as a paid Patreon member to see the extended video unveiling. Check out more of my fairy houses or visit my website for more of my whimsical and faux floral creations! Find more blogs like this by Di’s Studio Designs: DIY Projects blogs Fairy Houses and Gardens blogs Behind the Scenes blogs Project Updates blogs
0 Comments
Leave a Reply. |
Author
Some of the posts on this site contain affiliate links. This means if you click on the link and purchase the item, I will receive an affiliate commission. 
Categories
All
Archives
June 2025
|
 RSS Feed
|
|
Major credit cards accepted through Square. Apple Pay option available. This site also accepts PayPal payments for better online security, and it's free to sign up! Gift cards are now available for purchase!
Copyright 2025 |