|
Creating the finishing touches 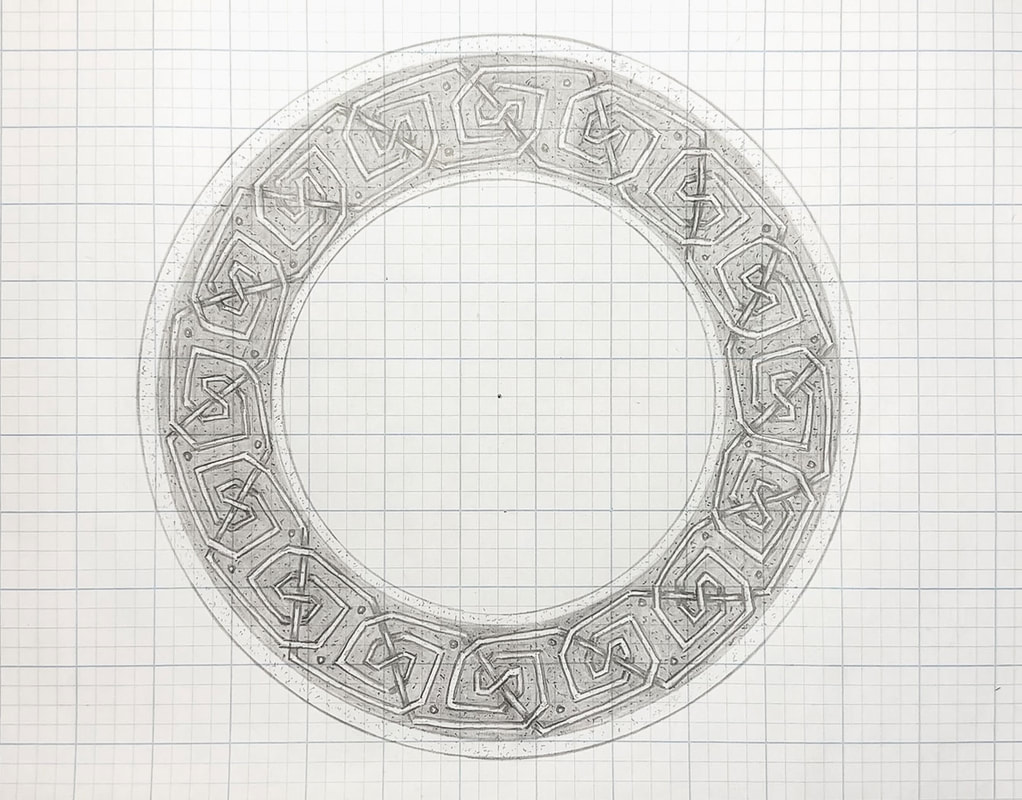 Welcome to the fourth and final part of my latest drawing tutorial series featuring a spiral knot border design. This blog post includes helpful tips and resources for you to consider while finalizing the design details for your new artwork. We will discuss mediums, line definition, texturing, the use of color, and creative applications for this border template. The hard work is done…Now it’s time to get creative!
0 Comments
Creating the rough spiral knot design  Welcome to Part 3 of this circular spiral knot border drawing tutorial series!
In parts 1 and 2 of this tutorial series, we created grid sections and break lines for a round border for a spiral knot design. In this tutorial (Part 3), we will begin working on the spiral design. We will draw our design as a single line, establish the over-under weave pattern for the thread, and finish this part with a rough sketch of the entire thread. So grab your art supplies, and let’s have some fun drawing spiral knots! Creating the grid and breaks  Welcome to Part 2 of this four-part series on how to draw a circular spiral interlace border! If you haven’t read Part 1 yet, I suggest checking that out first before proceeding with this tutorial. (Click here to read Part 1.) In Part 1, we drew the circular borders and divided them into equal sections to create a grid. Now, we will plot out the break patterns that will determine the style and direction of your spiral design. So grab your drawing supplies (my suggested supply list is below), and let’s delve into today’s tutorial! Dividing a circle into 64 equal parts using a compass 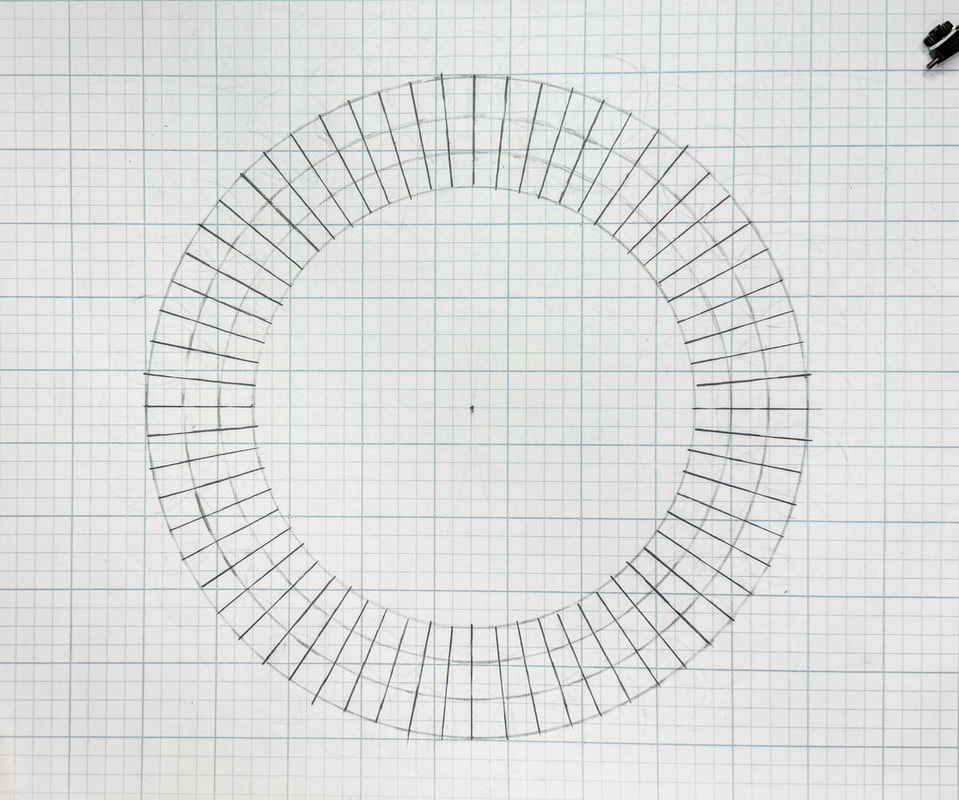 In a previous tutorial, I showed you how to draw a straight spiral interlace border. Today’s tutorial is the first in a four-part series that builds on that premise, walking you through using the same design pattern in a circular border. (You can find that tutorial here.) In this series, you will plot the basic template on a grid, add the break pattern, draw the rough lines, plot the overlaps, and stylize the final design. So, let’s start with Part 1, where you will draw the circles for your round border and then break that border into 64 equal sections. Below, you will find my suggested supply list for this project. 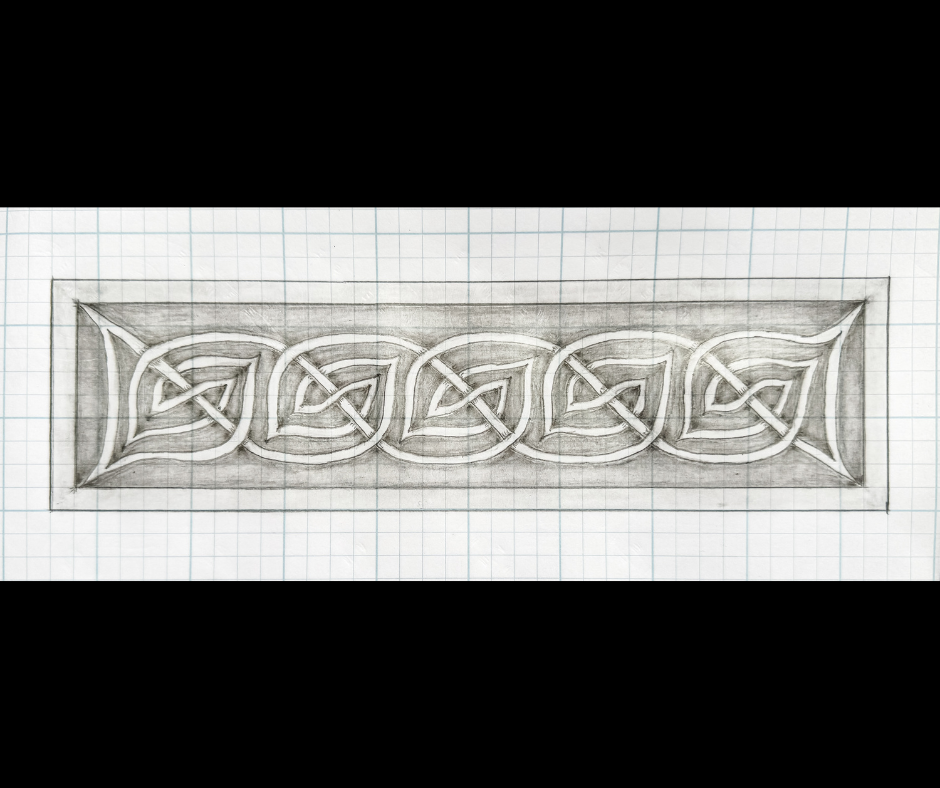 Hello, and welcome to another Celtic-inspired art drawing tutorial. Today’s tutorial will feature a simple spiral knot border that you can use to decorate line art, drawings, or craft items. Grab your drawing materials, and let’s get this party started!
 Welcome to another drawing tutorial blog!
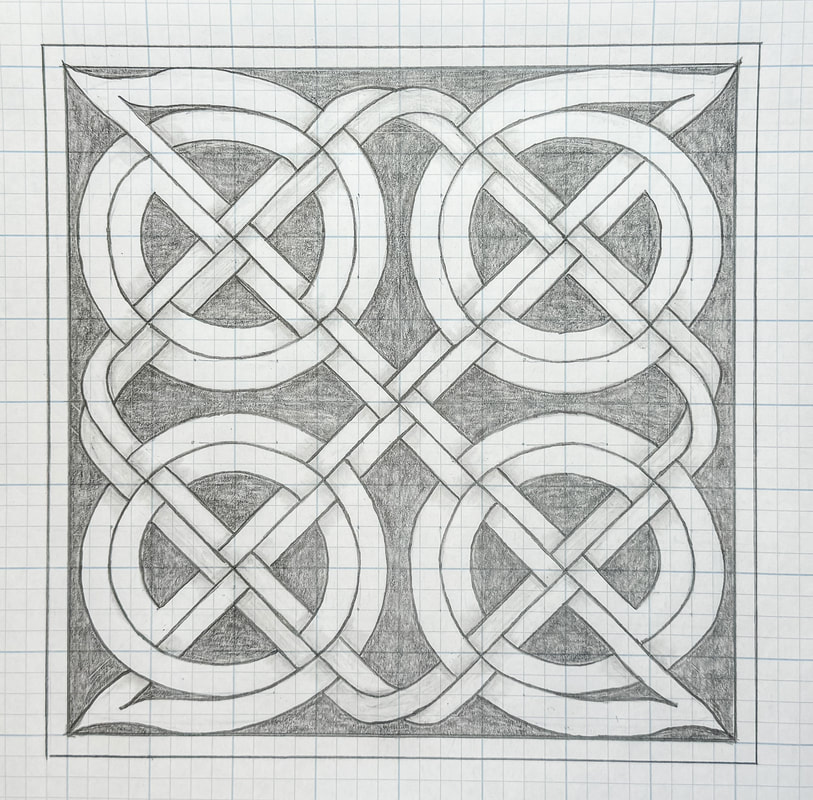
Today’s drawing tutorial uses multiple spirals in an expanded 8 x 8 grid. This tutorial will make more sense if you first read my previous blog (or watch the video) on how to draw a basic spiral knot, as this exercise will expand on that design to create a more complex panel with four spirals. If you are ready to tackle the next step, grab your drawing supplies, and let’s get creative! 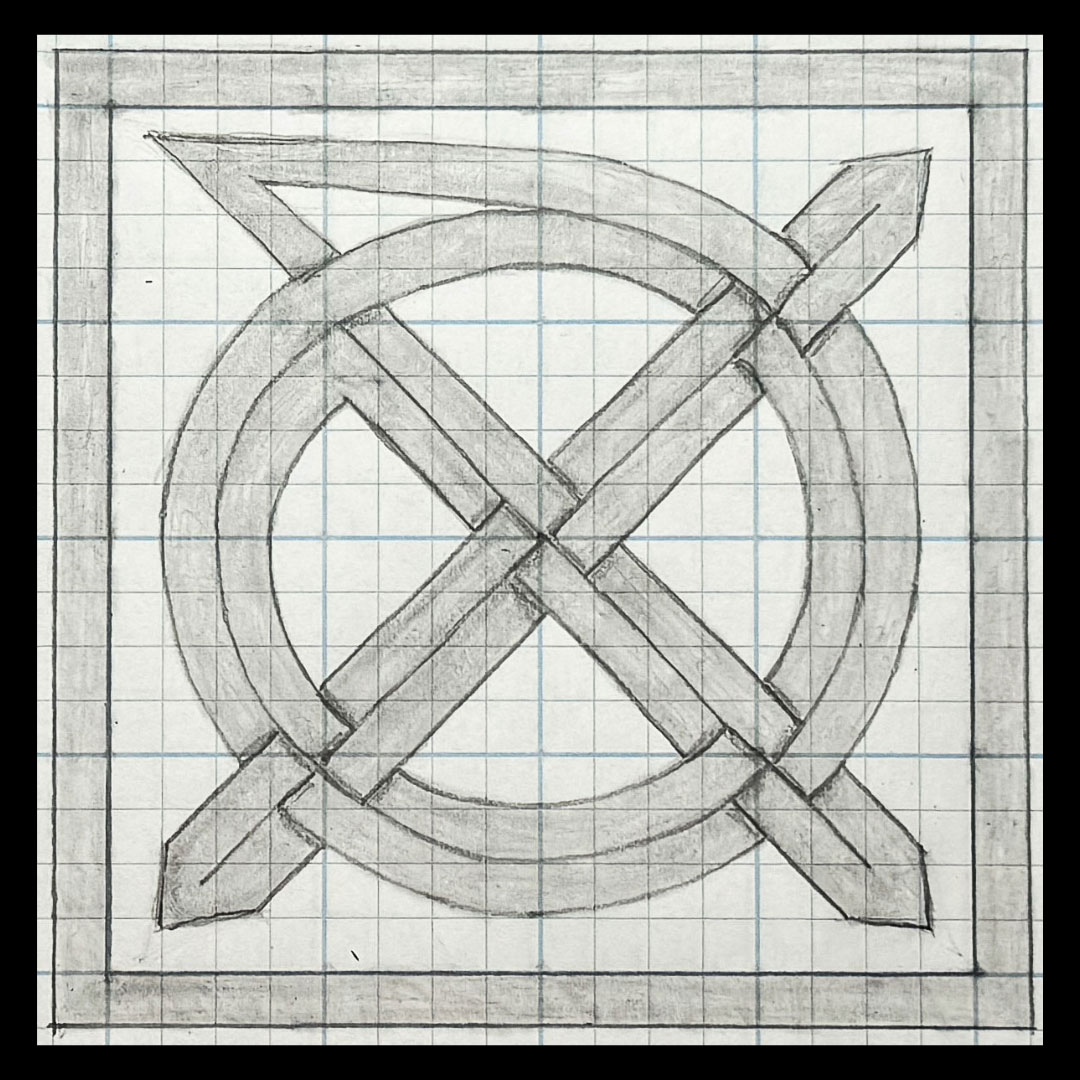 Welcome back to another Celtic knot drawing tutorial! This tutorial is the beginning of a series dealing with various styles of spiral knots and their application. In this blog, you will learn how to draw one type of simple spiral knot, setting the stage for the next tutorial where we will explore a more complex panel pattern. This particular spiral knot can be found in the ancient illuminated manuscript, the Book of Durrow, where it appears in border designs on pages full of intricate artwork. We’ve covered other design elements from this book in previous drawing tutorials (see the links at the end of this blog) so we’ll continue our journey with one more! Grab your drawing supplies and let’s get started!  What are illuminated manuscripts?
The Book of Durrow is one of the earliest known illuminated manuscripts from post-Roman British Isles. But what is an illuminated manuscript? The term “manuscript” is literally translated to hand (manu) written (script). In the dawning days of Christianity, religious texts were written or copied by hand priests and monks. These texts usually focused on the gospels of Matthew, Mark, Luke, and John, but could include material like special prayers and excerpts from the Bible. The texts were initially handwritten but, over time, they became more structured and elaborate. These religious manuscripts became works of art, their pages filled with colorful and brilliant images and lettering. These illuminated manuscripts contained carpet pages, full pages filled with intricate text, artistic details, and gold leaf. The term “illuminated” refers to the gold or silver leaf used to make the page shine, allowing the book to be seen from a distance and dazzling the audience.  Triangles are the perfect shape to use as a guide for drawing triquetras. The triangle’s shape provides the template for the loops, determining the shape and size of the finished design.
In today’s drawing tutorial, we will use an equilateral triangle, a compass, and a bit of freehand to create a triquetra (or trinity knot) that is even on all sides. This drawing project is similar to a previous tutorial with three overlapping circles. So grab your drawing supplies and let’s get started!  A triquetra (or trinity knot as it’s sometimes called) can be a handy design element to put in corners as a stylish way to fill space. In this tutorial, we will draw a triquetra using a right-angle triangle that puts the point of one loop into the 90˚ corner. No special supplies are needed for this tutorial, just a pencil, eraser, paper, and a straight-edge. But if you are not using grid paper a T-square or L-square might come in handy. If you don’t have grid paper or a T-square use a piece of paper folded into quarters. Remember to draw your triangle and initial arcs lightly as it is only a guide that will be erased. So let’s get to it!  The past few weeks have been dedicated to new tutorials featuring triquetras using triangles as a guide. In this technique, arcs are drawn around a central point. You can certainly find this point using guestimation, but there is a way to find the precise center of the triangle. So today’s blog takes you step-by-step through the process! 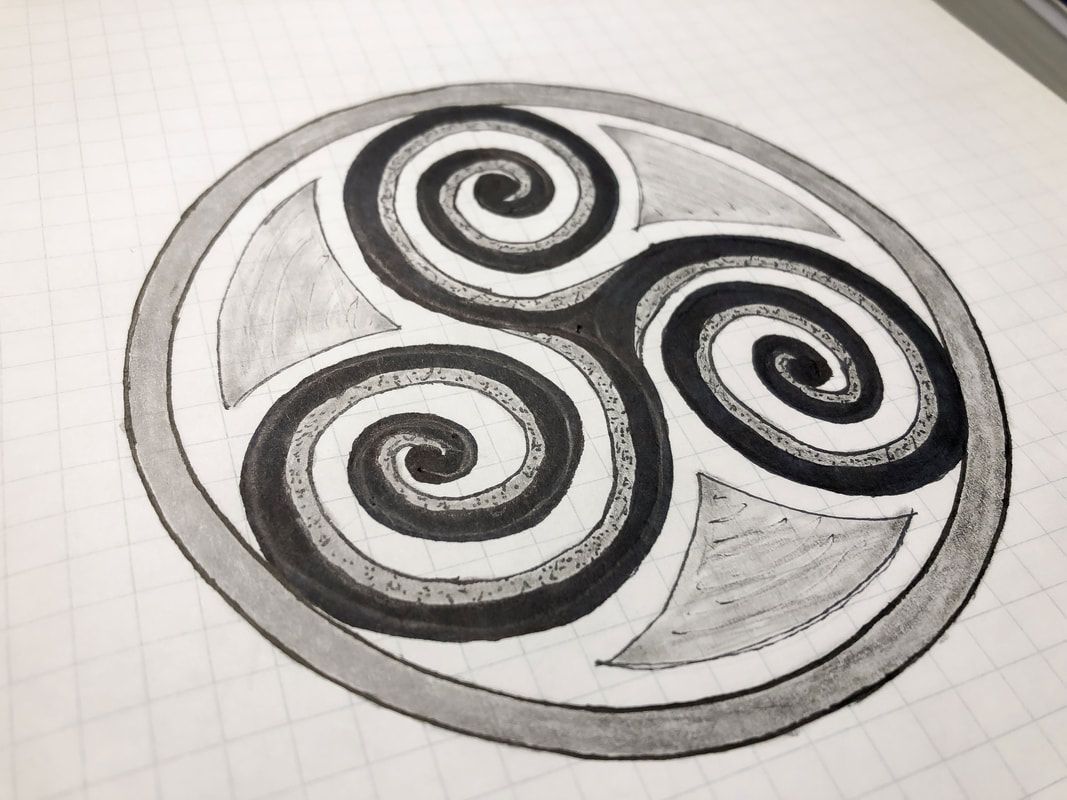 If you want to learn how to draw a triskele—like those seen in Ireland—you’ve come to the right place!
In today’s blog, I will take you through a step-by-step process for drawing a basic triskele design. You can then use this simple design as a base for a more complicated design. 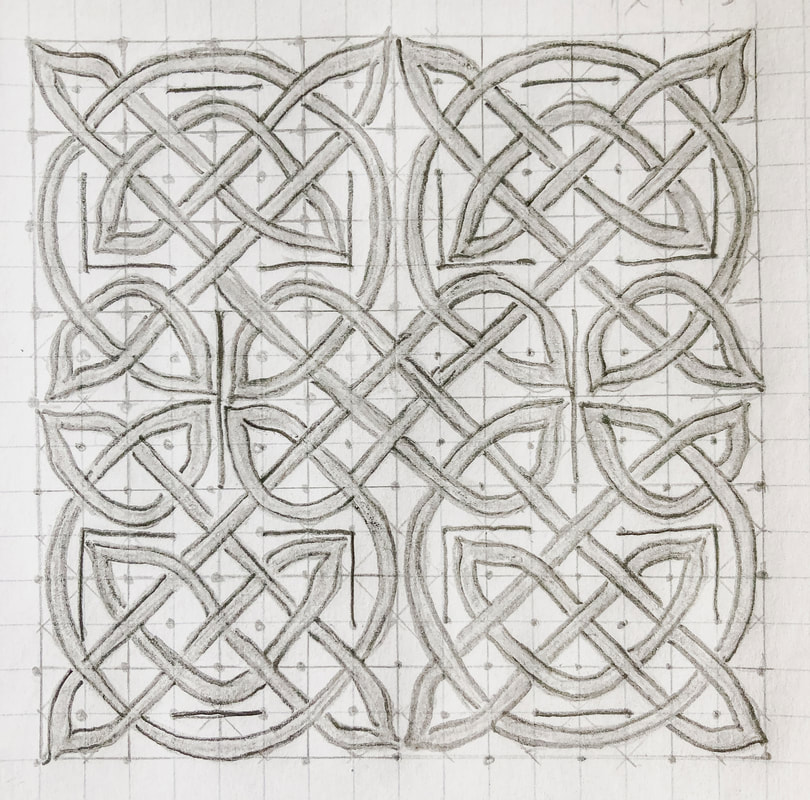 In today’s blog, I’d like to walk you through creating a panel with Celtic knotwork inspired by those seen on a Celtic Cross in Clonmacnoise, Ireland. We will draw four 4 x 4 grids that are interconnected using the same repeated design.
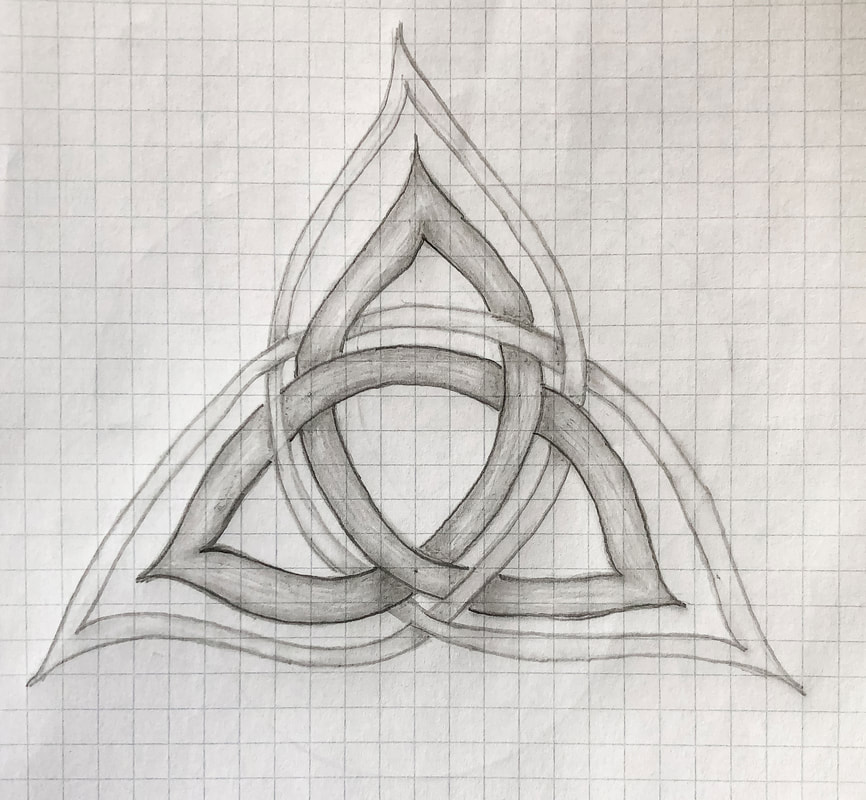 In today’s blog, I will walk you through the steps for drawing a simple triquetra using three circles to get an equilateral shape. There are other methods you can use, such as using a square to map out your angles and intersections, but whichever method you choose, you will end up with the equilateral triangle as the base for this style of triquetra. (There are other triangles and triquetra shapes, but this tutorial is for the triquetra that is even on all sides.) In my method, you won’t draw this triangle, but if you connect the intersections, you will see that they unveil an equilateral triangle. 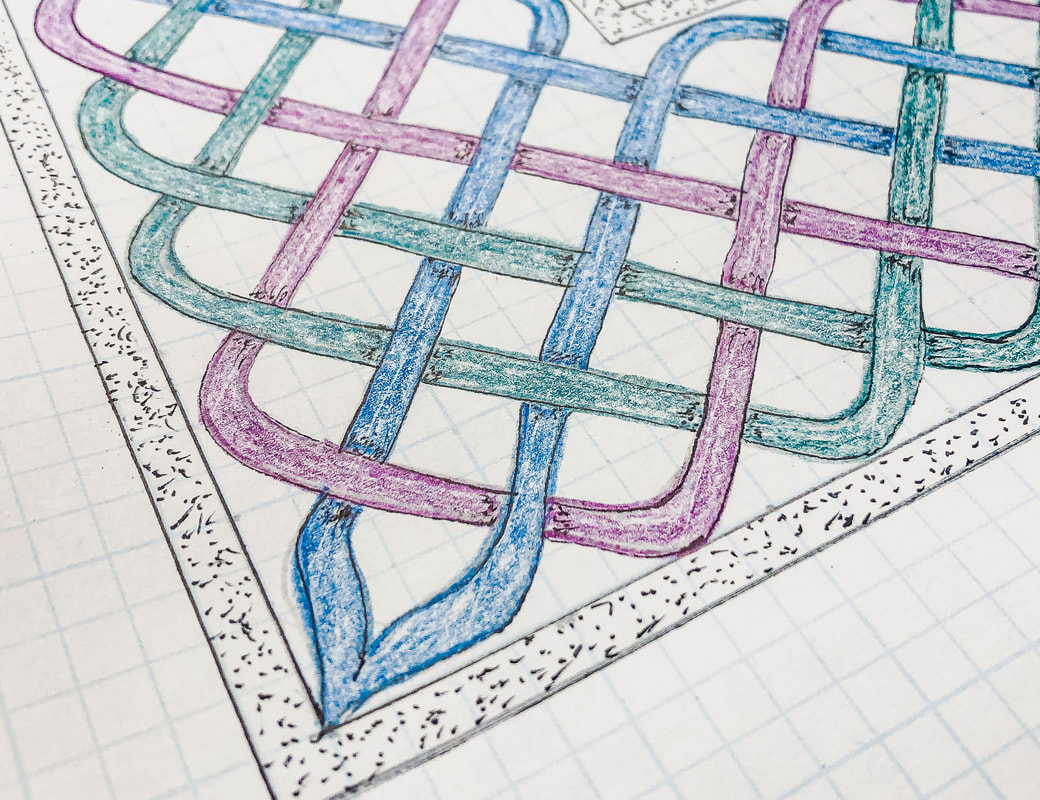 How to handle corners in Celtic knotwork Drawing borders with knotwork patterns can be a gratifying way to add drama to art pieces, picture frames, mirror frames, and trays. But what happens when you get to the corners? Dealing with corners can be tricky, but there are a few ways to handle this dilemma. 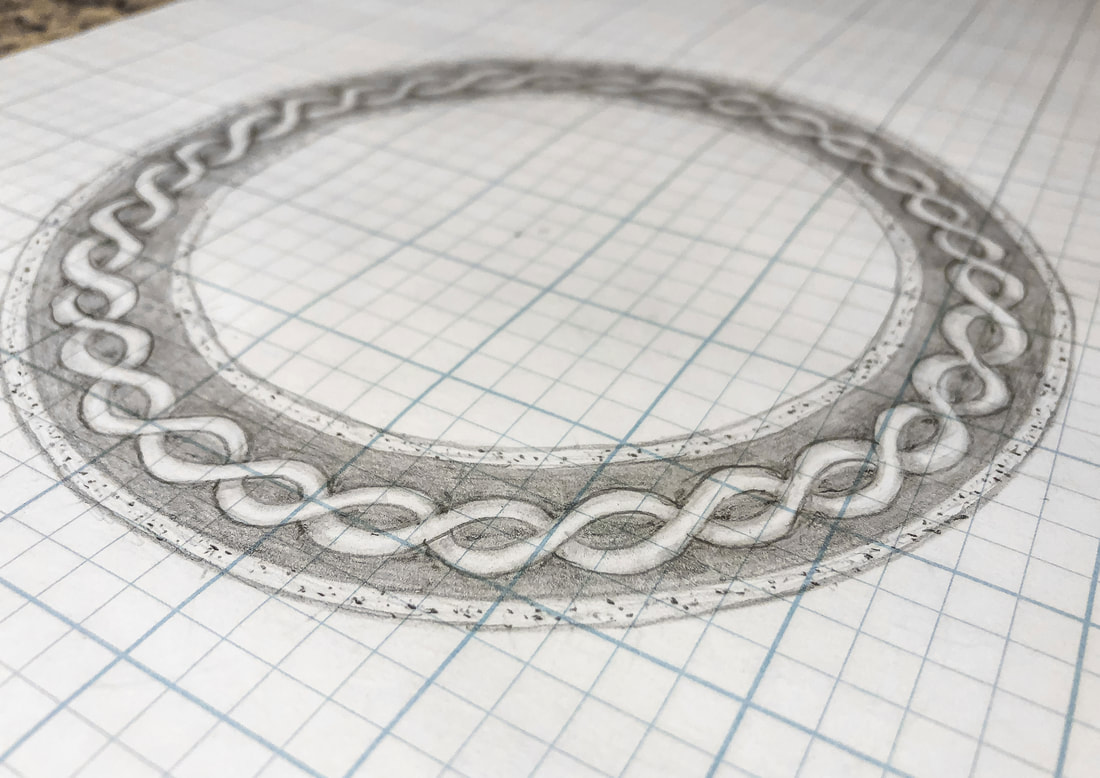 In a previous tutorial, we created a circular Celtic braid. This tutorial will be a simpler version of that design, just a basic twist that I will be using in a new piece of Celtic art—a High Cross.
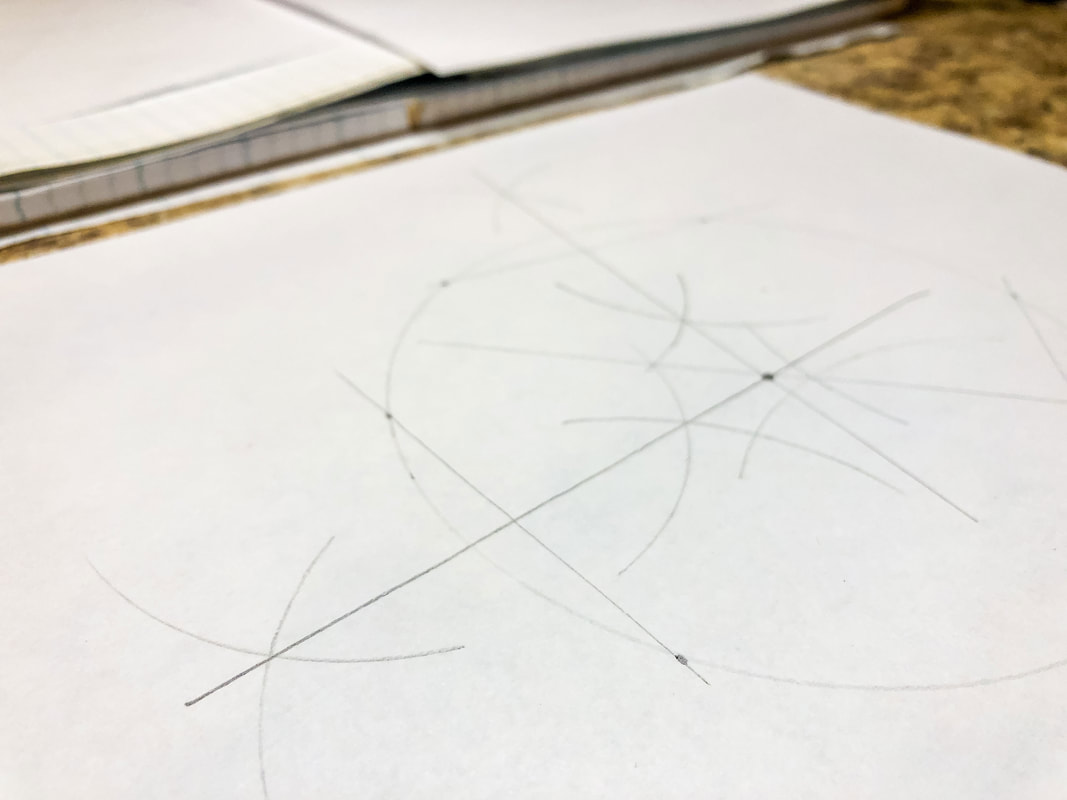 This week, I have started work on tutorials for drawing circular Celtic knot borders. Today’s blog post takes you through a couple of drawing tips that could be helpful for you as you follow along with these more complex Celtic design tutorials. Grab a pencil, a piece of paper, something with a straight edge, and a compass, and let’s get started! (Don’t have a compass? Use two pencils tied together with string at a length suitable for your project.) 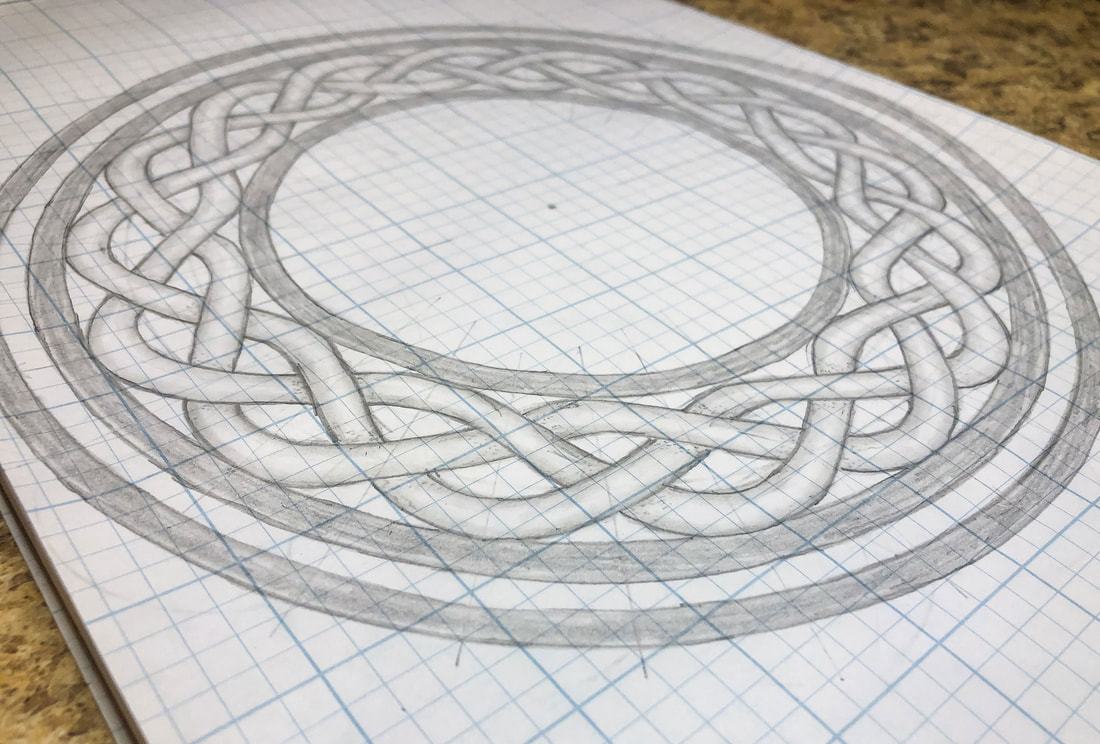 Hi again everyone! Are you ready for another Celtic drawing tutorial? This one is more complex than the border knots we’ve previously done. If you haven’t seen those tutorials, I suggest you click on the “Related blogs you may want to read” links at the end of this blog before attempting this circular Celtic knot tutorial. This tutorial is more advanced, and it will be beneficial to learn some basics first! Having said that, anyone can do this! I broke the process down into easy-to-digest bite-size snippets so that even a Celtic knot newbie can follow along! There are a lot of steps, so let’s jump right in… 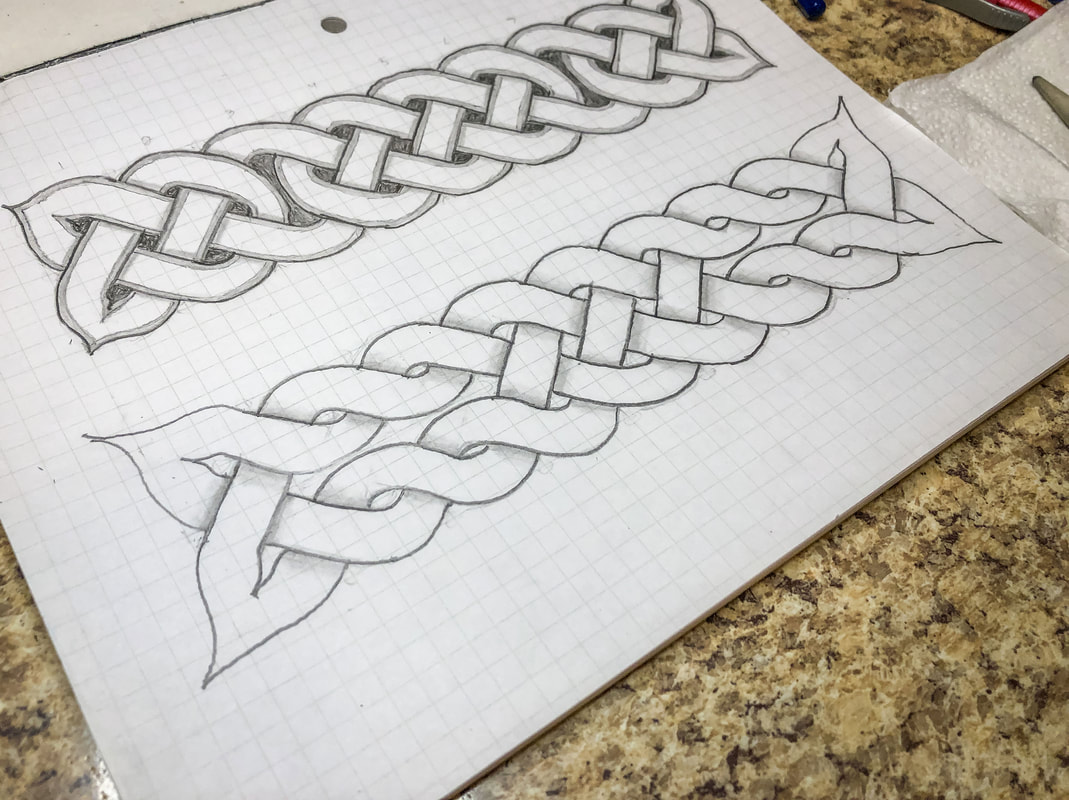 This drawing tutorial is the fourth in a short series of lessons to teach you how to draw a few variations of Celtic border knots. In the previous lesson, we added vertical breaks to a basic braid pattern to create a different knot style. In this tutorial, we will add horizontal breaks to the basic braid pattern to create yet another knot style with a different look. Below is a list of supplies you may want on hand (Amazon affiliate links are included), but you certainly don’t have to have all of these supplies to do this tutorial. Just find yourself a piece of paper, a pencil, and an eraser, and let’s get to drawing! 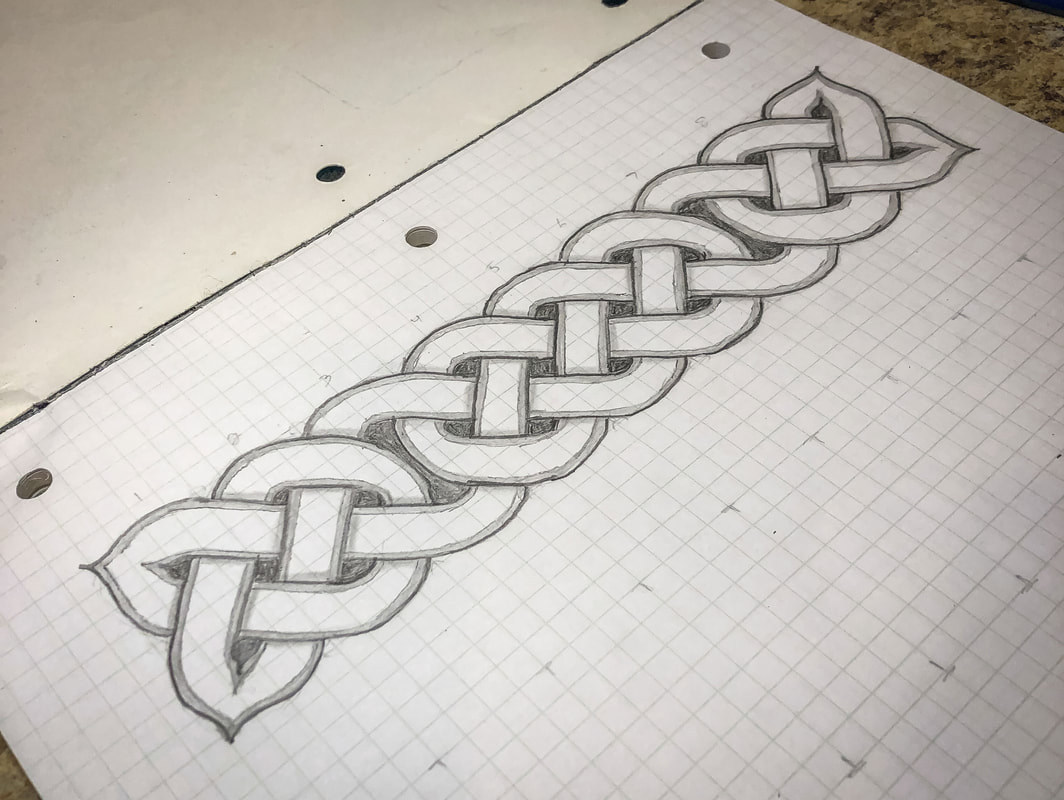 This drawing tutorial is the third in a short series of lessons to teach you how to draw a few variations of Celtic border knots. In lesson one, we learned how to draw a simple twist. In lesson two, we used a grid system to draw a basic braid pattern. In this third tutorial, we will build on what we have learned to create a variation using vertical breaks. Breaks introduce a level of complexity to the design that adds visual interest. There are many ways to add breaks to a border pattern, but today’s lesson will show you how to add two simple vertical breaks to the braid we have previously drawn. Below is a list of supplies you may want on hand (Amazon affiliate links are included), but you certainly don’t have to have all of these supplies to do this tutorial. Just find yourself a piece of paper, a pencil, and an eraser, and let’s get to drawing! |
Author
Some of the posts on this site contain affiliate links. This means if you click on the link and purchase the item, I will receive an affiliate commission. 
Categories
All
Archives
October 2025
|
 RSS Feed
|
|
Major credit cards accepted through Square. Apple Pay option available. This site also accepts PayPal payments for better online security, and it's free to sign up! Gift cards are now available for purchase!
Copyright 2025 |