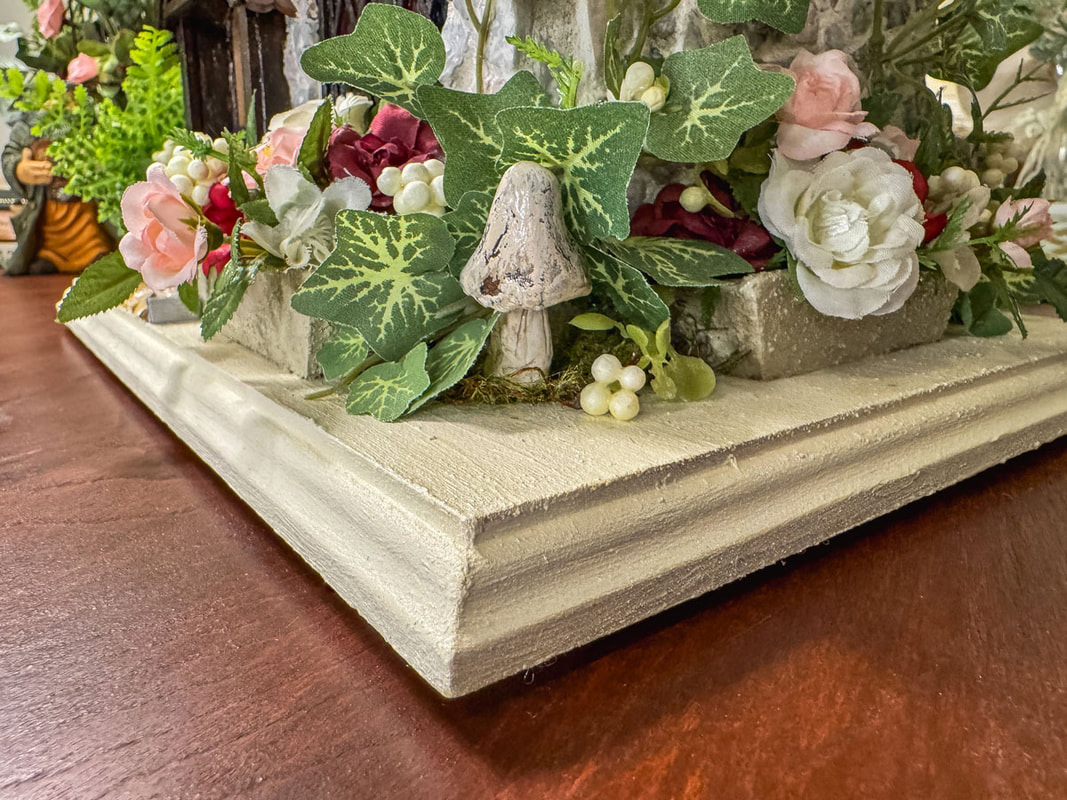
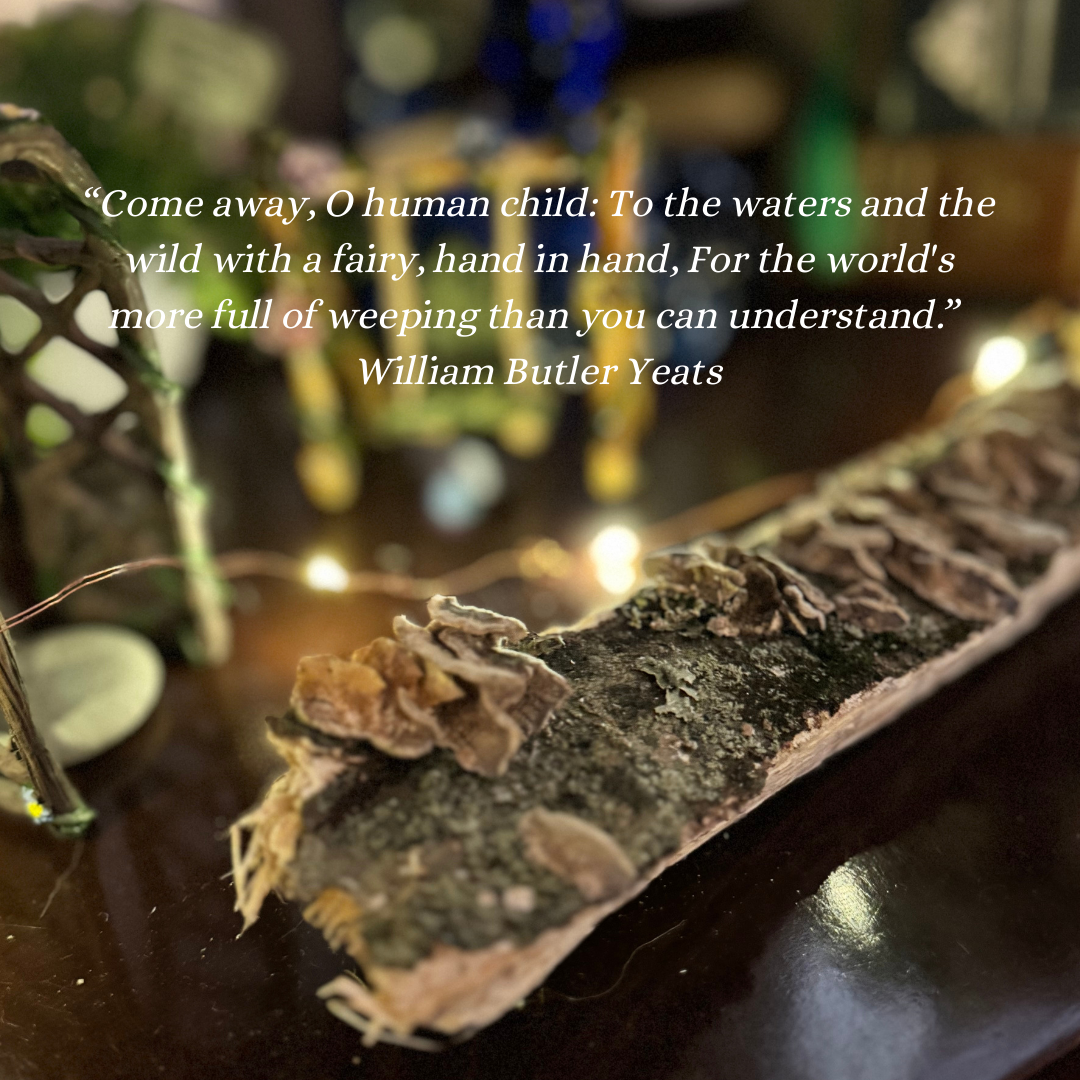
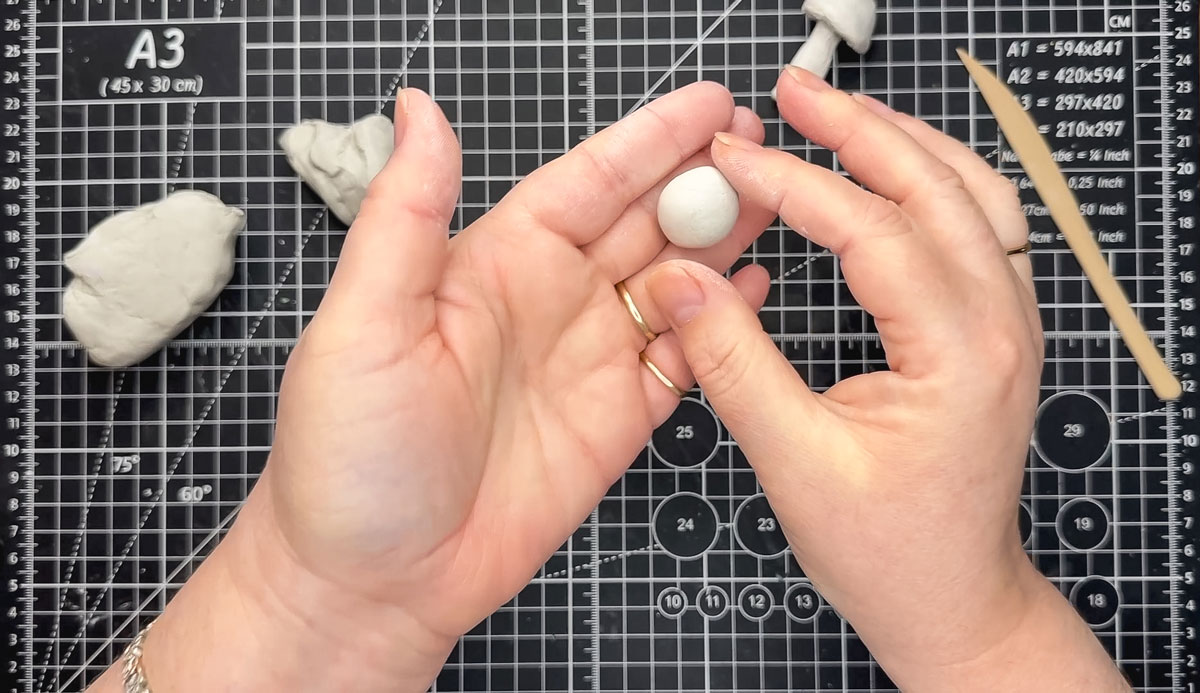
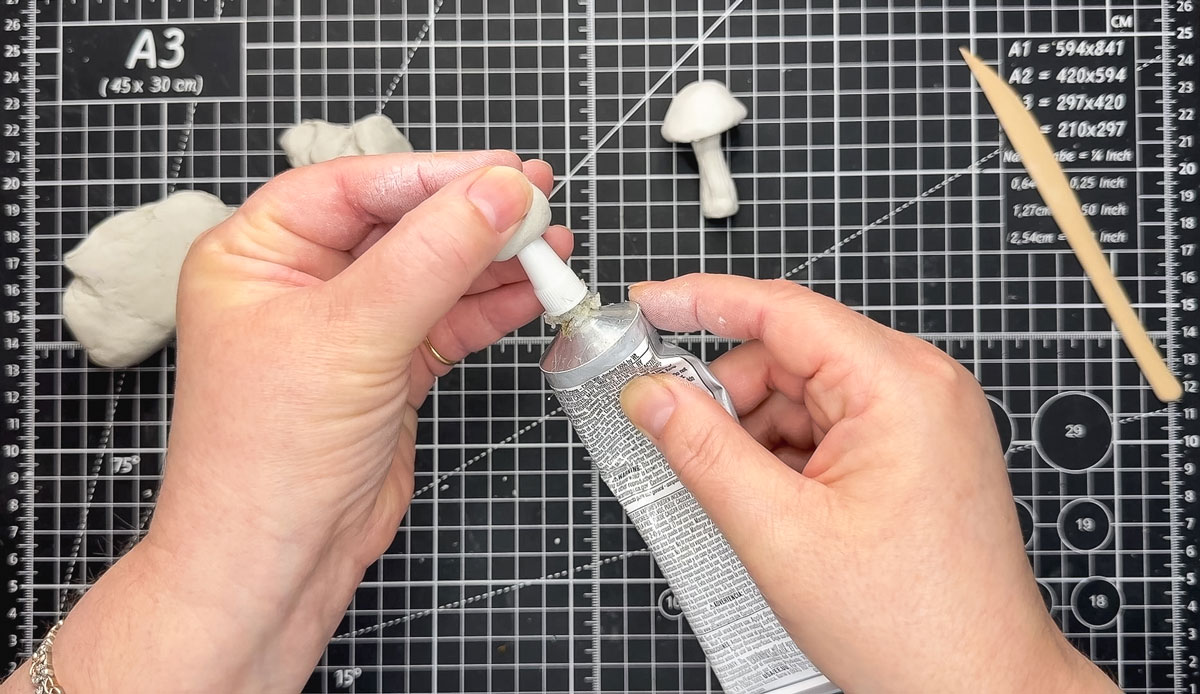
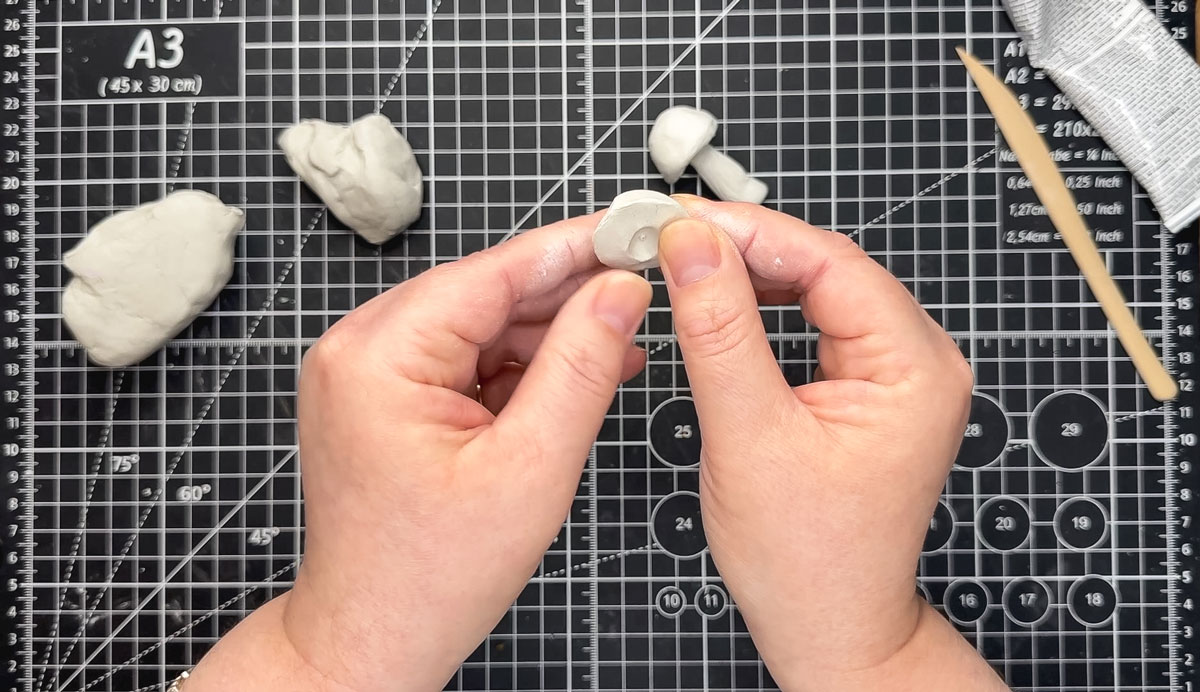
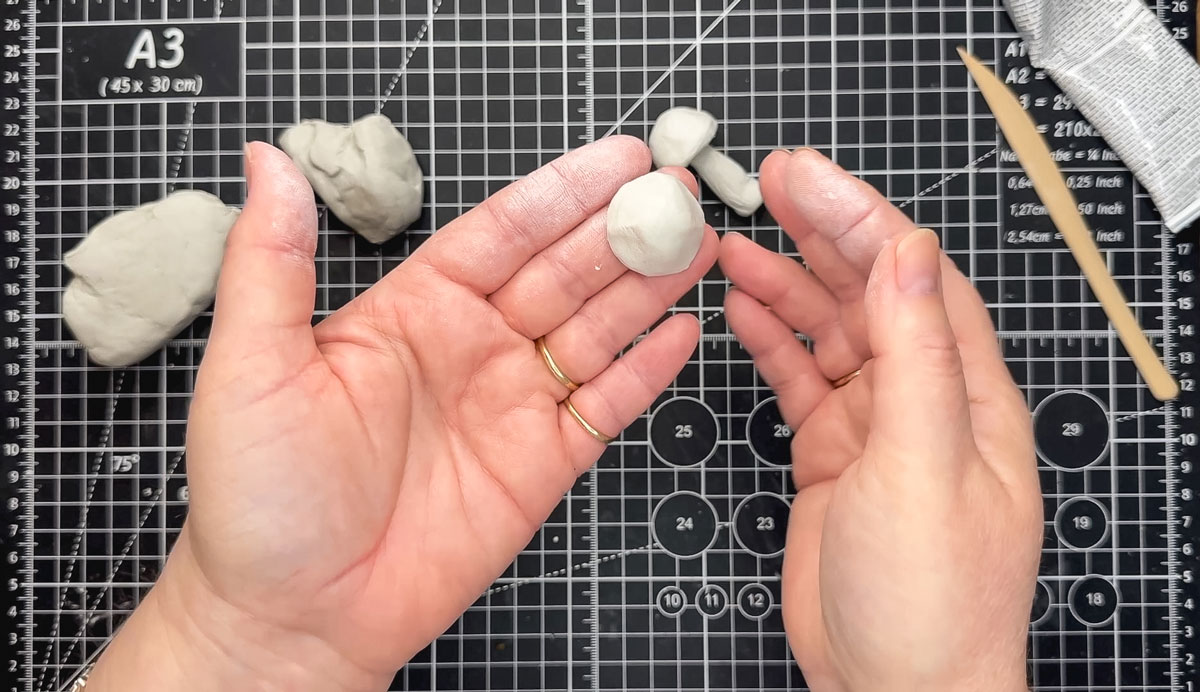
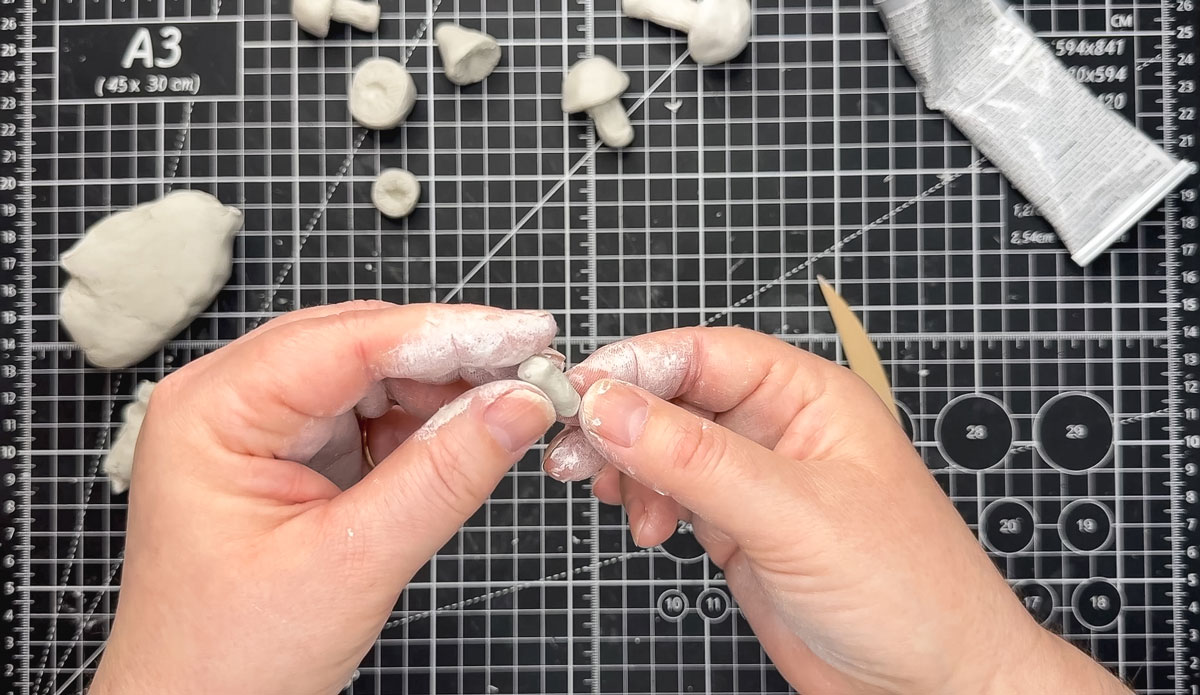
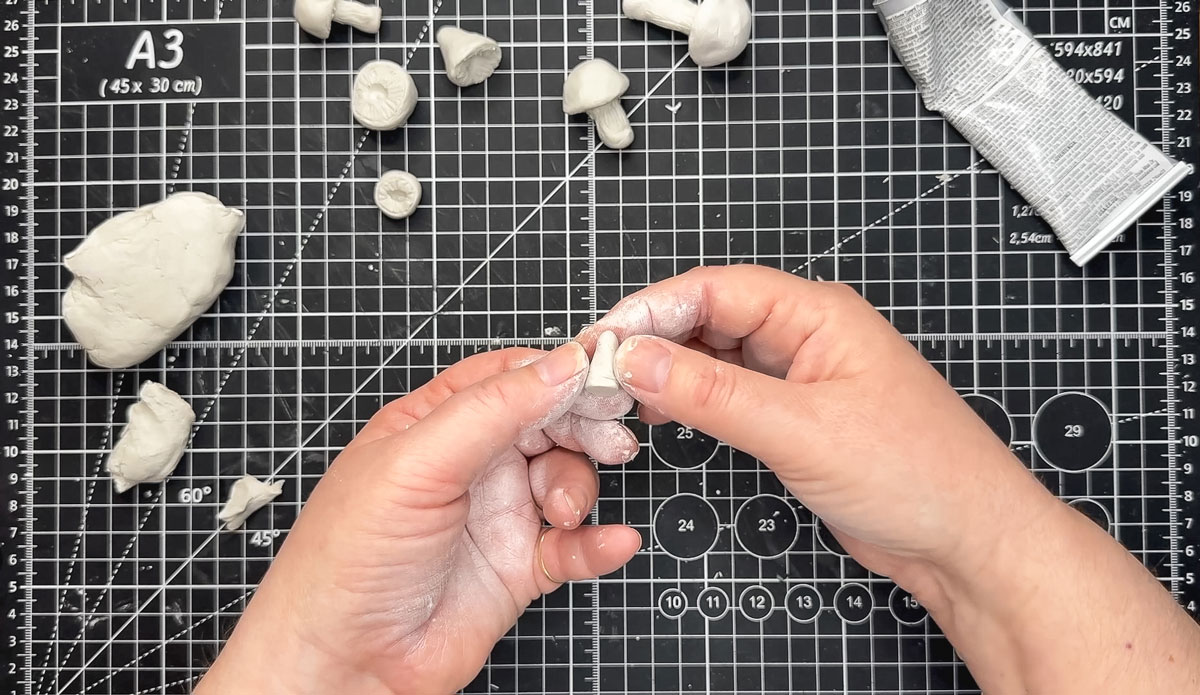
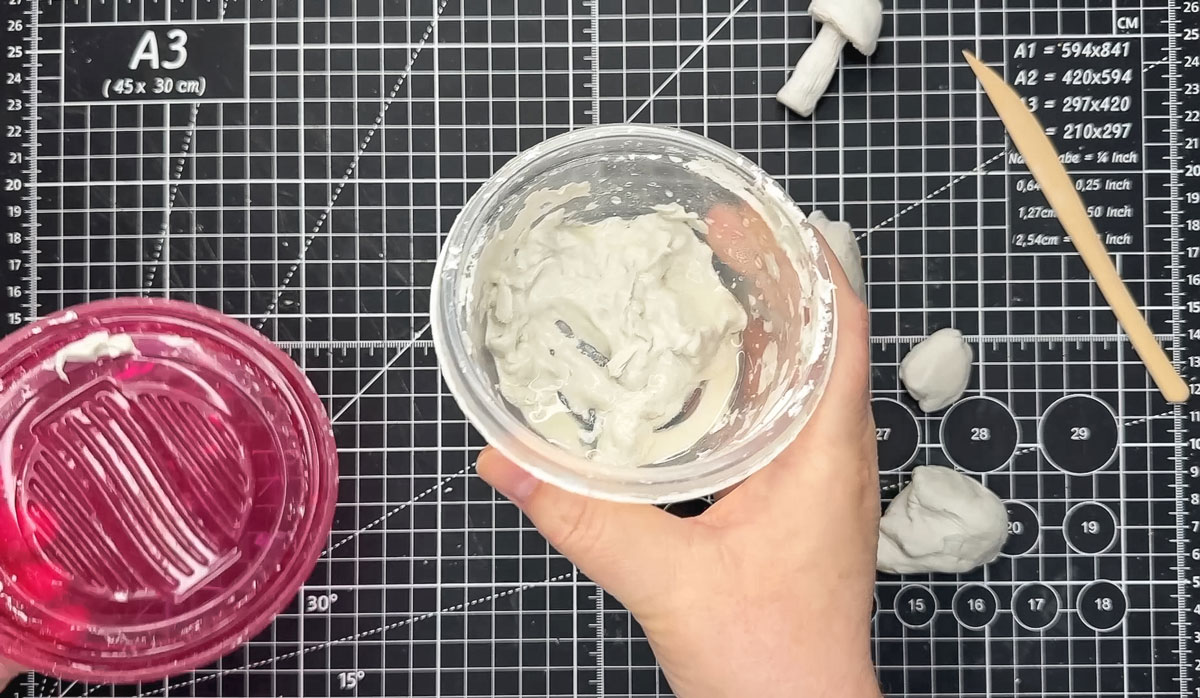
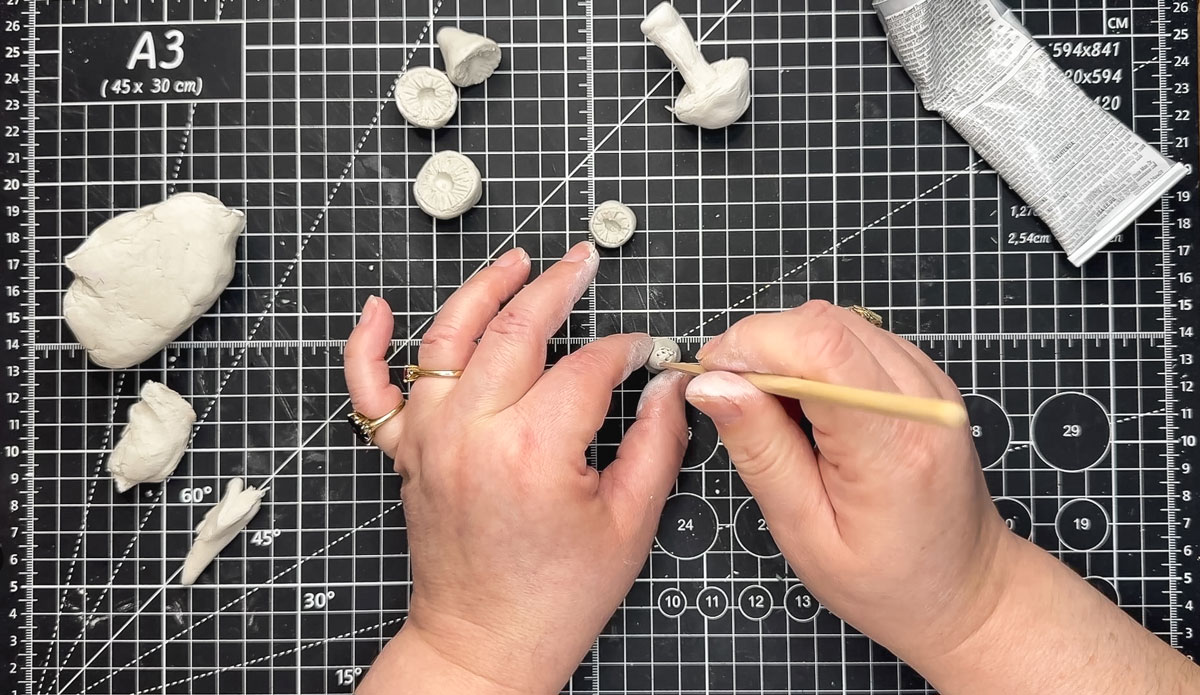
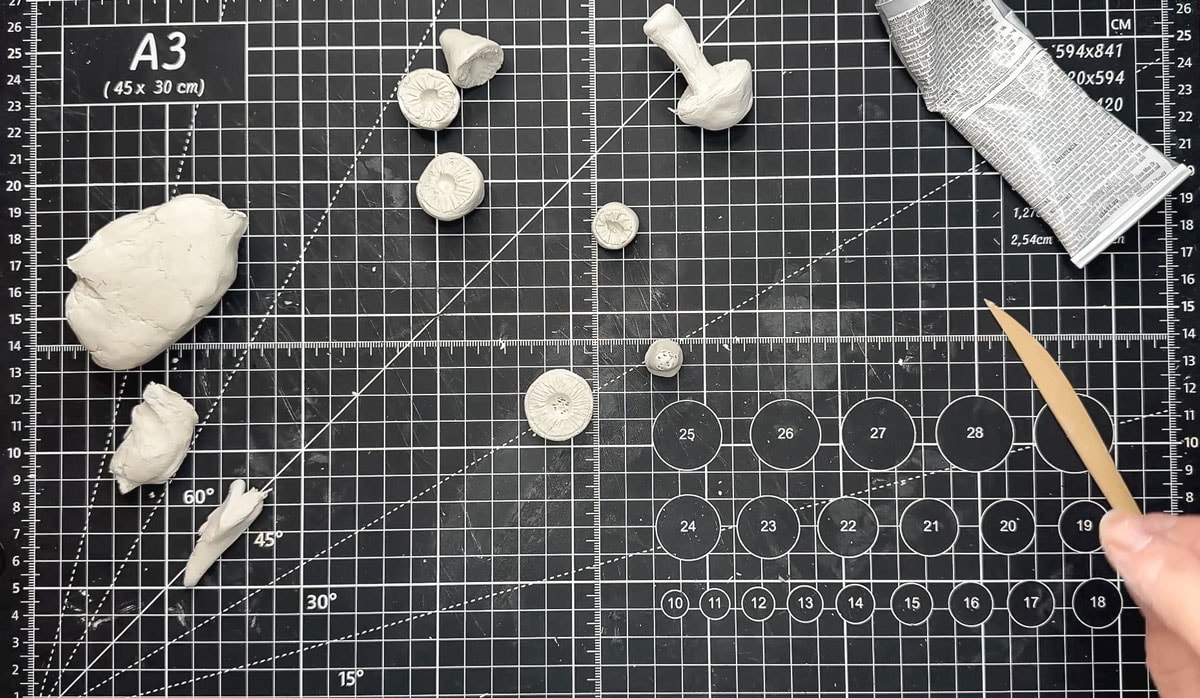
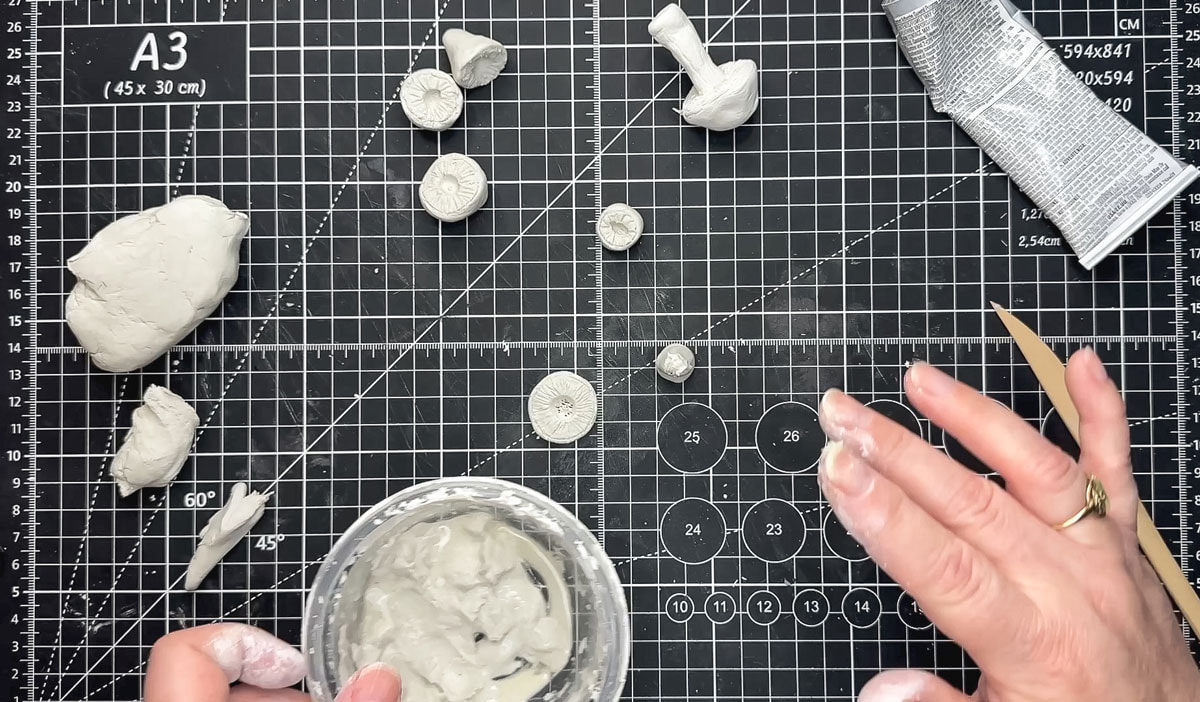
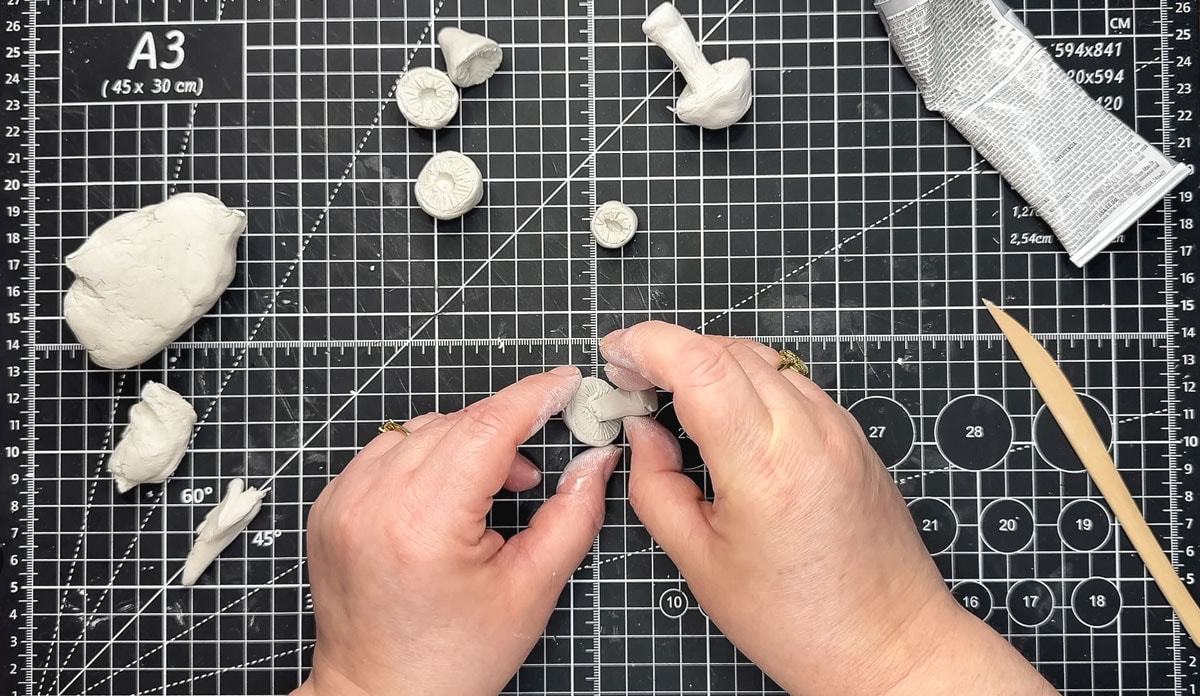
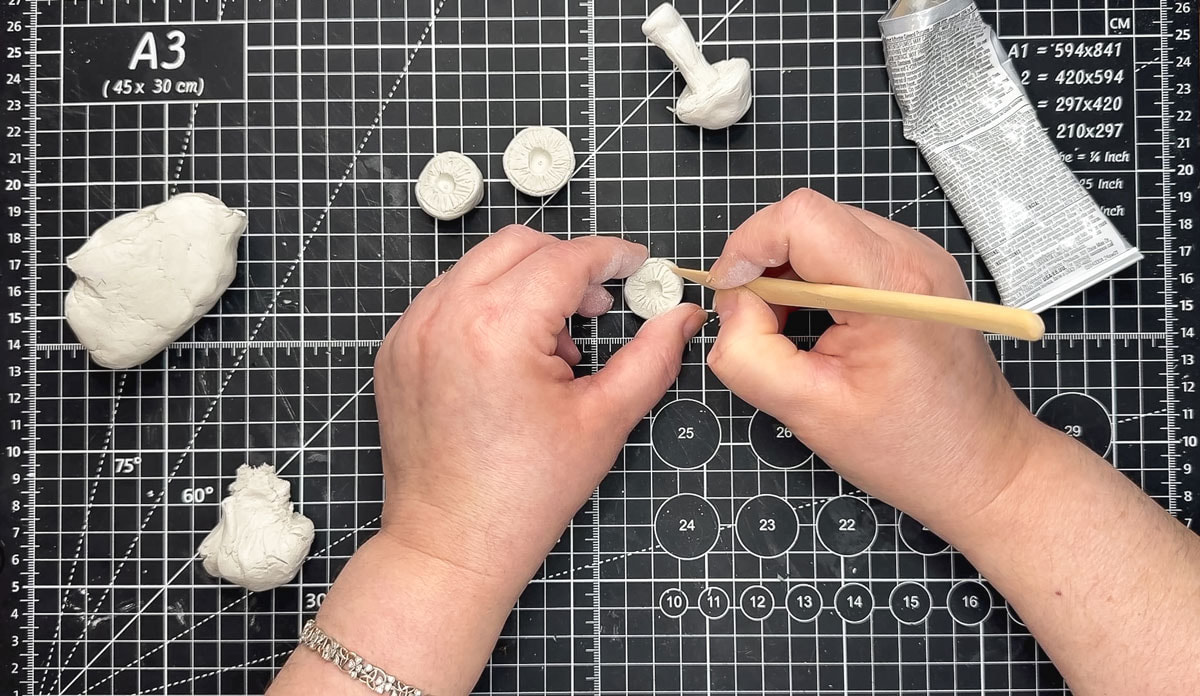
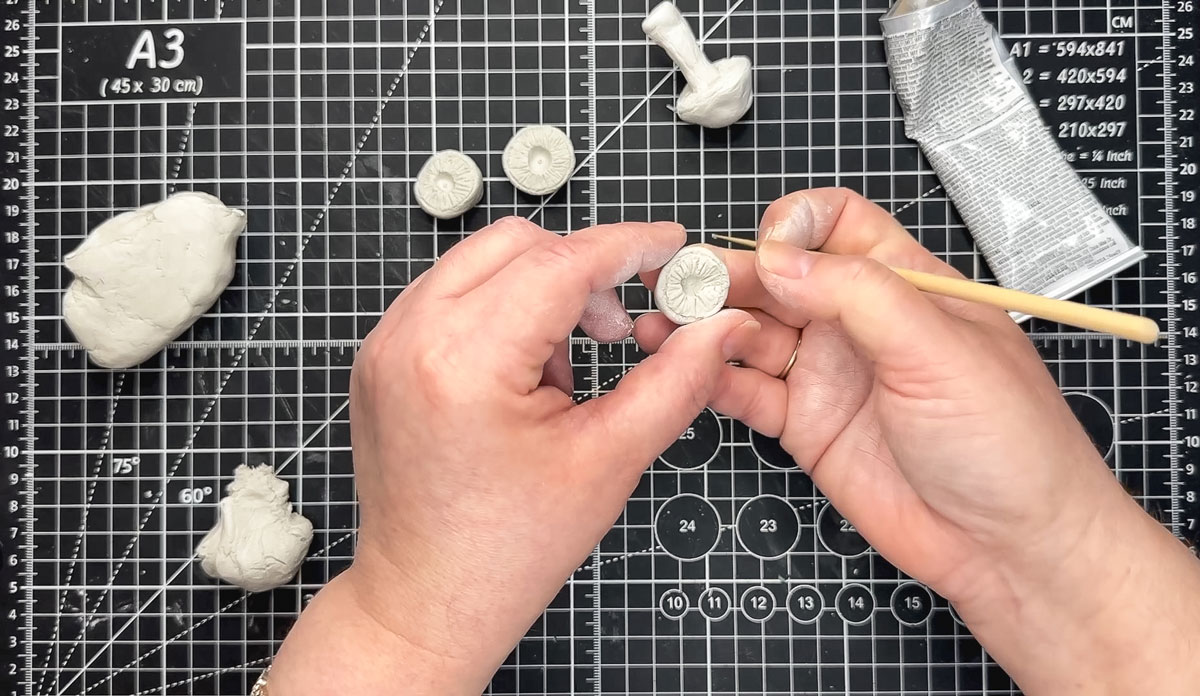
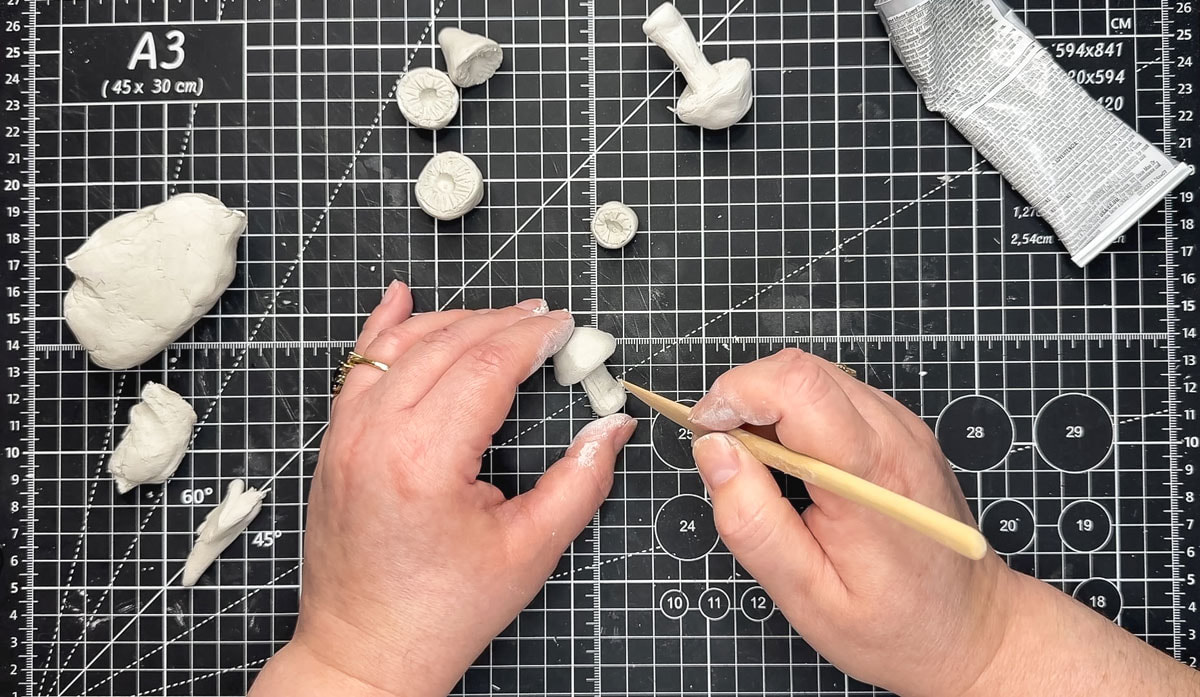
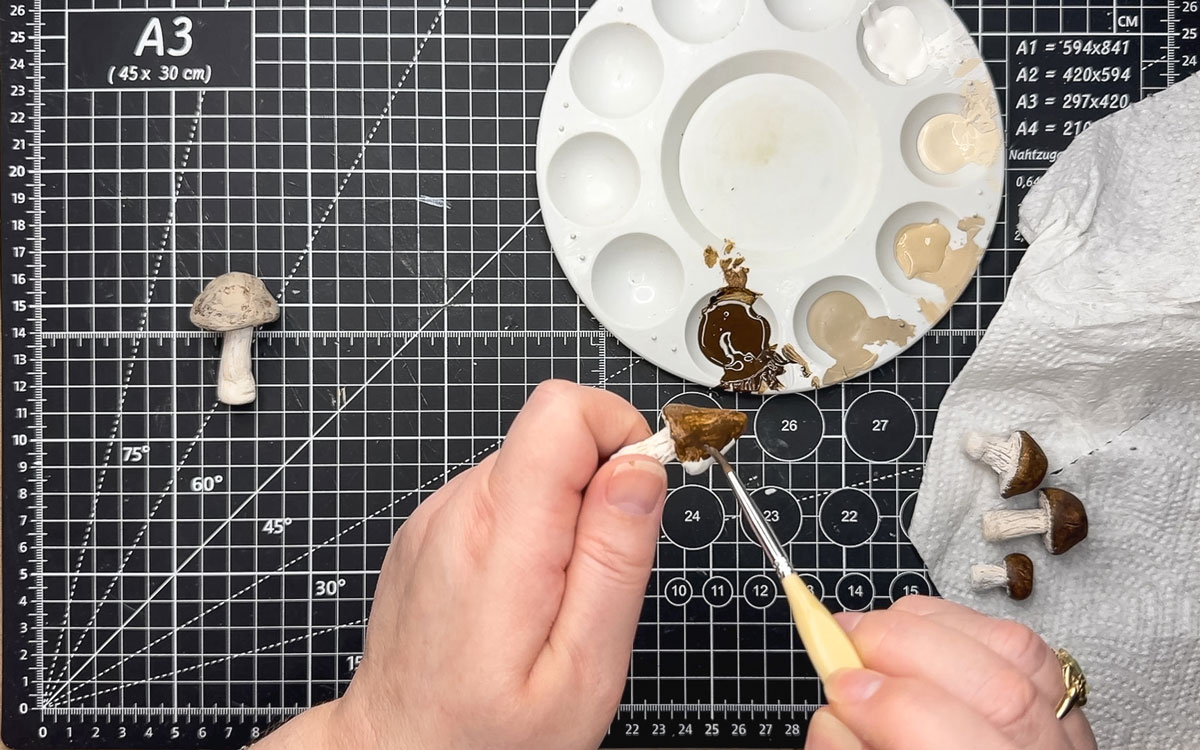
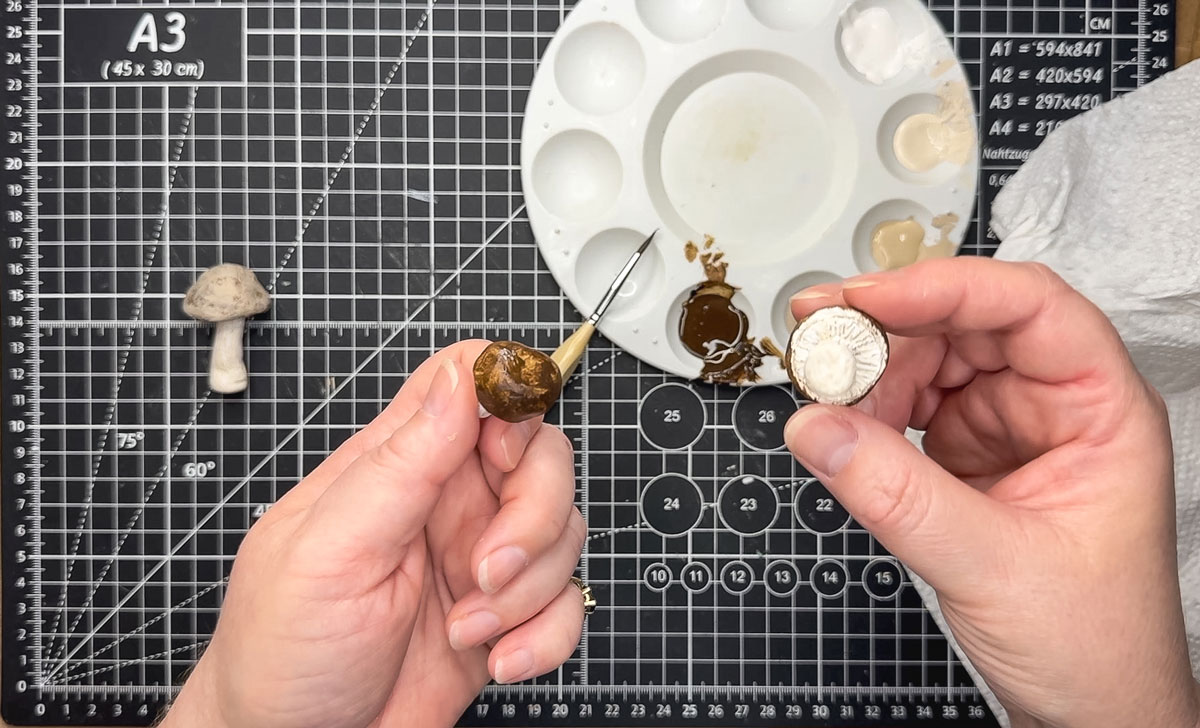
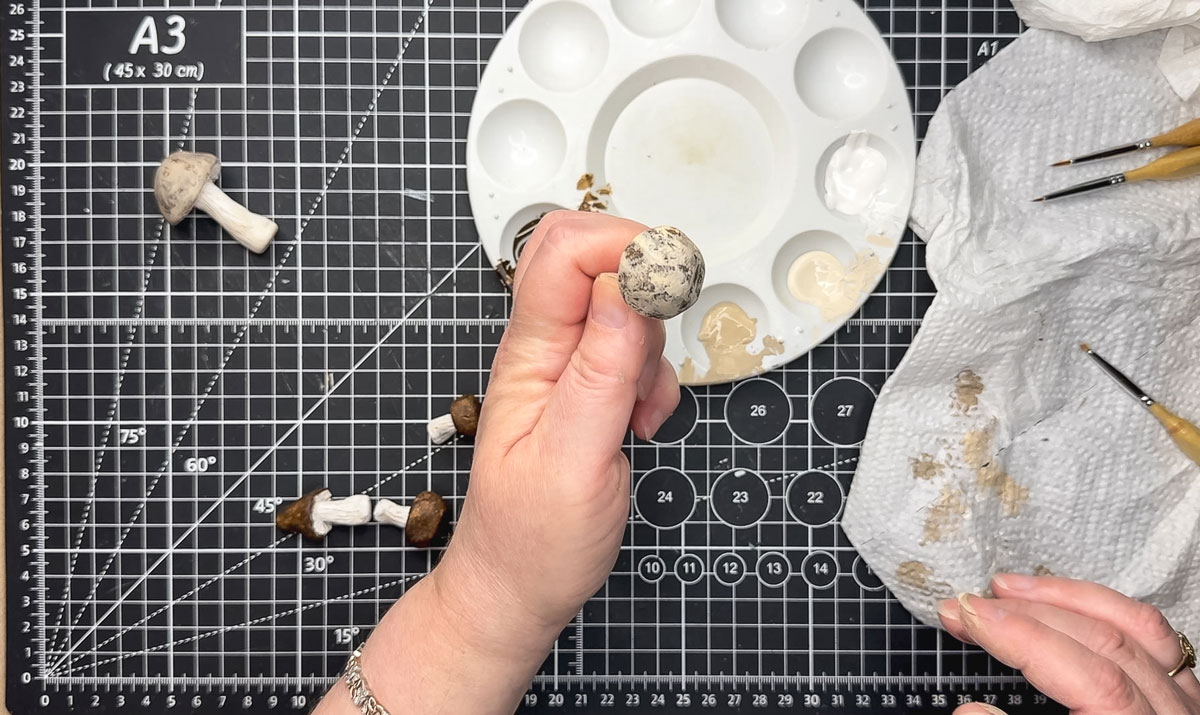
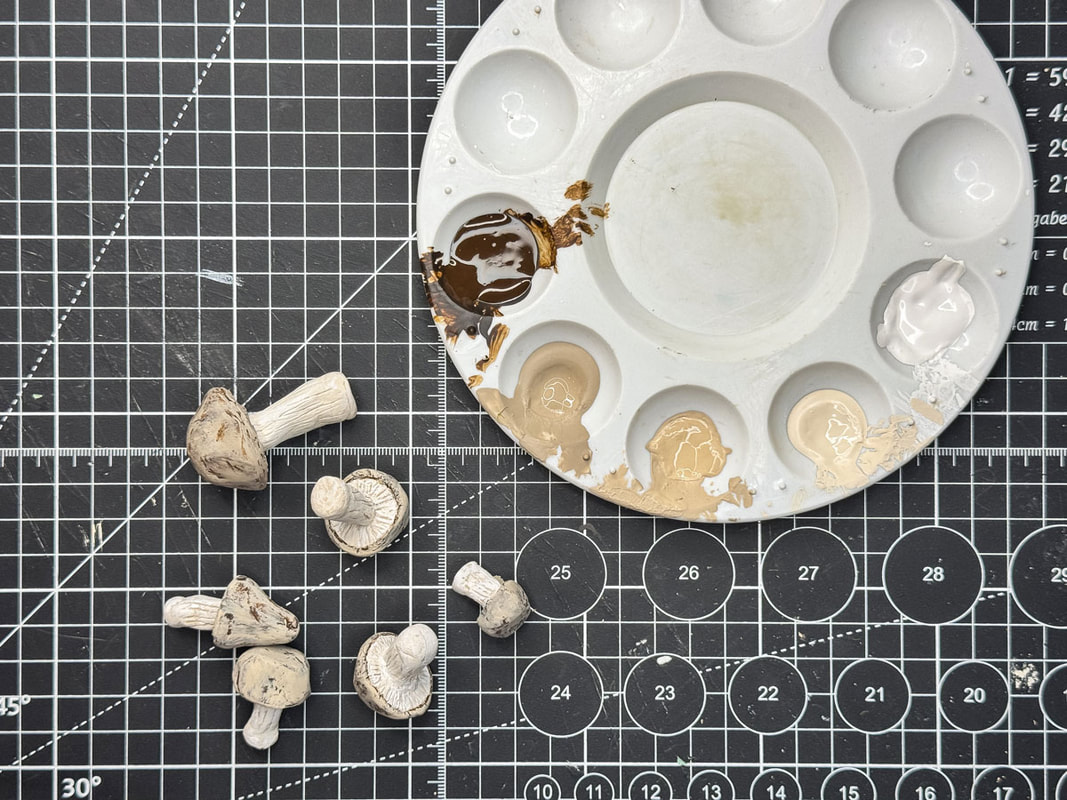
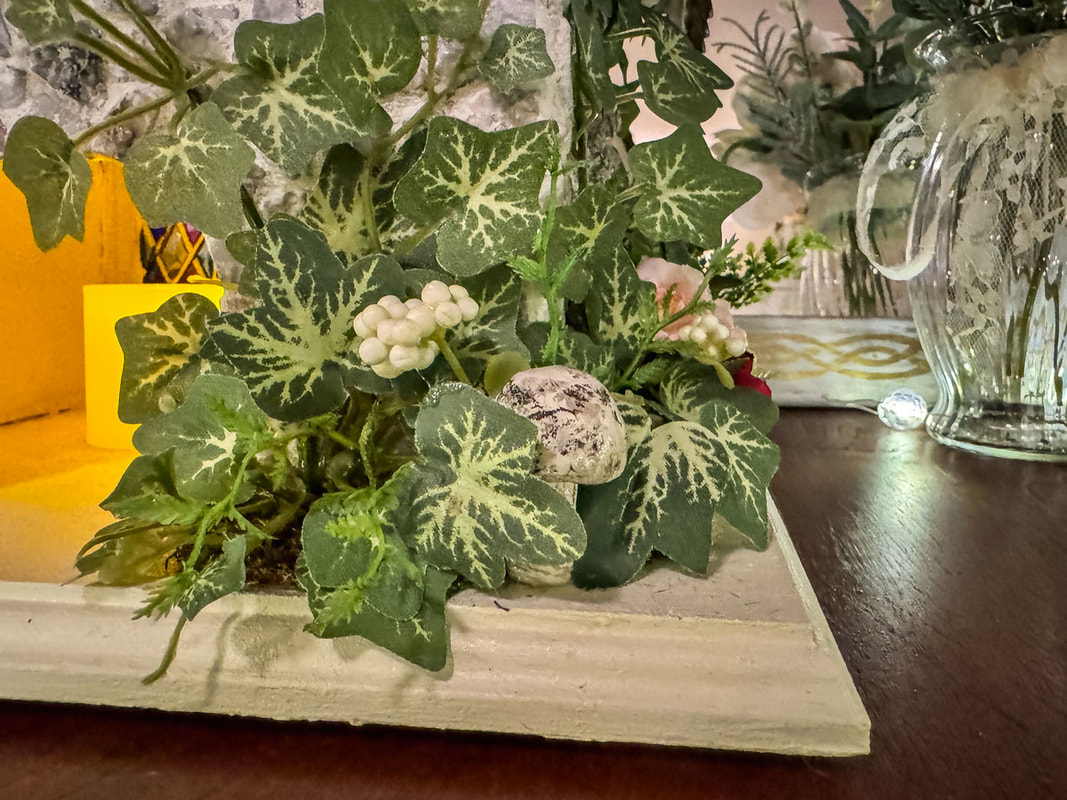
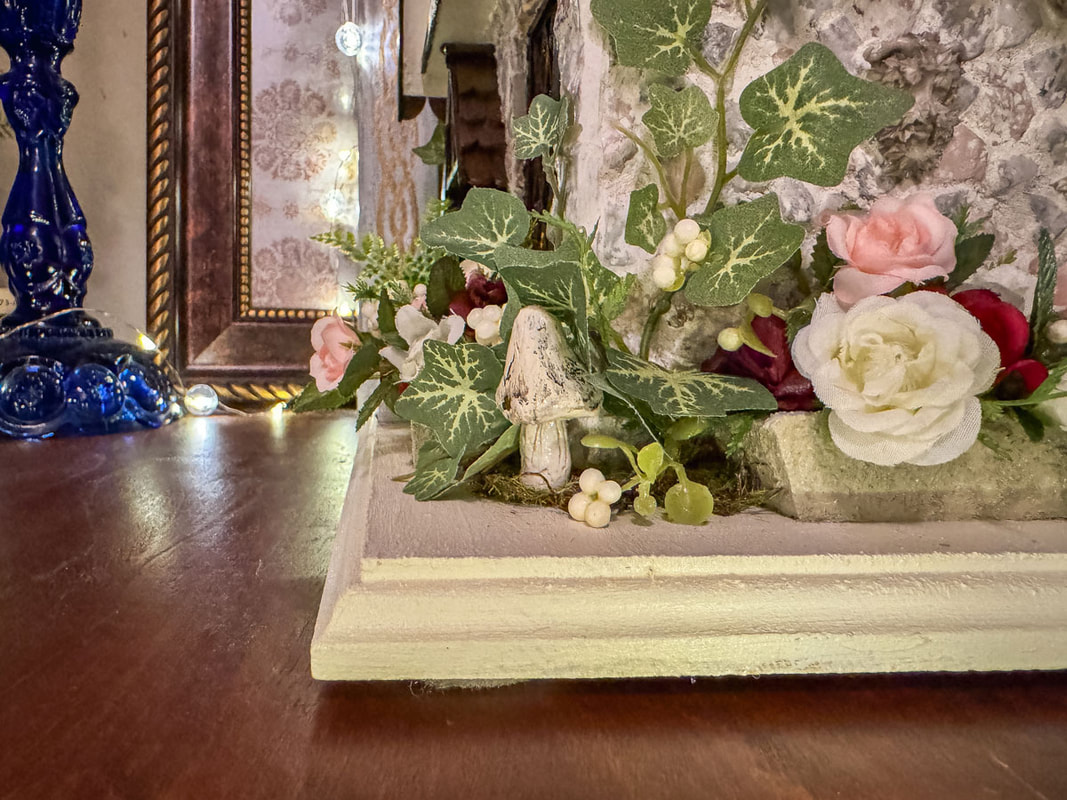
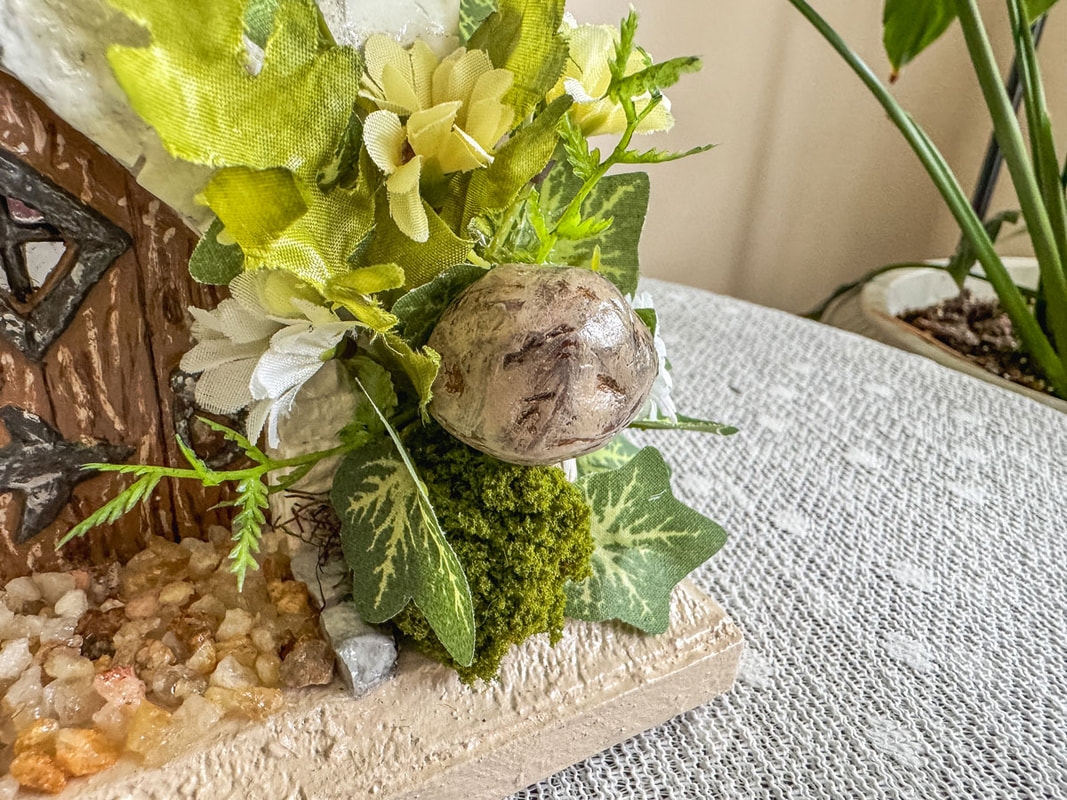
 These days, there’s a new favorite medium in my tool kit—air-dry clay! The more I work with this product, the more inspired I am to create things with it. It’s so organic! Anyone who enjoys baking can relate to the satisfaction of feeling their fingers push into soft dough, shaping and reshaping it until they achieve just the right texture and form. I couldn’t help but notice the resemblance as I experimented with this clay material. And, since this is a new fascination for me, I simply HAD to include something clay in my new handcrafted fairy houses! Two new projects need a final whimsical flourish, and I immediately thought of miniature clay mushrooms. What could be more magical?! Full disclaimer: I’m relatively new to using air-dry clay. My first attempt at making clay mushrooms yielded surprisingly adorable but crudely sculpted shrooms. The basic premise is there, but the technique needs work. The good news is I gained valuable experience, and the so-so mushrooms can be reused. There are ways to fix them by sanding rough areas or re-wetting the clay to re-sculpt, but that’s a project for another day… 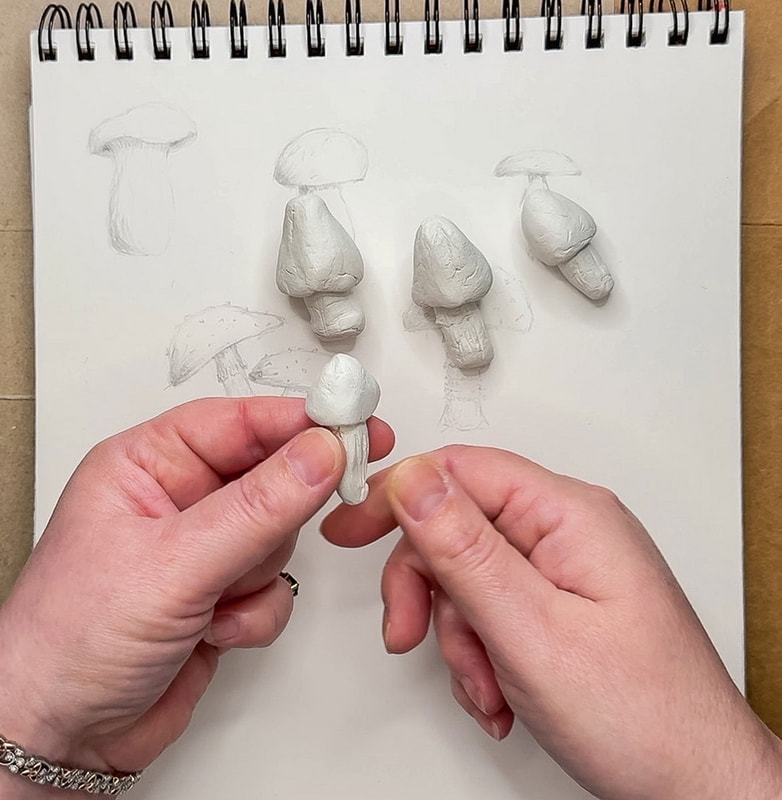 But back to my current project…I set about researching different kinds of mushrooms, focusing on shape and color. The most common type of mushroom used in anything fairy-related is that iconic red-capped variety, the toadstool. 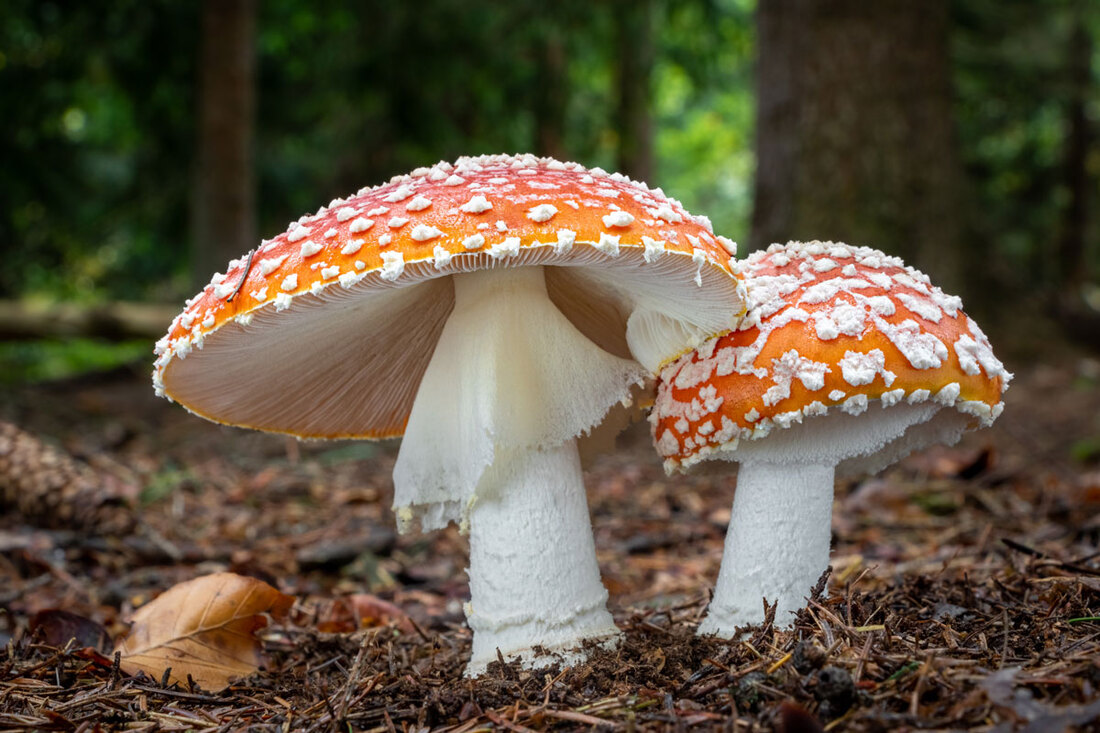 Toadstools. Jaroslav Machacek on Adobe Stock. At first, I thought about using toadstools in my designs, but didn’t love the red color. It’s too much color for the existing color scheme. So, I set out on a journey to find mushroom types that are more neutral in color. As part of my research, I sketched out a few thumbnails to get a feel for shape, form, and details (a process that helps with the sculpting process). And that became the launch pad for today’s project… 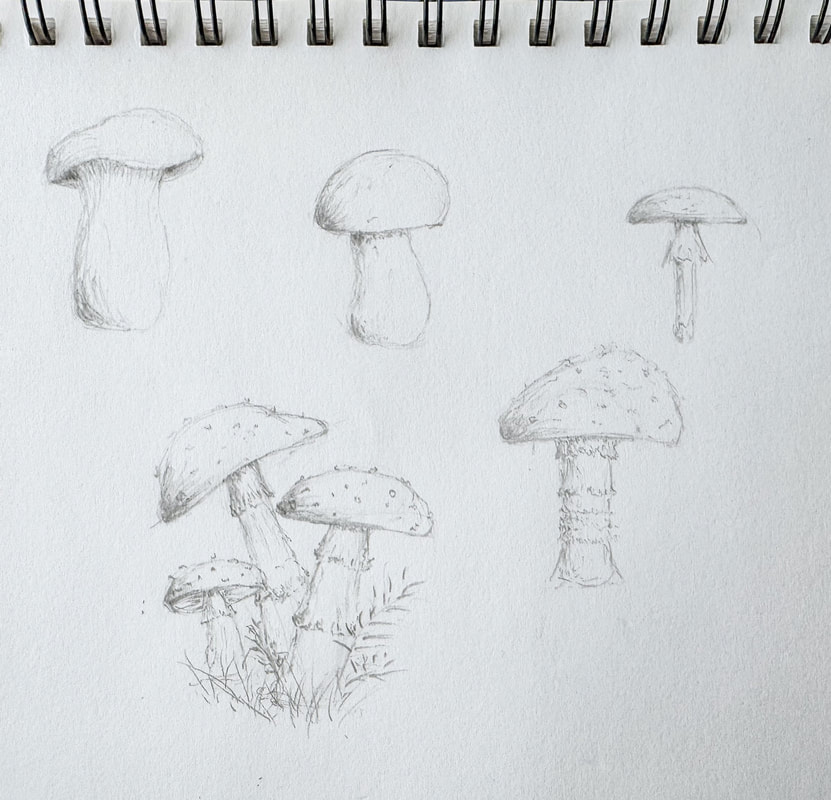 So, are you ready for an easy DIY clay project? Gather your supplies (a suggested list is below) and let’s have some fun! Suggested supplies: Air-dry clay Sculpting tools Flat work surface Small bowl of water Paper towels Bottle, cylinder, or rolling pin Craft paint Paint brushes Sealant E6000 glue 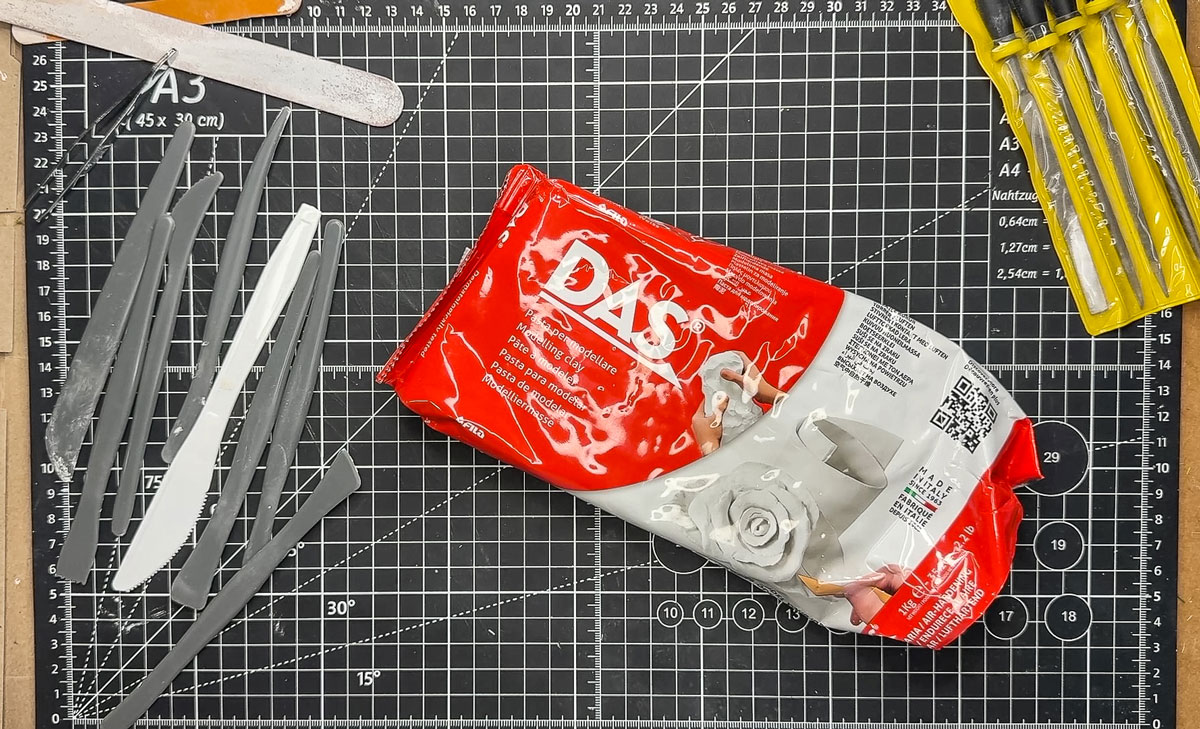 Affiliate Disclaimer: I am an affiliate associate of Amazon, Factory Direct Craft, and Blick Art Materials, so some of the posts in this article contain affiliate links. If you click on the link and purchase the item, I will receive an affiliate commission at no extra cost to you. I will only recommend products or services I use personally and/or believe will add value to my readers, so there is no conflict of interest. Condition the clay The first thing you need to do after opening your package is to condition the clay. You do this by kneading it until it is malleable. Break off a piece of clay roughly the size you want to work with and roll it in the palm of your hands, squish it between your fingers, and push it into itself, until the stiffness is gone, until the clay has “movement”. This is where you get to know the clay, become intimate with it. If there are any stubborn dried-out areas of clay, add a small amount of water and knead until the dryness disappears. (When deciding how much to break off for a project, remember it’s better to go bigger and reduce rather than not have enough to create the sculpted piece.) Shape the stem and cap Roll a small piece of clay into a ball using your palms. Use your finger or another handy object to push in a spot at the center of the ball. Start to flatten out an area around that indented spot. (This is where the gills on the underside will be.) Sculpt the top of the mushroom into whatever shape you’d like, using your fingers to explore the surface, pushing in here and pushing out there, until you end up with the shape you’d like for your mushroom cap. Once you have your basic form, you can start to etch in the divets, gills, and other details. If the clay is firm enough, this can be done right away. If not, let the piece sit for a few minutes before attempting to add details. Now for the stem…This part is super easy! Just roll a piece of clay in your hands to create an oblong shape, breaking off the ends to get the right size. Shape it, squish it, add scratches, lumps, and bumps wherever you like to make it look organic. Tip: If the clay begins to dry while sculpting details, dip fingers in a small bit of water and dampen (not soak) the clay. You can’t mess up! If you don’t like what you’ve made, simply start over by kneading it, or add a small amount of water to reshape. Use other objects/materials to form a base An alternative to sculpting a solid object out of clay is to create a base with some other material that establishes the form of the intended sculpture. Use this technique to create a sturdy base or lessen the amount of clay needed for a project. Some materials I’ve seen used in clay projects: polystyrene, wood dowels, tin foil, jars, and cans. You can use just about anything you have on hand, but remember that the clay will shrink and change shape as it dries, so it might not adhere well to a surface underneath. Also, remember that as the clay dries, it will shrink, and cracks might appear if the clay is wrapped too tightly around an object. For this particular project, you could wrap clay around a nail or a cylindrical piece of wood for the stem and use aluminum foil to create the basic form of the cap. Personally, though, I feel like these mushrooms are small enough for solid clay. Just remember that solid clay takes a bit longer to set. Attach the cap and stem Attaching two pieces of air-dry clay couldn’t be easier! They can be attached before or after the pieces are set, and the process is (more or less) the same. You will need a clay mixture called slip (created with water added to pieces of clay for a wet glue) to use for adhesion. Have a small bowl of prepared slip mixture handy, along with a little bit of water. Once you have the cap and stem molded, it’s time to decide how you will attach them. If you’re doing this before they have set, rough up the surface of the stem and the inside of the cap where the stem and cap will meet. Apply the slip to either surface and push the two pieces together. Hold for a moment, then carefully set the mushroom aside for at least a day before handling. If the clay pieces are already set, you won’t need to rough up the connected surfaces, but you may want to strengthen the bond with a little glue. Sculpt the details This is perhaps the hardest part of the process, as the outcome depends heavily on your skill and confidence using tools. Practice makes perfect, and your finished piece will look much more convincing if you get to know your material and tools first. Before trying your finished piece, practice with your clay and a variety of tools to get a feel for the process. Also, study real-life objects—or photos if you don’t have access to the real thing—to learn what an object would look like. This attention to detail will make your final sculpted piece look more believable. When it comes to tools, there are tool kits you can use, but you don’t necessarily need them. You can use anything you have on hand to do the job. (For instance, I used the pointed cap from my glue to create the indent for my mushroom cap.) Look for items that can be used to smooth, scratch, poke holes, and rough up a surface. Some household items that might work well in this project are toothpicks, a plastic knife, and a toothbrush. Speaking of details, it is time to add the gills and other textural flourishes, if you haven’t done so already. Add the gills under the cap by gently carving radiant lines underneath. Add textural details to your stem as well. If the clay dries out, use a small amount of water to dampen it. Be careful not to oversaturate the clay (you could end up with the gooey consistency of slip). Tip: Tiny sculptural elements may not hold up the best with air-dry clay, so keep the details simple. If you need to stop for a few moments, wrap the project in a damp cloth to prevent the sculpted piece from drying out. Wash your hands and tools when you develop a messy dry film. Let the air-dry clay set Let the mushrooms dry for about 2 days. (Larger sculptures can take up to 4 days to dry.) Resist the temptation to handle your sculptures! I can tell you from personal experience, this does not end well! I couldn’t keep my hands off these adorable clay mushrooms, and I knocked the adhesive loose on many of them. I could’ve added more slip and waited an extra day or two, but time was short, so I resorted to using super glue to reattach them. Sculptures that contain a lot of clay may dry too fast or unevenly. Clay that dries too fast may crack; try covering it with a damp cloth or plastic to slow down the drying process. If you have a rack, place your sculptures on it to help the air circulate. This will help with more even drying. Otherwise, you will have to turn the sculpture to expose damp spots to the air. Once the clay is set, you can use sandpaper to smooth out rough edges and enhance details. Dampen slightly to adjust surface imperfections. Let the surface dry, and you’re ready for the next stage! 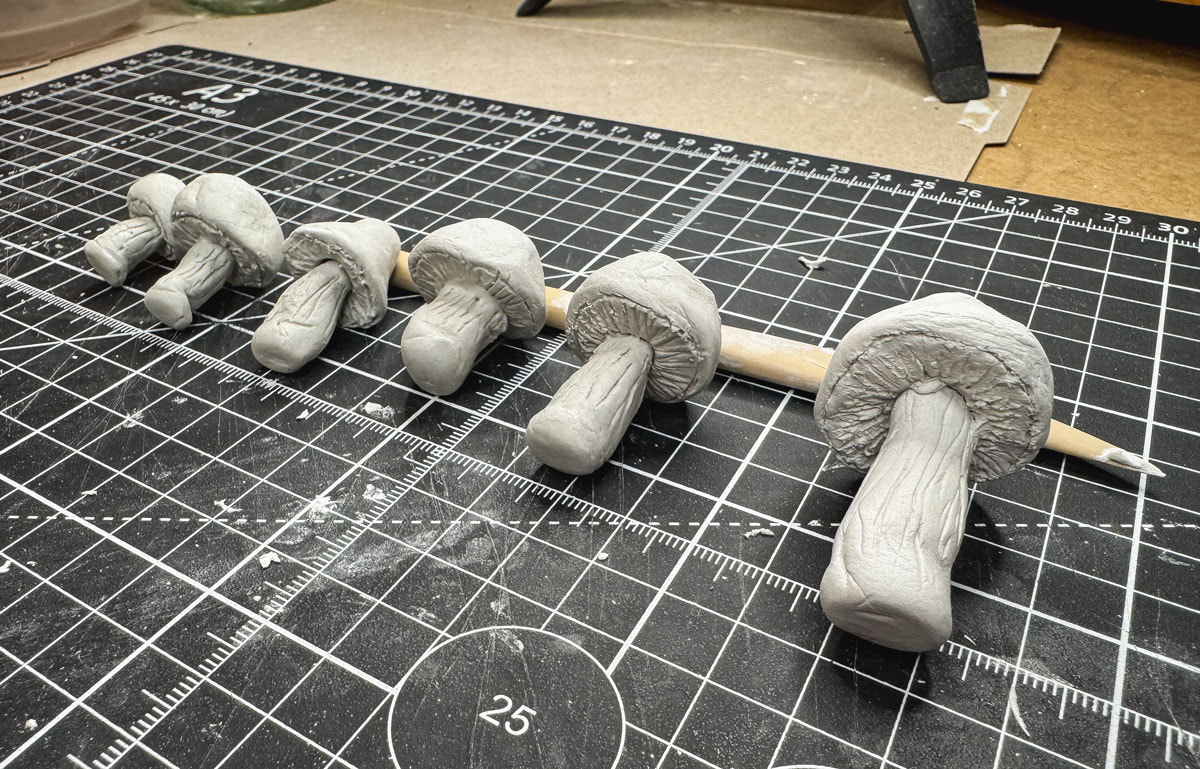 Paint the mushrooms Use acrylic craft paint to bring your new mushrooms to life with magical color. Use layers of color (working dark to light) to add a more realistic, organic depth to your new clay mushrooms. Push dark colors into the nooks and crannies, and add light colors to raised surfaces for highlights. Get creative and have fun! (Remember, it’s only paint…You can paint over it if you make a mistake. I did!) Seal the clay If you’d like to preserve and protect your clay mushrooms, you can use a variety of finishes. I used a water-based varnish to seal my new creations, but you could use polyurethane, shellac, or Mod Podge to seal your mushrooms. If your miniature mushrooms are going to find a home outside, be sure to use a weather-proof varnish. Store unused clay Place any unused clay in an air-tight container or resealable bag to keep it from drying out. If using a resealable bag, squeeze out all of the air as you zip it closed. If there are dry bits next time you use the clay, add a small amount of water to soften it. Knead the clay so that it becomes workable again. (You may need to leave it for a day or two if it’s really dry.) Add the new clay mushrooms to projects Now that you’ve finished creating your magical mushrooms, it’s time to attach these new clay creations to your projects using your favorite adhesive. In my projects (an enchanted fairy castle tower and a half-timbered medieval fairy house), I used a combination of hot glue, E6000 glue, and super glue. I half hid a few behind ivy vines to give the display an air of mystery, making the viewer look a little harder at the details. I think it adds to the enchantment! So there’s a peek into another one of my creative projects! Let me know in the comments if you liked this DIY or if you tried it yourself. You can view the accompanying video on my YouTube channel here, or support me on Patreon as a member to unlock the extended version, a behind-the-scenes look at the painting process for these clay mushrooms! Find more blogs like this: DIY Projects blogs Fairy Houses and Gardens blogs Behind the Scenes blogs Project Updates blogs
0 Comments
Leave a Reply. |
Author
Some of the posts on this site contain affiliate links. This means if you click on the link and purchase the item, I will receive an affiliate commission. 
Categories
All
Archives
June 2025
|


 RSS Feed
|
|
Major credit cards accepted through Square. Apple Pay option available. This site also accepts PayPal payments for better online security, and it's free to sign up! Gift cards are now available for purchase!
Copyright 2025 |