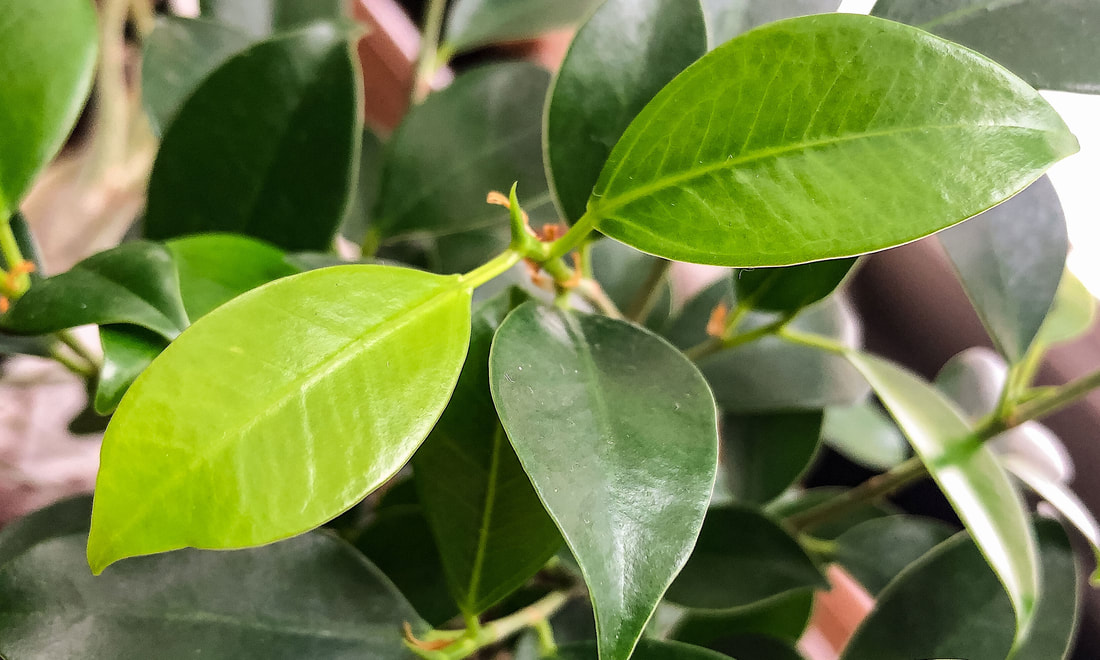
 Closeup of bonsai ficus leaves. Photo by Diane M. Lilly, 2022. If you have a small bonsai ficus that has become a little unruly or has over grown its pot, today’s blog has a few tips that may help you repot that burgeoning bonsai tree! Last year I purchased a bonsai ficus retusa and over the past year it has become side heavy, leaning to one side and pulling itself out of the soil. The tree leaves themselves are flourishing and look amazing, drinking in the warm sunlight from its tranquil spot in front of my south facing window. The severe lean that is causing the roots to be exposed, however, has me concerned that this tree may soon find itself in distress. An intervention is needed! 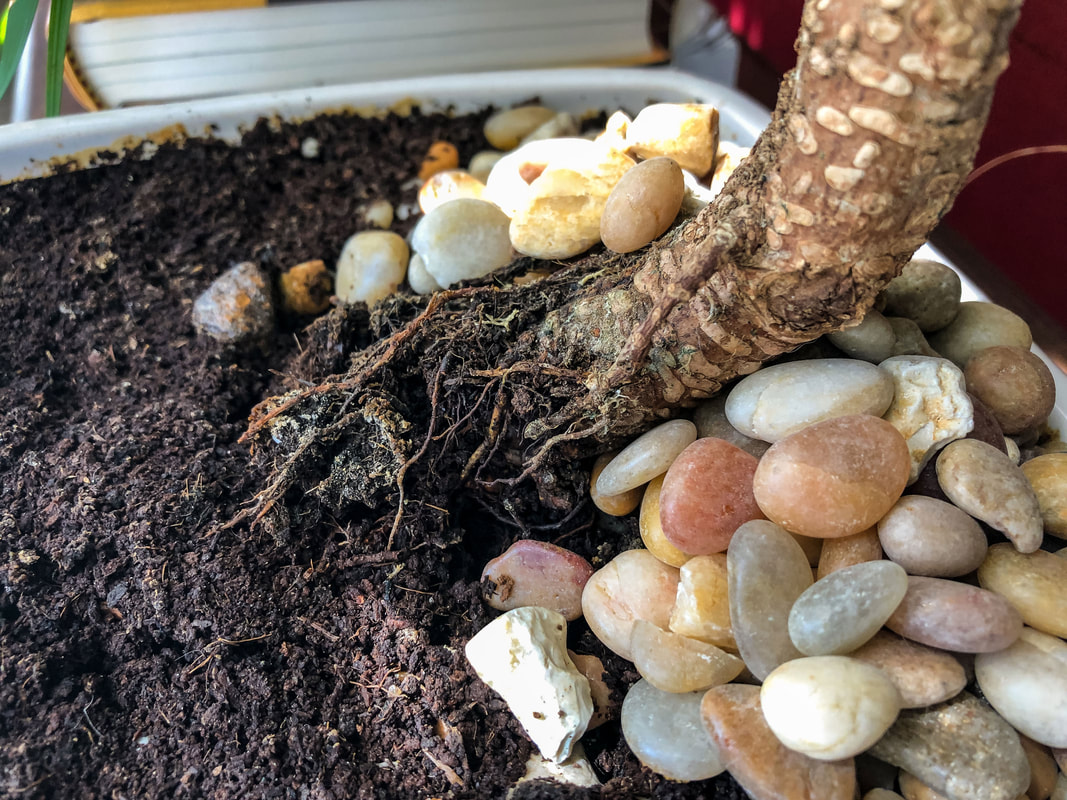 My bonsai ficus plant pulling itself out of the soil. Photo by Diane M. Lilly, 2022. Originally from Asia, this type of tree loves humid environments, but does not like to be soggy, so keep that in mind when choosing pots and soil. The bonsai ficus retusa is said to be a very forgiving, undemanding plant for beginners and I can certainly vouch for that! 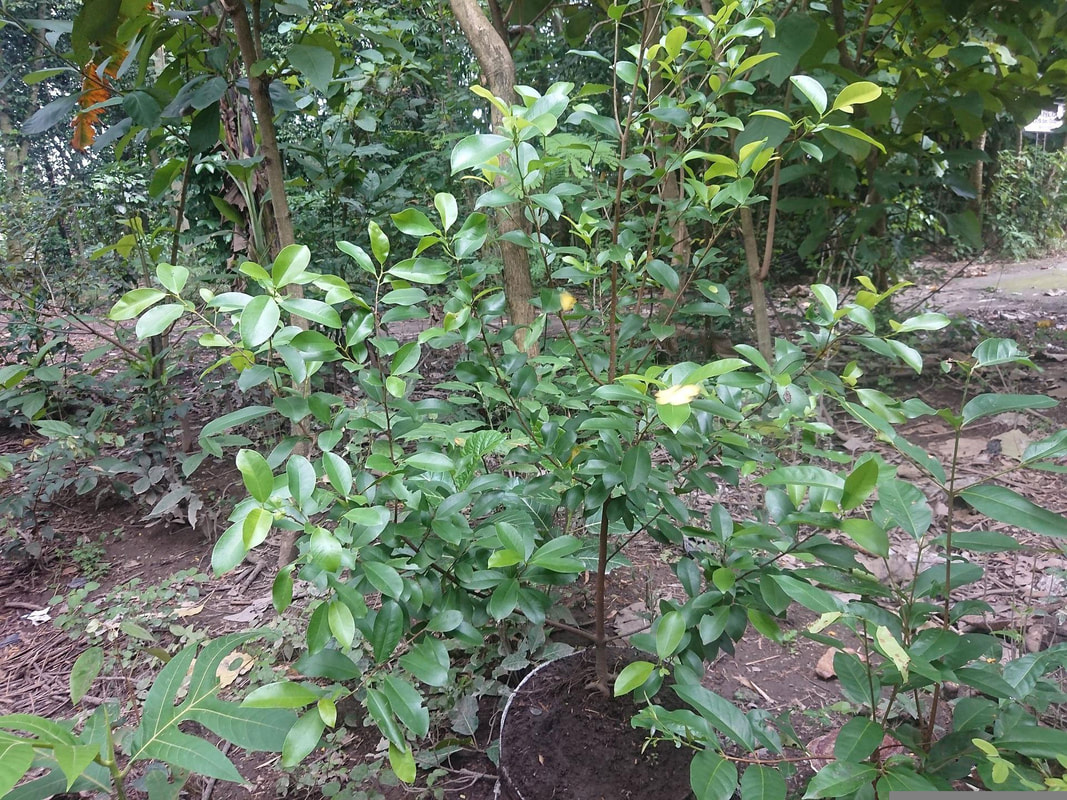 Image by Samudra Dirgantara from Pixabay. Having said that, the thought of transplanting this tree was just a wee bit intimidating to me. But, like anything else, you have a to do a little research and then just dive in, right? So, I’m going to share with you the things I learned and my process for transplanting my latest plant baby... 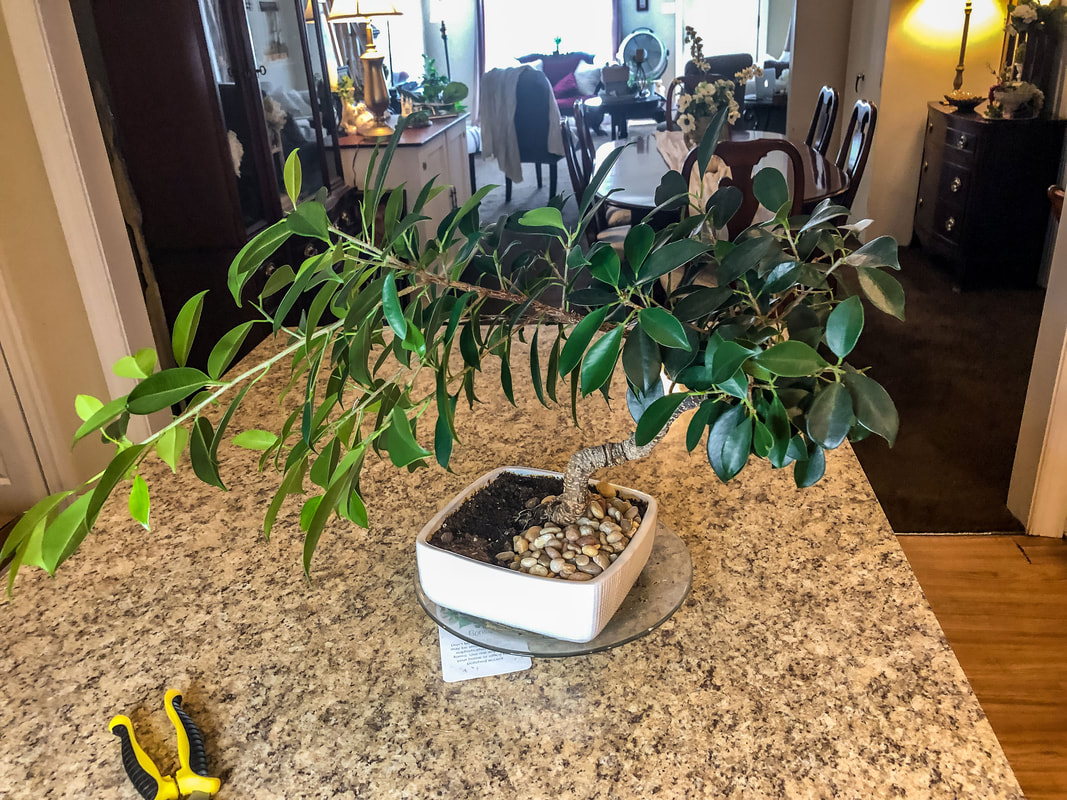 The "before" shot of my overgrown bonsai ficus. Photo by Diane M. Lilly, 2022. When to repot a bonsai ficus For most houseplants, the going wisdom is to repot in early spring, but the timing for repotting a bonsai tree depends quite a lot on the specific type of tree. (And it’s important to note that bonsai plants are miniature trees, not a typical houseplant.) My specific tree (as mentioned previously) is a bonsai ficus retusa, so my timing for repotting this plant is not in early spring but in mid to late summer. This may be an oversimplified overview of repotting the bonsai ficus, and it’s only fair to share a little of the abundance of information I have found on the topic. I have discovered (frustratingly) that there are different opinions on the topic, but much of how you care for your bonsai ficus will depend on a few key points:
According to one source--Bonsai Empire—you should avoid replanting bonsai trees in summer or winter, but other sources indicate that indoor plants are less vulnerable to the changes in the season and will tolerate repotting at other, less ideal, times of year. 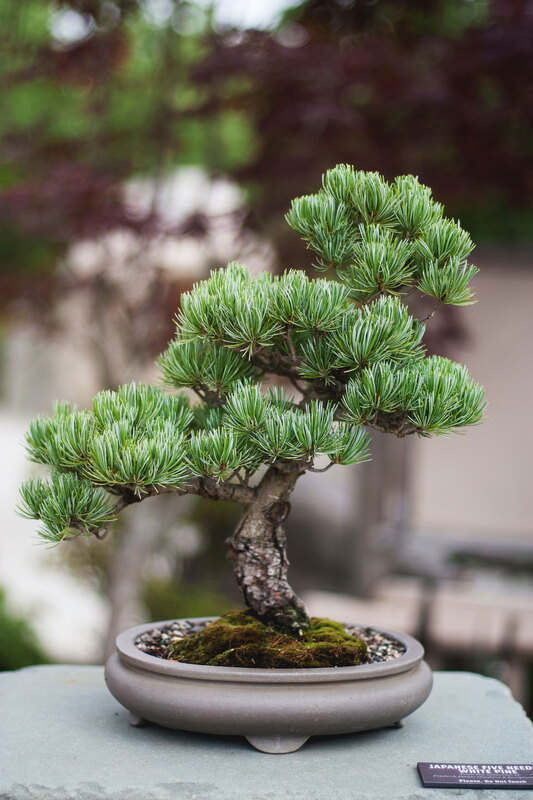 Image by StockSnap from Pixabay. 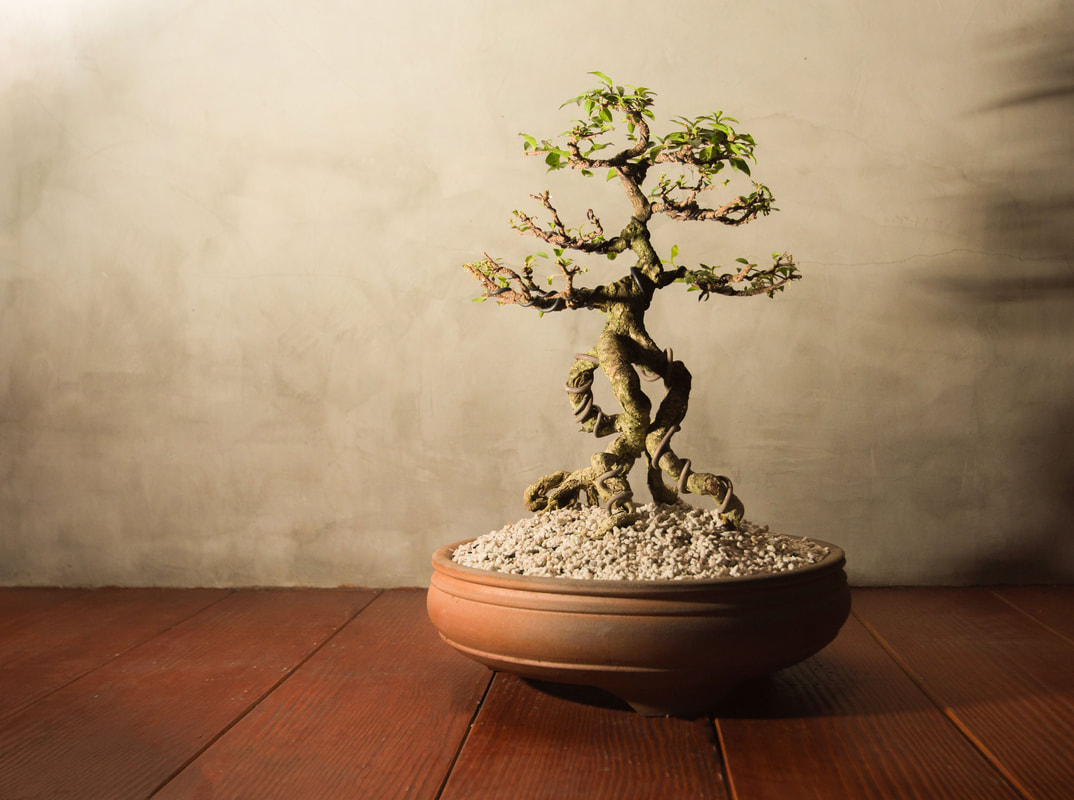 Image by teerapon from AdobeStock. Kaizen Bonsai (a source that I found invaluable as I was researching the topic) recommends repotting according to your tree’s species, and for my tropical ficus, that means repotting the plant in summer when its growth has slowed. You can repot your bonsai ficus every other year or as needed, such as if the tree has rapid growth or has become root-bound. Type of pot for a bonsai ficus Most times, when you see a bonsai tree, it will be in a low flat pot. The art of caring for bonsai trees is an ancient one steeped in tradition that has a very distinctive visual style. The design aspect of bonsai leans on a basic design theory of the rule of thirds. The pot of the bonsai should be 1/3 the height of the tree, just like with vases for floral arrangements. You may need a pot 2/3 the width of the tree to create the right balance, forming a triangular shape for your display. When choosing a pot, remember you will be shaping your bonsai using triangular geometry in your design. 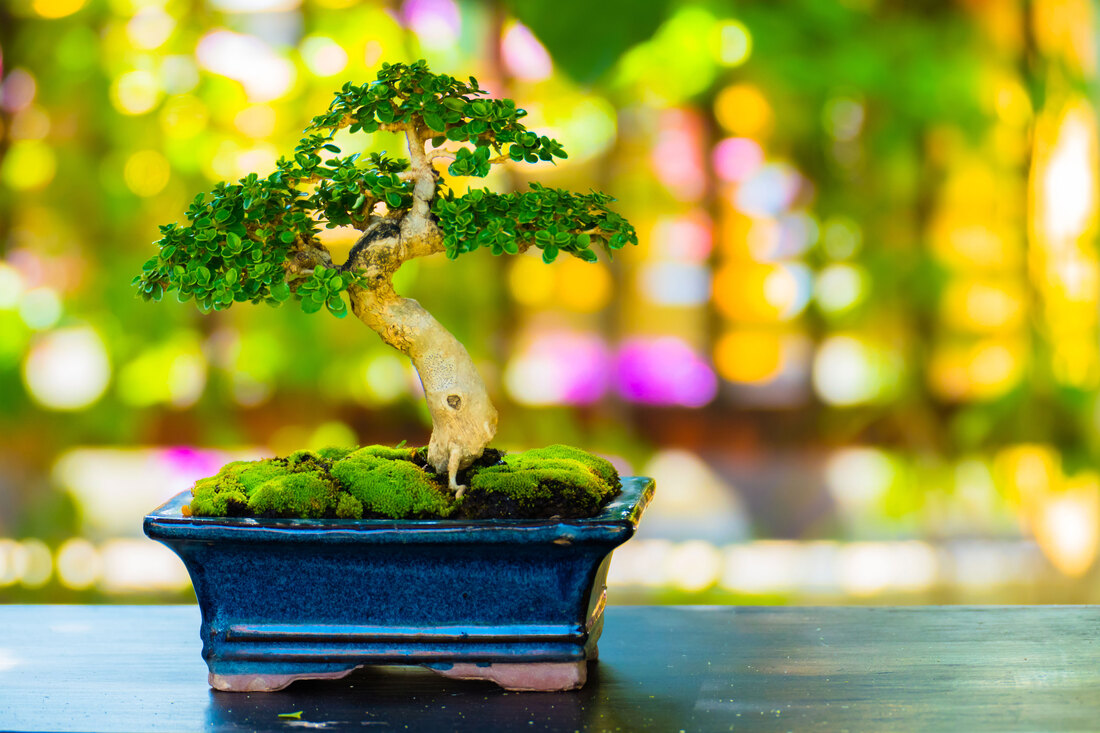 Image by teerawit from AdobeStock. Having said that, Kaizen Bonsai says that you can use any pot that works well with the size and shape of the tree, so don’t get too stuck on the idea of using traditional shallow pots. Just focus on finding a well-balanced container size with good drainage that highlights the tree's beauty and form. I purchased the perfect pot with two drainage holes, mesh, and wire from Amazon. 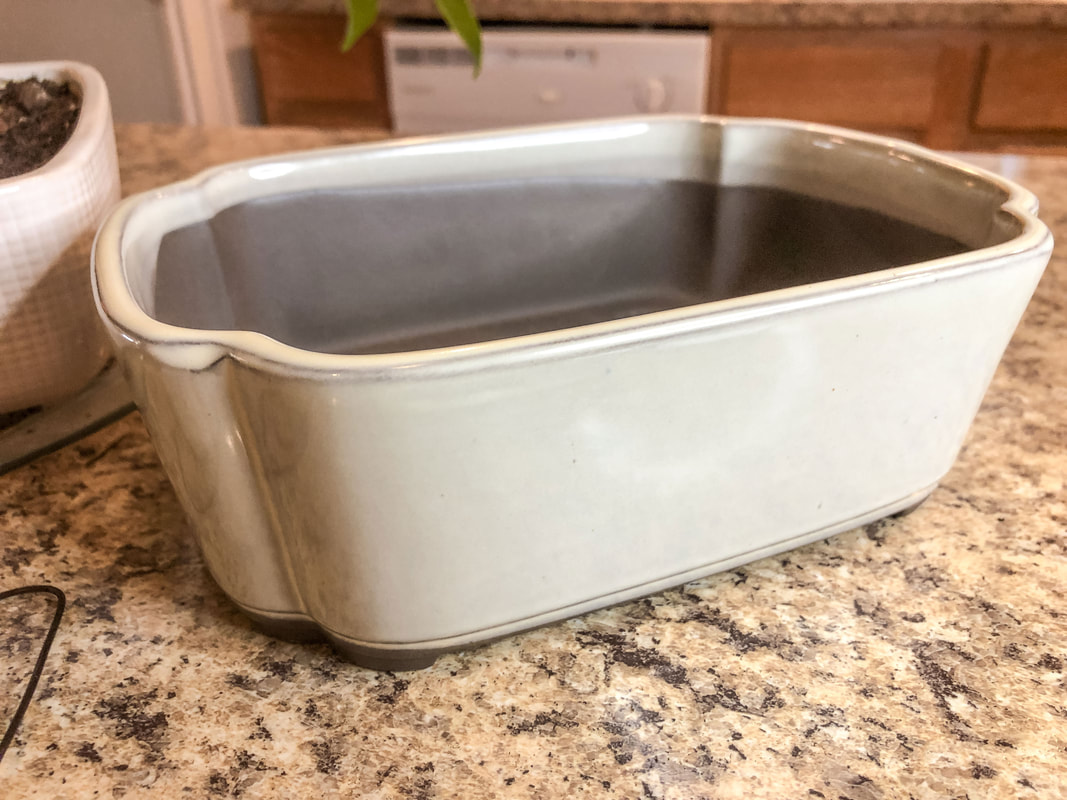 New pot for my bonsai focus. Photo by Diane M. Lilly, 2022. Cover the holes in the pot base with mesh to limit soil loss and allow good drainage. Also, there is usually a type of floral wire that is fed up from the bottom holes of the pot and wrapped around the tree to anchor it so it doesn’t tip over. (During the repotting process, I discovered that my plant was never properly anchored in, making the plant top-heavy and tippy.) 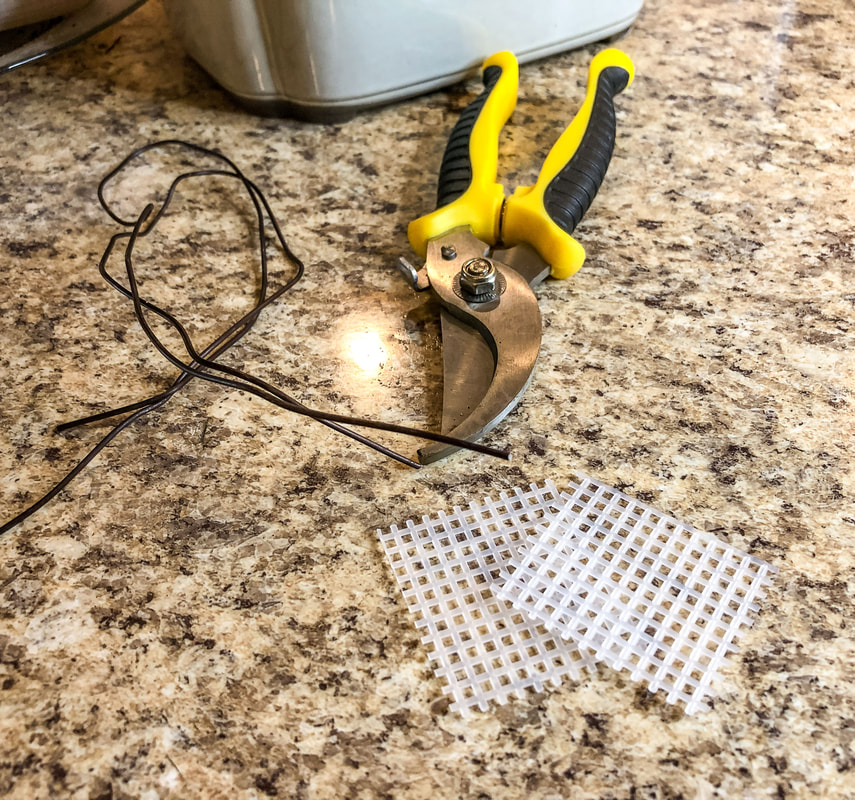 Wire, cutters, and mesh for the repot project. Photo by Diane M. Lilly, 2022. 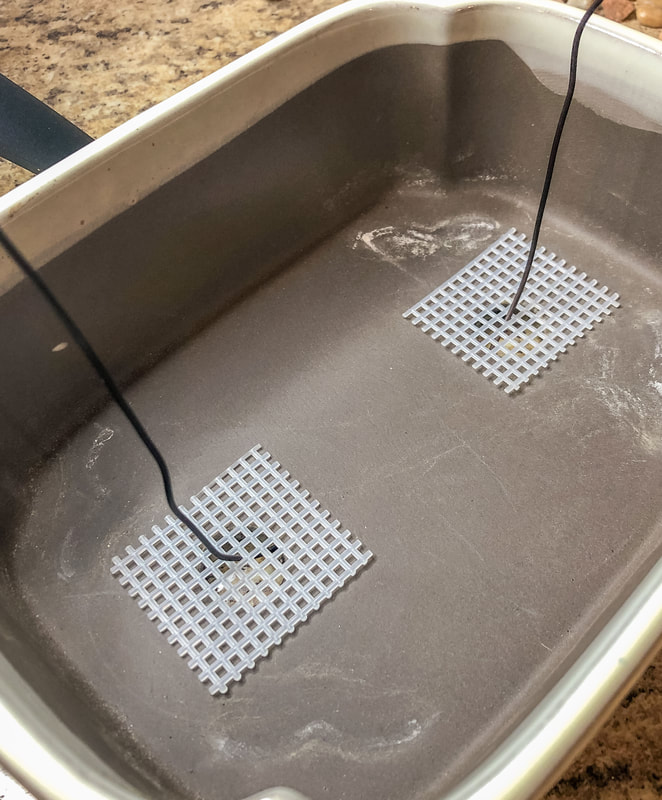 Mesh and wire prepped at the bottom of the new pot. Photo by Diane M. Lilly, 2022. Best soil for a bonsai ficus Now that we’ve addressed the pot for the bonsai, let’s talk about soil. What type of soil will you need for your bonsai ficus? Just like I mentioned before, there are different schools of thought depending on who you ask, but Below are a few suggestions from my research:
I have also been told that cactus soil is good to use in a bonsai soil mixture for its drainage properties. It’s a good idea to tailor the soil mixture to the type of tree and the humidity in the environment. You want an overall well-draining soil. You want your soil to hold just enough moisture for the tree to thrive without sitting in soggy soil. For my mix, I used a mixture of what I had on hand—cactus mix, sphagnum peat, potting mix, and orchid bark. For the fungicide (for the branch I cut off and potted), I used a TBS of apple cider vinegar in 1 cup of water. 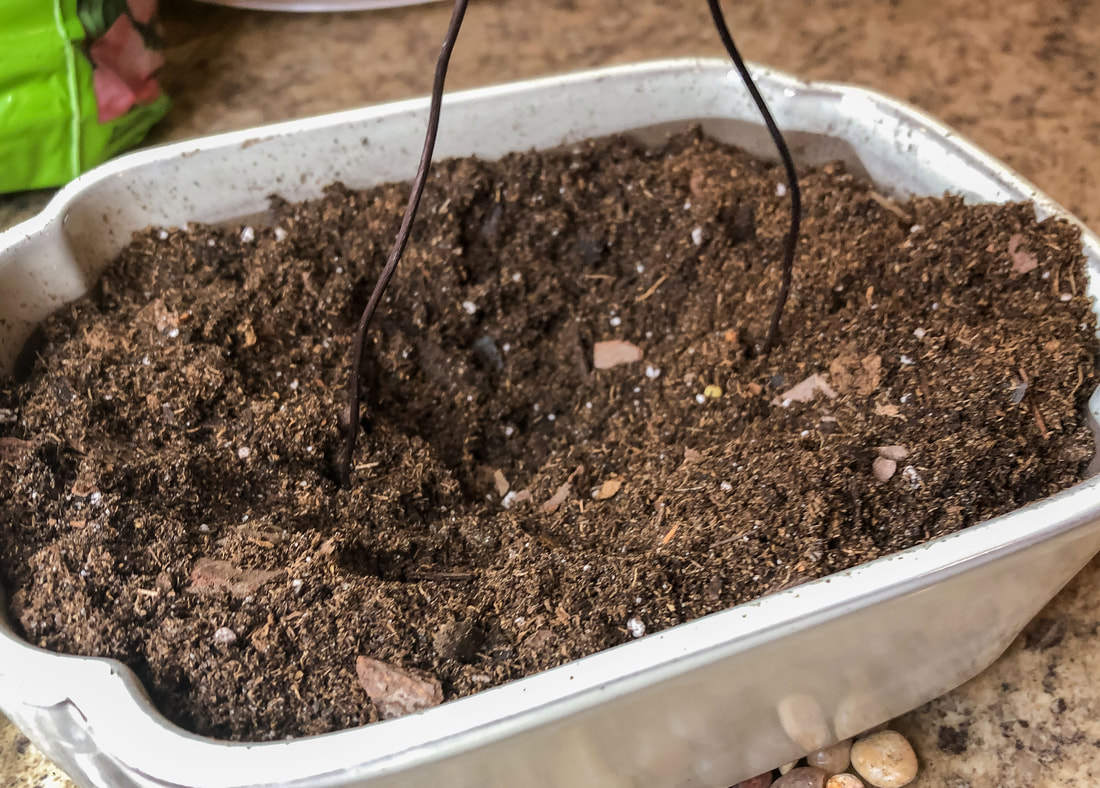 New pot filled partially with soil. Photo by Diane M. Lilly, 2022. Bonsai Empire recommends the following process for planting: wire the tree to the pot bottom to anchor it, create a layer for drainage topped with bonsai soil, and then add more bonsai soil. Carefully work the new soil between the roots to prevent air pockets (don’t tamp down too hard). 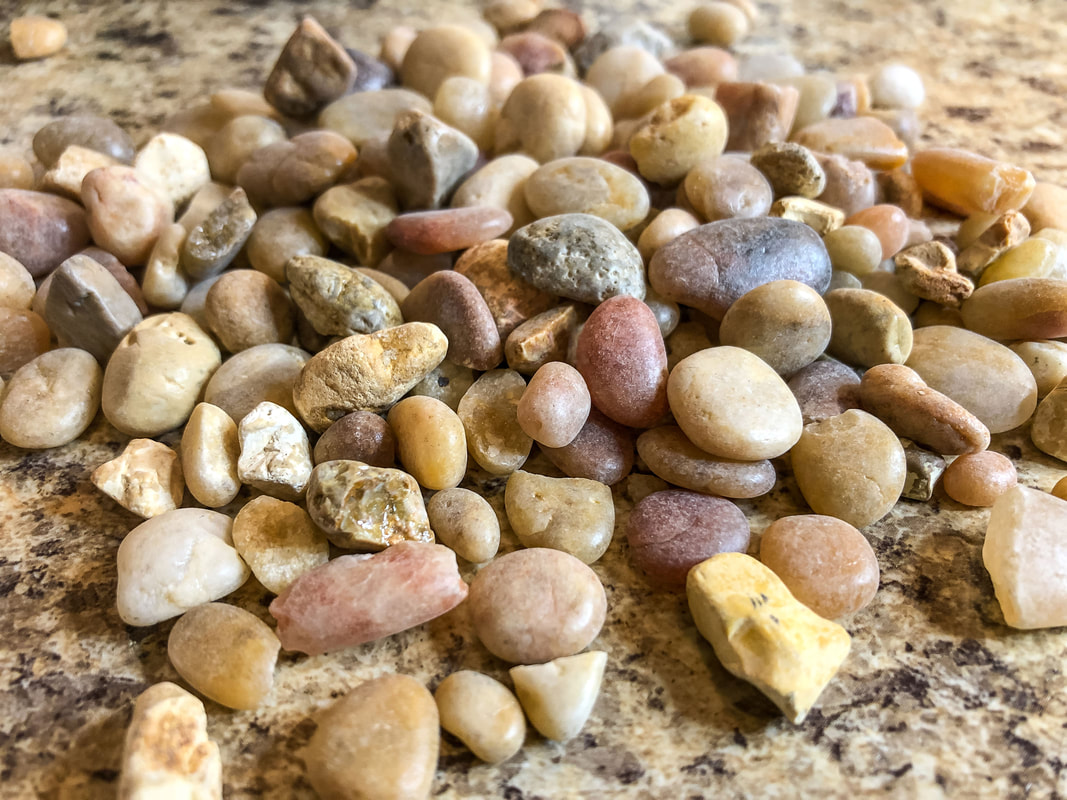 River rocks to be used on wet tray. Photo by Diane M. Lilly, 2022. Another source--Kaisen Bonsai—recommends just using well-balanced soil instead, tailored to the specific tree type, how much growth you want to encourage, how often you plan to water, the depth of the pot, and environmental conditions. You will need to water more often if using well-drained soil and may lose nutrients quickly. On the other hand, you do not want your bonsai sitting in wet soil, which causes root rot. Outdoor conditions (such as wind, humidity, and sunlight) affect how the plant retains water or dries out. Kaisen Bonsai recommends letting the soil dry out before repotting, as repotting with wet soil stresses the tree. The root ball of your bonsai tree will need to be carefully manipulated and unraveled during this process. Carefully unravel the root ball, and rake out the old soil using your fingers or a small rake so you can stretch out the roots for pruning (see the next section for trimming instructions). Once the roots are prepped, add a layer of soil or drainage rocks, feed in the wire that will hold the tree in place, place the tree in the soil, carefully work new soil between the roots, and then add soil to fill the pot. Wire the tree into place (we’ll discuss this later) and water thoroughly. 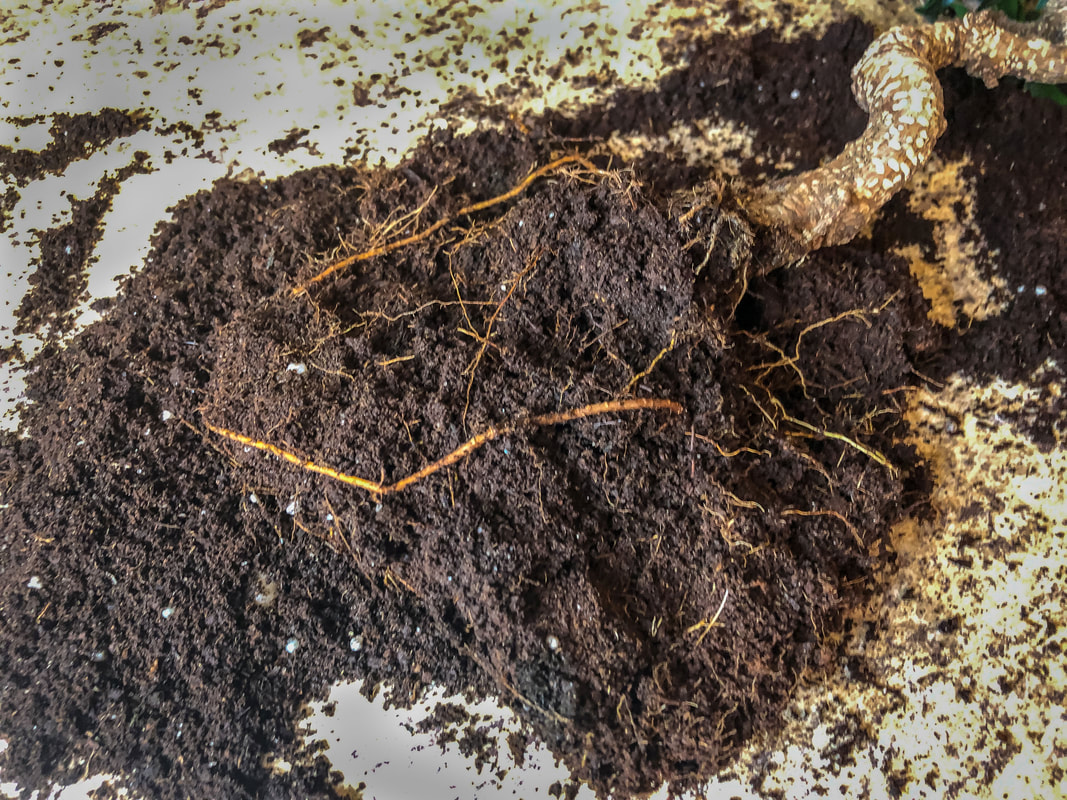 Root ball of the bonsai ficus plant. Photo by Diane M. Lilly, 2022. Trimming the roots of a bonsai ficus After the soil has been raked out and roots have been carefully loosened, it is time to assess how—and if—the roots get trimmed. Kaizen Bonsai recommends trimming the roots according to the tree species and the tree's condition and roots at the time. If in doubt--or if the tree is not doing well--err on the side of caution and leave the roots alone. Why trim the roots, you might ask? Giving the roots a haircut (root pruning) while replanting helps stimulate new growth. This process will help the tree get water and nutrients faster. Don’t get too carried away during this process—only cut up to 1/3 of the roots. 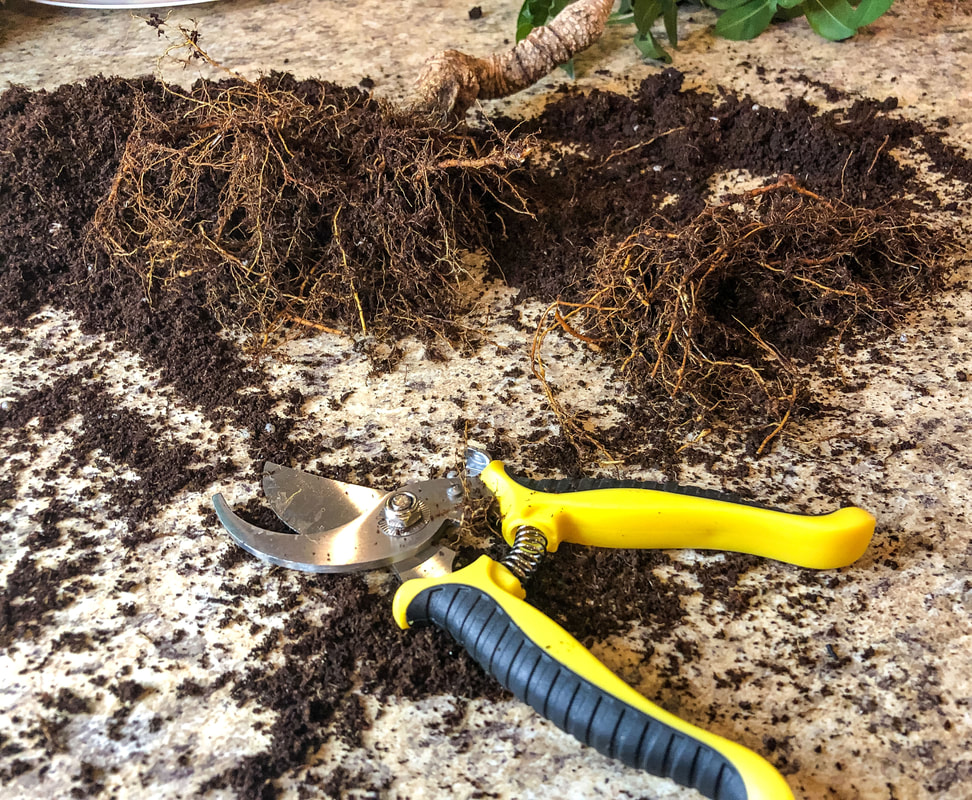 Roots trimmed off the bonsai ficus root ball. Photo by Diane M. Lilly, 2022. How to fertilize a bonsai ficus According to Kaizen Bonsai, only fertilize when the plant shows strong growth. Fertilization will also depend on your specific type of tree. Do not try to fertilize to fix “problems”; if there are plant health issues, try other options, such as adjusting the water schedule, pruning, loosening roots, or repotting. Another source says to fertilize once every two weeks during spring and summer, once a month in winter and fall, and dilute the fertilizer by half. How you fertilize will depend on your tree species and circumstances. I have not given my tree any fertilizer because it just didn’t need it! It had steady growth, with new shoots all the time, so I chose to forego the fertilizer. How to water a bonsai ficus Water the bonsai ficus when the soil feels almost dry. Do not let the soil become dry as a bone, but do not overwater either. Try to strike a nice balance with moist but not soggy soil. Soggy soil will cause catastrophic root rot. Bonsai trees usually sit in shallow pots, so keep an eye on the soil moisture to prevent damage from the soil drying out. When you water, water slowly and deeply, then let alone until almost dry before watering again. A tip I learned that has become invaluable to me for tracking the soil moisture in my plants is to use a water meter. I check all of my plants—plunging the water meter into the soil in several places to monitor the evenness of the soil moisture—before I pour water into the pot. A quick note about misting…The bonsai ficus does not need to be misted but could benefit from an occasional mist in dry environments. As this is a tropical plant, it does like some humidity, so an occasional mist and a wet tray can provide that little extra bit of moisture in the air. 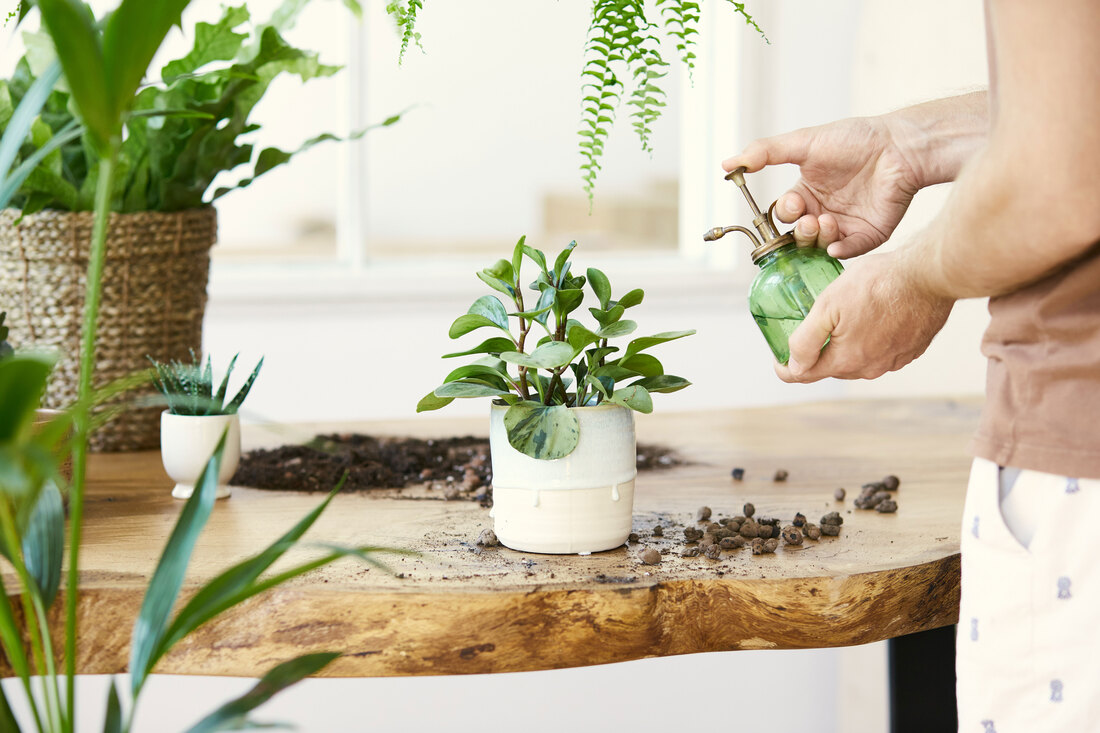 Image by FollowtheFlow from AdobeStock. Lighting needs for a bonsai ficus The bonsai ficus likes to be in full sun, but this tree can tolerate indirect light, as long as it gets a little bit of direct light on its leaves. The southern sun is perfect for this plant, but less direct light from the east or west will work. My plants sit in a southeast window of my house, and they all seem to love it! They get plenty of direct light until mid-afternoon, and they are happy. Do not leave this plant in the dark! It won’t tolerate dark corners or cold drafts (think tropical). 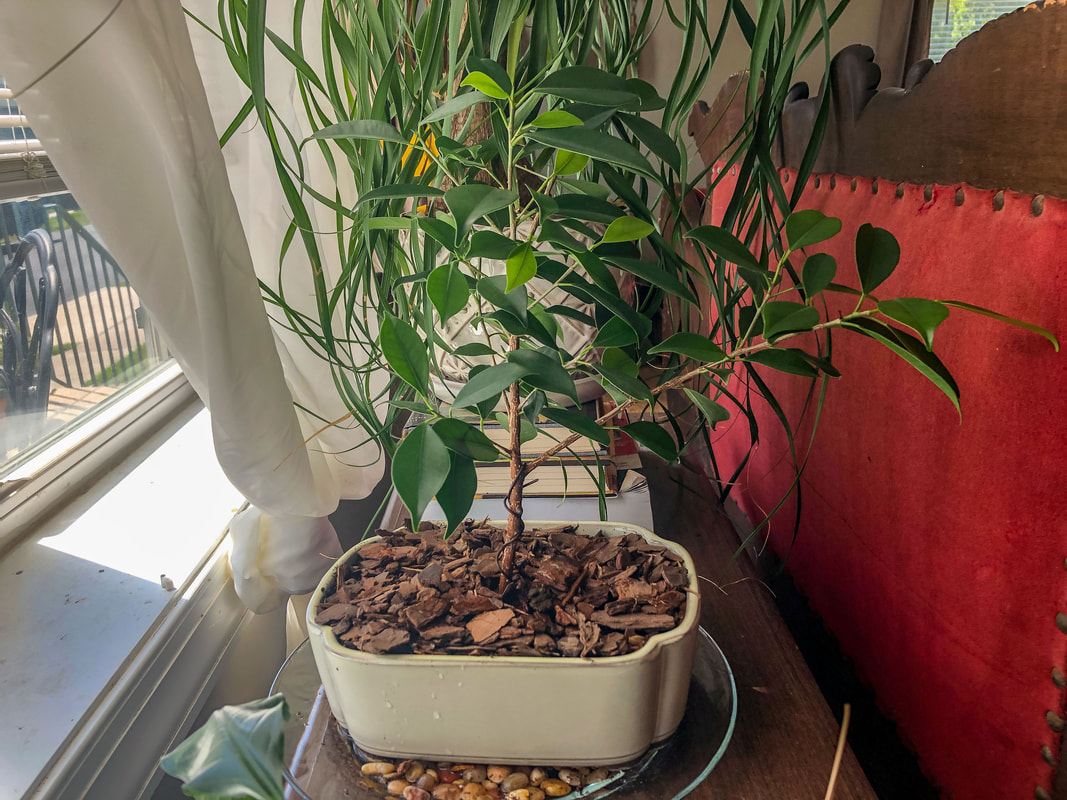 Newly planted bonsai ficus cutting in the front window. Photo by Diane M. Lilly, 2022. How to prune a bonsai ficus There are whole books and videos on this topic, and there’s no way I can do it justice in this short blog, but here are just a few tips to get you started… Manage the shape and size of the tree by trimming back new growth leaves to only a couple. For example, you can cut branches back to the first two or three leaves, promoting a bushier, less straggly growth. Pruning helps with apical dominance, or the tendency for the new growth to dominate, leaving older growth to wither and die. In simpler words, pruning helps control new growth to improve the tree’s overall look and health. Pruning is most effective in spring but can be done whenever the tree gets out of hand with growth. And don’t worry about the milky sap (latex) that will ooze out of the cuts. They are the tree’s way of creating a protective sealant to help heal the cut. 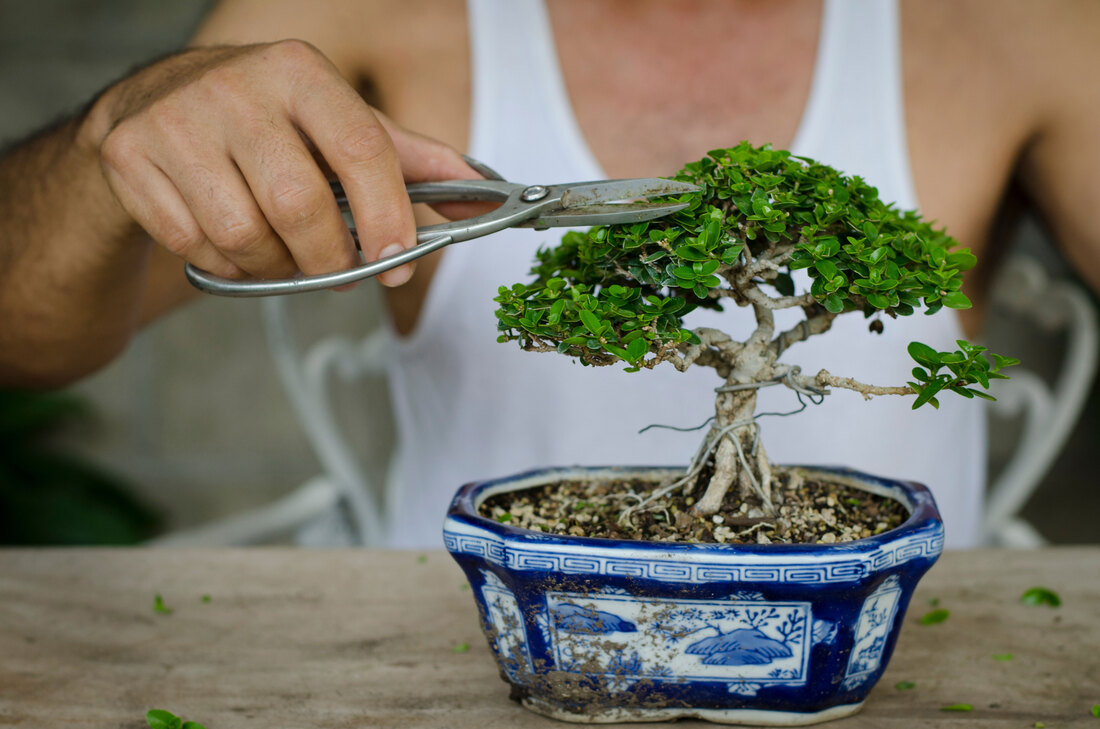 Image by Irene Marti from AdobeStock. How to propagate a bonsai cutting My bonsai tree developed a large branch off to one side of the tree, leading to leaning and tipping over from the weight. This was my fault for ignoring the pruning! The repotting process gave me the perfect excuse for pruning that branch, but I couldn’t bear to throw it away. The branch was the ideal size to propagate as a new tree! 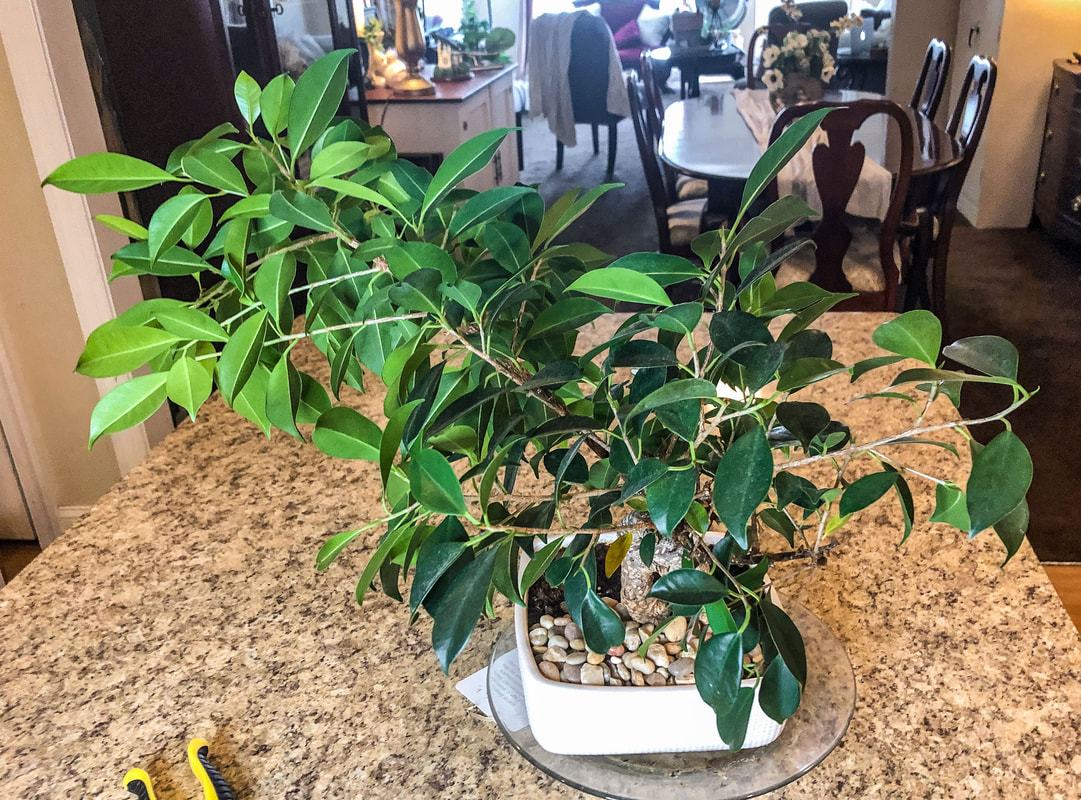 "Before" shot of large unruly branch on my bonsai ficus tree. Photo by Diane M. Lilly, 2022. So, how do you propagate a cutting from a bonsai tree? The bonsai is a tree, so it’s pretty resilient when chopping off bits here and there. The tricky bit is getting the cut piece to grow roots. To prune a branch for propagation, cut at a 45-degree angle like you would for fresh-cut flowers. This helps the cutting have more surface to soak up much-needed water. 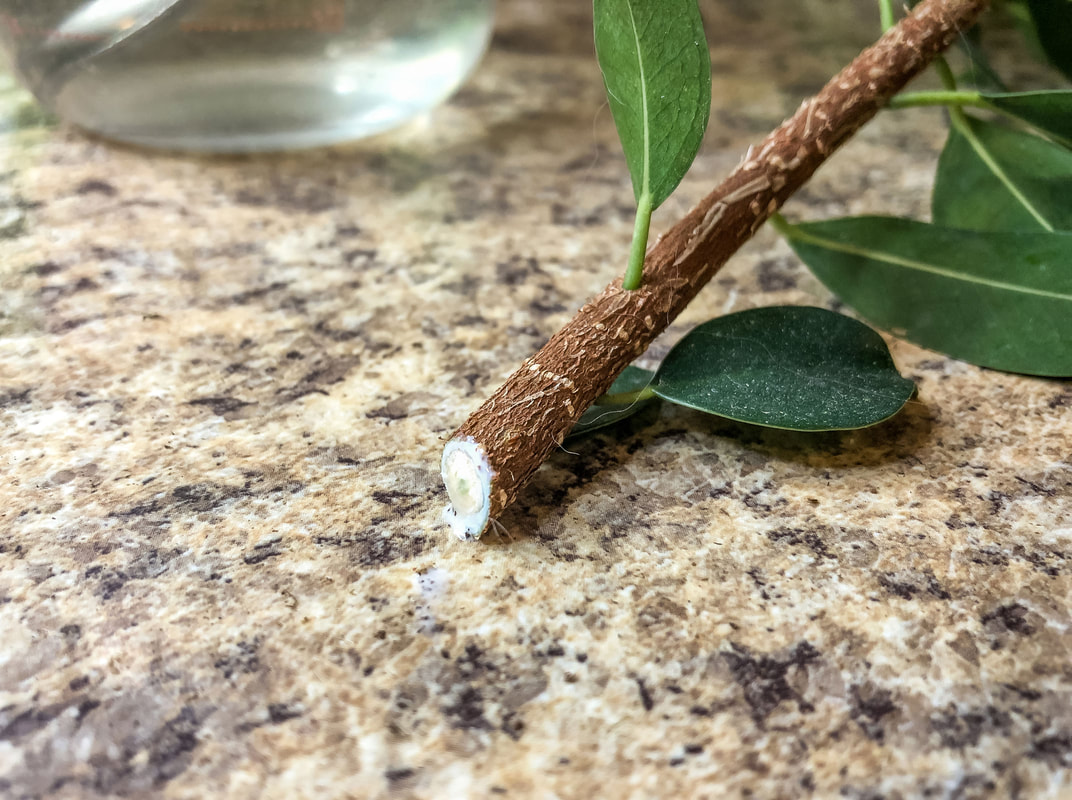 The large branch cut off the bonsai ficus tree at a 45 degree angle. Photo by Diane M. Lilly, 2022. There are two ways to get the piece to root—place it in a vase with water for a few weeks or plant it directly into another pot with soil. (I tried both techniques since I had a few extra pieces I didn’t want to throw away.) 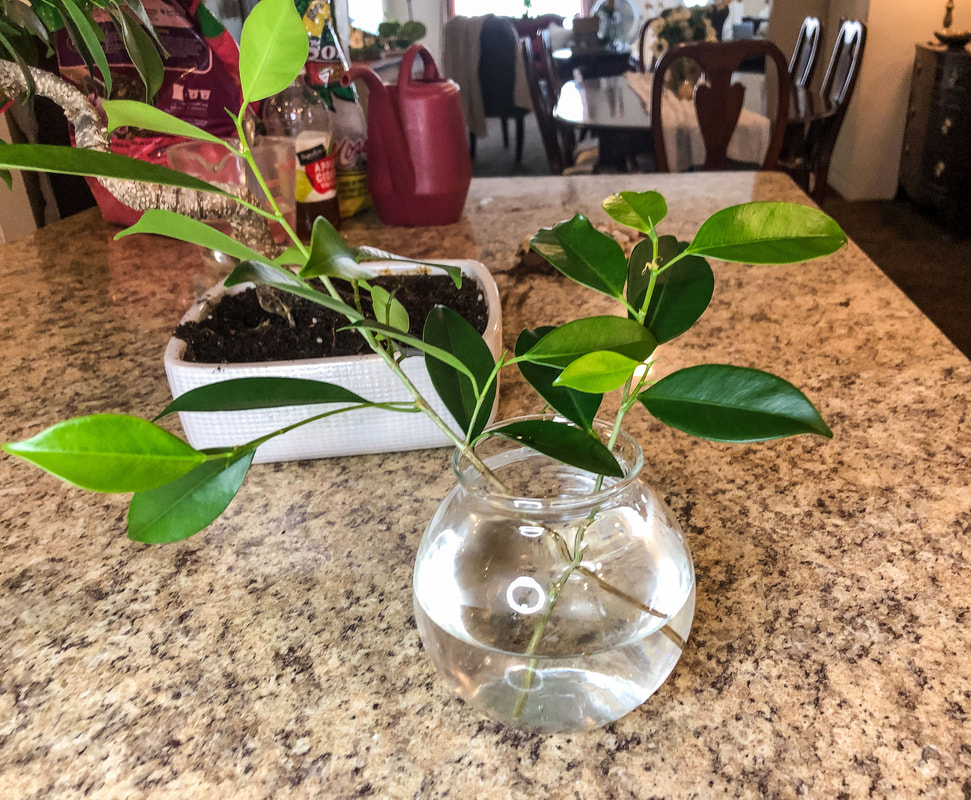 Two tiny branches from the bonsai ficus tree placed in water to root. Photo by Diane M. Lilly, 2022. According to Plantophiles, to propagate using the soil method, place the cutting in a pot with good soil for bonsai trees, using the same step-by-step method as when repotting a bonsai tree. The cut branch should start rooting within a couple of weeks. Keep the cutting watered, and carefully monitor the soil so it’s not soggy but has enough water for the new tree to grow. Place the newly potted branch in a spot with plenty of bright indirect light, like a south-facing window. (Just like with a newly repotted bonsai tree, avoid stressing the plant by putting it in direct sunlight.) 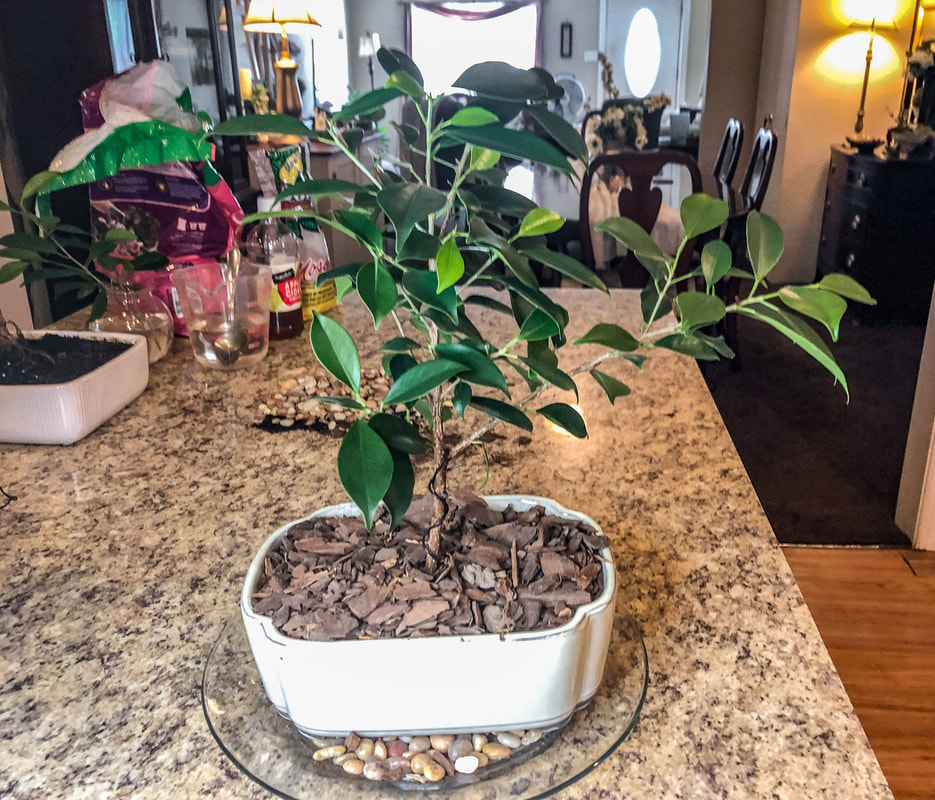 Newly potted cutting from the bonsai ficus plant. Photo by Diane M. Lilly, 2022. How to wire your bonsai ficus The trick to getting those fantastic shapes in professional bonsai trees is to use wires to help the malleable branches grow in the desired direction. Wires can be used to help manage shape, but use the thinnest wire possible (wire for bonsai comes in a range of thickness) depending on the thickness of the branches. Thin branches are more flexible and easy to train, requiring thinner wire, while thicker (less flexible) branches will need heavier wire and possibly a guy wire. Cut and remove the wire when the branch has grown in the desired direction and can hold its own (about six weeks). A few “don’ts” for wiring are: don’t wire up a bonsai just after the shock of repotting, don’t wire branches too tight, and don’t let the wire cut into the tree. The first thing to do when repotting is to wire and anchor the tree trunk. Wiring the plant from the base will help stabilize the bonsai tree, create balance for the desired shapes, and keep the tree from tipping. (My tree was never wired into the pot and is now toppling over!) The wire gets fed up through holes in the bottom of the pot, wound securely around the large roots (and tree base), and then secured to keep the tree stable. Try not to wrap too tightly and dig into the tree. 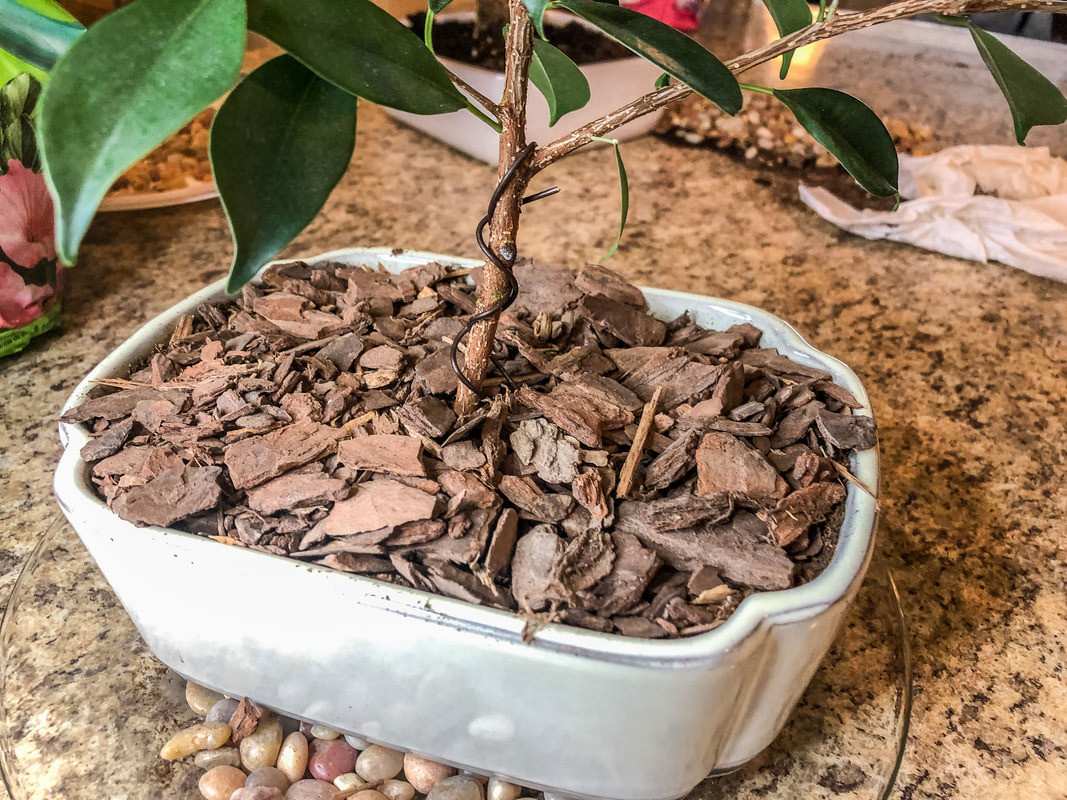 Bonsai ficus cutting wired into place in its new pot. Photo by Diane M. Lilly, 2022. 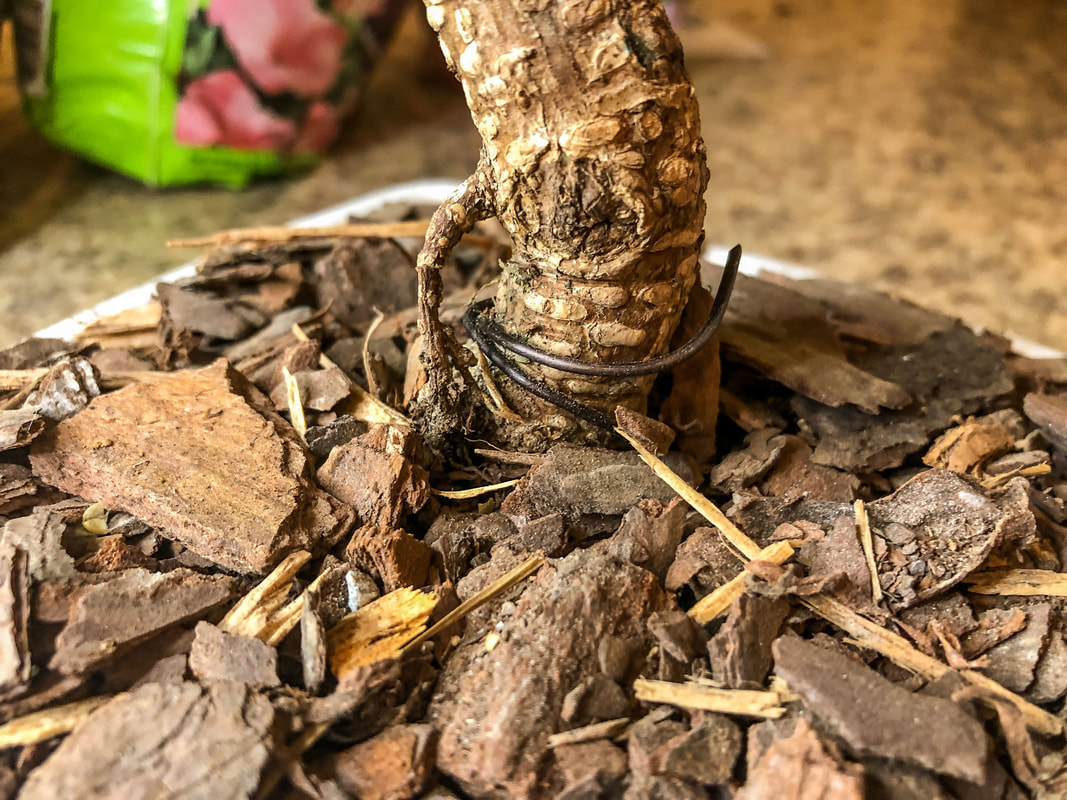 Main trunk of the newly potted bonsai ficus wired into its pot. Photo by Diane M. Lilly, 2022. So, in trying to help my bonsai plant, I learned a lot! Bonsai plants are trees and behave more like trees, just in miniature. There is no one-size-fits-all standard for repotting your bonsai, so it is essential to understand your tree type and specific needs. In the past, I have been afraid to touch this plant for fear of ruining it, but I am learning that it is more resilient than I previously thought. I’m sure this is just the beginning of an educational journey, especially since I have gone from one bonsai to two bonsai trees via propagation. (And I almost forgot two small cuttings sitting in the water trying to root!) This is a lot of information to digest, and I’ve only just scratched the surface, but I think this is the beginning of a beautiful friendship with my bonsai ficus trees! Stay tuned for updates! Please feel free to drop a line in the comments with any tips!  Newly potted bonsai ficus. Photo by Diane M. Lilly, 2022. Related blogs you may want to read: How to repot a pothos plant How to propagate bromeliad pups Small houseplants that love bathroom humidity Eight health benefits of decorating with plants How to harvest and use fresh mint from the garden Tips for harvesting chamomile for homemade tea Growing tomatoes and cucumbers How to care for 11 common herb seedlings Tips for planting seeds indoors Sources: https://www.bonsaiempire.com/basics/bonsai-care/repotting https://www.allthingsbonsai.co.uk/bonsai-tree-species-care-guides/ficus-indoor-bonsai-tree-care/ https://www.allthingsbonsai.co.uk/bonsai-tree-care/a-discussion-on-bonsai-soil/ https://www.bonsaioutlet.com/ficus-bonsai-care/ https://www.kaizenbonsai.com/bonsai-tree-care-information/graham-s-guide-to-repotting-bonsai https://shinnong.org/how-to-care-for-your-ficus-bonsai/ https://plantophiles.com/plant-care/how-to-grow-bonsai-from-cutting/ Affiliate Disclosure Some of the posts in this article contain affiliate links. This means if you click on the link and purchase the item, I will receive an affiliate commission at no extra cost to you. I will only recommend products or services I use personally and/or believe will add value to my readers, so there is no conflict of interest.
0 Comments
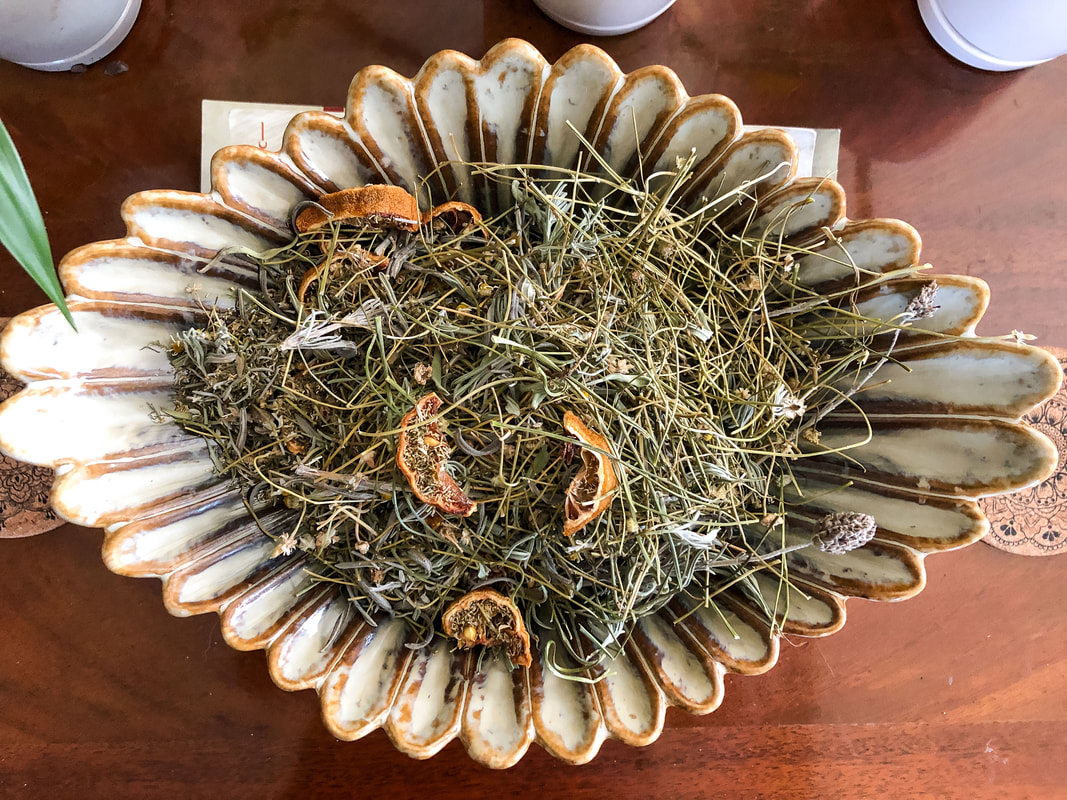 Homamde lavender, chamomile, and lemon potpourri. Photo by Diane M. Lilly, 2022. Nothing speaks to being calm and relaxed like the aromatic floral scent of lavender. Retail stores are filled with essential oils, incense, candles, and potpourri with the lavender scent.  Image by googlerankfaster from Pixabay. As an amateur gardener who has been growing a few select herbs for several years now, lavender has been one of those plants I’ve been chomping at the bit to get my hands on, and this year was finally the year I succeeded! I have my dad to thank for that…He gifted me a couple of plants for my deck, one of them being a small lavender plant that had yet to develop blooms. There was no label with identification of the specific plant type and care instructions, so I had to guess the exact type of lavender, but--now that small blooms are appearing--I’m pretty sure the plant is of the French or Spanish variety.  Lavender bloom from my potted plant. Photo by Diane M. Lilly, 2022. I’ll never understand why these garden stores don’t label the plants to let you know what plant you are buying! That information is crucial so you know how to care for your new plant, right? And here’s why it’s important: When it comes to growing lavender, there are many varieties from which to choose. I was astonished at just how many varieties of this purple beauty exist! Some lavender varieties thrive in drier climates, and some can tolerate colder temperatures over the winter months. So, it is critical to understand exactly which variety you are growing so you can enjoy your lavender and get the most use from it.  Image by Sabrina Wisian from Pixabay.  Image by gianniarmano from Adobe Stock. In addition to the French lavender plant my dad bought me, I have also decided to experiment and grow some Munstead English lavender from seed. The tiny plant is growing very slowly, but it is growing! It’s still tiny-- and probably won’t be of much use to me this year--but this plant (along with the other lavender plant) is sitting on my front porch just soaking up all of that warm southern sun, which lavender loves.  Munstead English lavender seedling in a pot on my porch. Photo by Diane M. Lilly, 2022. There are a couple of concerns with the climate in my area and whether or not it will be suitable for allowing these plants to thrive. The first concern is the high humidity in the summer months, and the second is the cold temperatures in the winter. I’ve decided to keep both lavender plants in pots so that they can either be moved to different spots or be brought indoors where I can better monitor their needs. Lavender does not require a lot of water, as it thrives in drier Mediterranean climates, so be careful not to overwater! That’s an issue for my lavender plants right now. The summer weather in my area has become humid and rainy, so I now have to decide to relocate my pots to a better-suited area or bring them inside. How to harvest and store At any rate, I am super excited to see how these two distinctly different lavender plants grow, and I’m on a mission to learn how to use clippings for scenting my home with potpourris and oils. My goal: learn as much as possible about growing, harvesting, storing, and ultimately using these aromatic herbs. I’ve been spending a lot of time researching, and below are a few tips I’ve uncovered…  Image by ExQuisine from Adobe Stock. Harvest below the flower, where the stem meets at the junction of another stem. Harvest lavender in early spring or summer or early in the bloom when the buds are just opening so you can get another crop later. The more you harvest or deadhead (remove old flower blossoms), the more new growth is encouraged. If you leave the flowers too long, they may lose their potency and therapeutic benefits, so keep that in mind when harvesting for these purposes. Always harvest in the morning to minimize the stress on the plant and preserve any oils in the blooms. You can prune up to a third of the plant to promote future growth (especially in the fall). If you prune heavily in early spring, you’ll get a lot of new growth during the spring and summer. You can prune in the fall to shape the plant for the next season. Prune only the top 1/3 of the plant, right above the woody growth, and only when the plant becomes too woody. Seeds from the lavender plant can be gathered by hanging stalks upside down with a bag underneath. Store clippings in a dry place and let hang dry for at least a week. Make the bundles small to reduce the chances of mold developing from trapped moisture. My quick and easy lavender chamomile citrus potpourri Now that I have my long-coveted lavender plants, I’ve been itching to create a potpourri mix using lavender clippings, so I looked around the internet for ideas. Many of the summer recipes I found included lavender, rosemary, chamomile, and some citrus scent, and they all sound so lovely! Many of these recipes also include essential oils, and I just so happen to have recently bought a box with several different scents that I would like to use in my home. So today, I decided to take this opportunity to create a dry potpourri using my homegrown chamomile and lavender, some slices of lemon, lemongrass essential oil, and lavender essential oil. This DIY project's goal was to create a quick potpourri that I could put out on a table to scent my living room for a few days, maybe a week. So here’s the recipe I tried… Lavender & chamomile potpourri fresh lavender clippings fresh chamomile clippings 2 small lemons, sliced thinly 3 or 4 drops lemon grass essential oil 3 or 4 drops lavender essential oil a decorative bowl The first things you’ll need are the lavender and chamomile stems. I went out to my yard and clipped chamomile flowers with stalks, choosing the ones where the flowers were open but not drooping. Next, I headed to my lavender plant and cut several stems with the blooms. You don’t necessarily need the lavender flower because the leaves are very fragrant, but I wanted to add some visual interest to my potpourri mix, so I cut the blooms as well. And it’s worth noting that French or Spanish lavender is perfect for use in potpourri.  Chamomile growing in my garden. Photo by Diane M. Lilly, 2022.  Lavender clippings from my plant, keeping fresh in a glass vase of water. Photo by Diane M. Lilly, 2022. The next step is to cut a couple of small lemons into thin slices. It is essential to keep the slices thin so they don’t take as long to dry out. To dry out my fresh lavender, chamomile, and lemon slices, I spread everything out on a baking pan and place it in the oven at 200˚ F for at least a couple of hours or until all the moisture is gone from the flowers and lemon slices.  Lemon slices and lavender clippings on a tray, waiting to be put in the oven for drying. Photo by Diane M. Lilly, 2022.  Dried chamomile, lavender, and lemon slices on a tray. Photo by Diane M. Lilly, 2022. At this point, you can decide what essential oils you want to use to enhance the fragrance. The reason I used essential oil is that--while the lavender, chamomile, and lemon are fragrant--the mixture isn’t potent enough to scent the room on its own. Essential oils infuse the dried flowers with a strong scent that lasts longer. For my mixture, I wanted to use essential oils that enhanced the citrus and lavender aroma, so I chose to use a few drops each of lemongrass and lavender…and it smelled AMAZING!  Newly purchased box of essential oils. Photo by Diane M. Lilly, 2022.  White ceramic vase filled with potpourri herbs and lemon slices. Photo by Diane M. Lilly, 2022. The only step left is to find a decorative bowl to put the potpourri in and a nice spot in your home where you would like to smell your new potpourri. I didn’t have a nice bowl, so I went to my nearest Hobby Lobby and bought this beautiful green ceramic bowl that perfectly fits my decor! It ended up being just perfect for my potpourri mix.  My freshly dried herbs and lemon in a newly purchased decorative bowl. Photo by Diane M. Lilly, 2022. Just a word of caution…If you have cats like I do (and this probably also goes for dogs), be aware that some essential oils and herbs can be toxic and even fatal if ingested. My cats don’t bother my plants or potpourri, but I am careful because lavender and chamomile are toxic to cats, and essential oils are toxic to pets. So please use these things with caution! So, I hope you found this article interesting and maybe learned something from it as I did, and I’d love to hear from you in the comments about your tips for growing lavender or potpourri recipes you love. And if you enjoyed this article or my blog, please share so we can expand and grow this community! Related blogs you may want to read: Tips for harvesting chamomile for homemade tea Learning how to harvest and use fresh mint from the garden How to care for 11 common herb seedlings Tips for planting seeds indoors Six herbs I planted indoors It’s planting season again Growing tomatoes and cucumbers for my garden How to repot a pothos plant How to propagate bromeliad pups Small houseplants that love bathroom humidity Sources: https://www.gardenloversclub.com/edible/herbs/lavender/types-of-lavender/ https://www.proflowers.com/blog/types-of-lavender https://www.gardeningchores.com/types-of-lavender/ https://homesteadandchill.com/how-to-harvest-dry-lavender/ https://preparednessmama.com/lavender-harvest/ https://bytherfarm.com/homemade-potpourri/ https://afternoonteareads.com/make-homemade-potpourri/ https://nwmaids.com/how-to-make-potpourri-2-methods-1-aromatic-result/ Affiliate Disclosure Some of the posts in this article contain affiliate links. This means if you click on the link and purchase the item, I will receive an affiliate commission at no extra cost to you. I will only recommend products or services I use personally and/or believe will add value to my readers, so there is no conflict of interest. 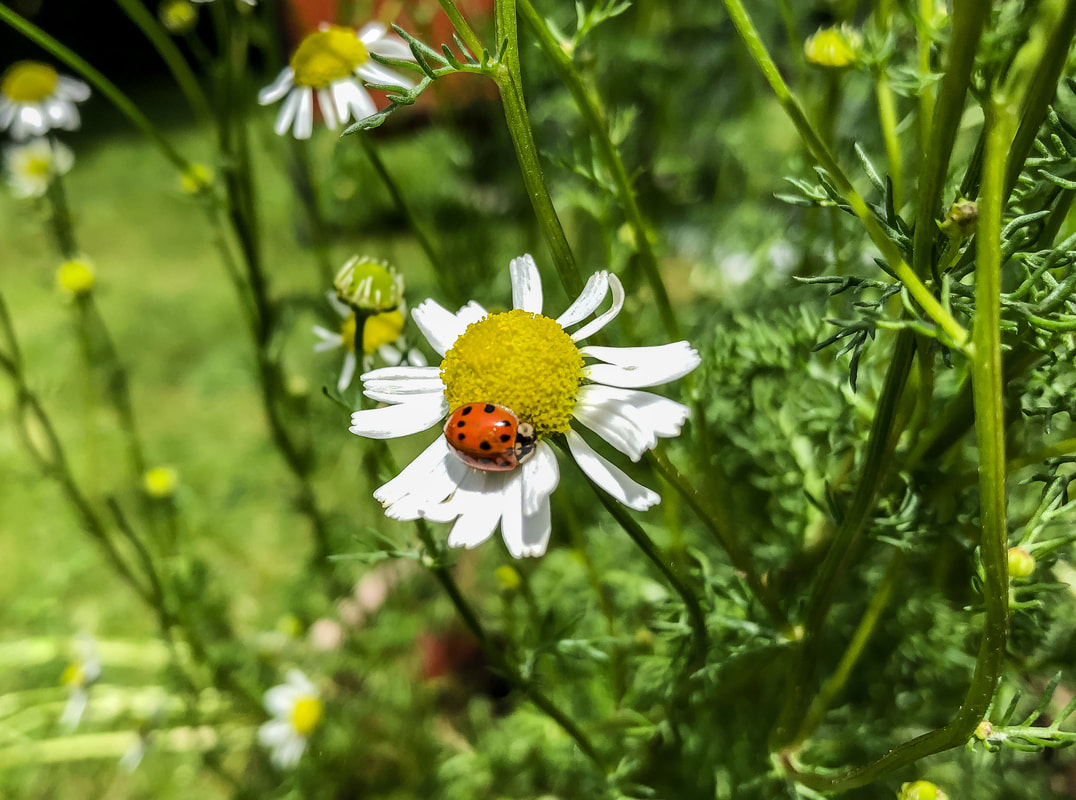 My chamomile has a ladybug visitor. Photo by Diane M. Lilly, 2022. I’ll let you in on a little secret—chamomile is my favorite herb! I have to tell you, I have developed quite an infatuation with this gorgeous little flower. Two years ago, I planted chamomile in pots that eventually ended up on my back patio. Chamomile is part of the daisy family, as evidenced by the slender white petals stretching out from knobby yellow buds…And this herb is so deliciously fragrant! Typically, chamomile is an annual—meaning it only blooms once and then dies—but this flowery herb is a prolific self-seeder, so it comes back for me every year just like a perennial. There are two main types of chamomile—German chamomile, which grows tall with tiny flowers, and the Roman variety, which grows shorter with slightly larger blooms. Either variety of chamomile will bloom through the entire warm season, which in these parts is from mid-spring to early fall. 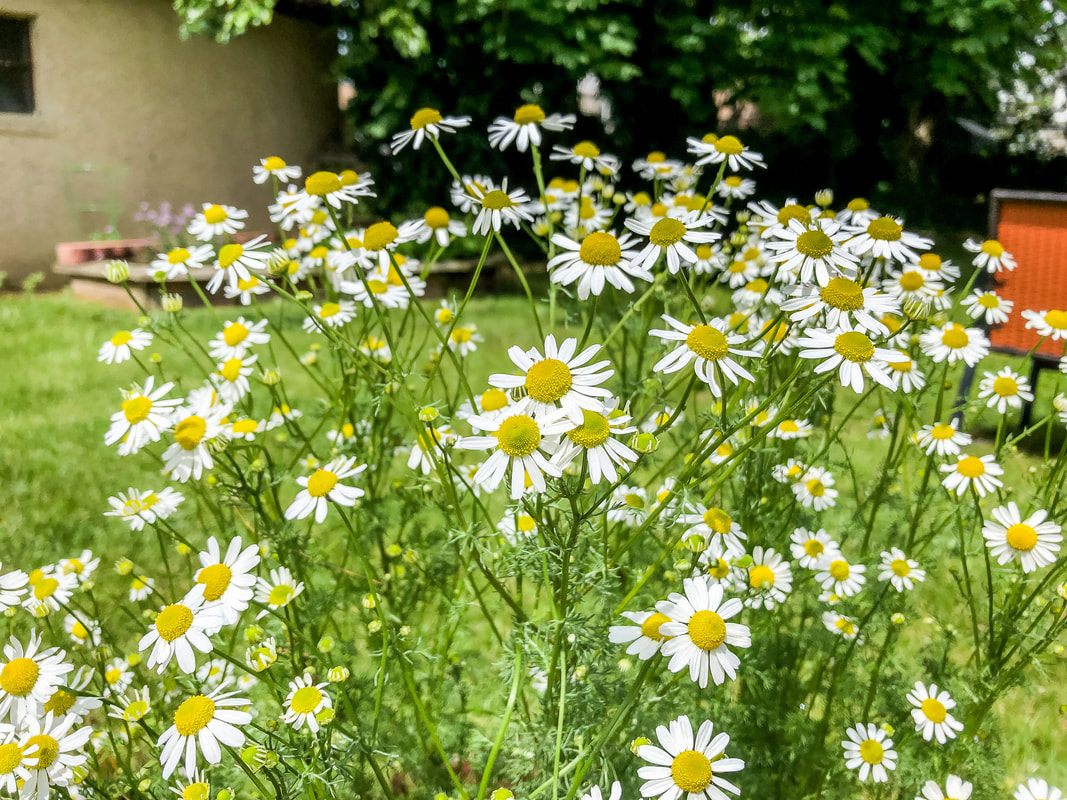 Chamomile growing in my garden. Photo by Diane M. Lilly, 2022. So, my big idea was that I wanted to drink homemade tea with my fresh chamomile. (That’s been a mixed bag…but I’ll get to that later.) As I do more research into this aromatic herb, I am discovering more and more possibilities for uses in my home, from using it in recipes to essential oils and so much more. This journey of exploration should be educational! But first, a few tips on how to harvest and store chamomile, and at the end, I’ll discuss my attempts at making that homemade herbal tea… How and when to harvest chamomile… Generally speaking, I harvest throughout the summer, picking the blooms as needed. You do not harvest all the flowers at once, but instead harvest frequently by snipping off only the flower bud itself and only the flowers whose petals are fully open and not drooping. Harvest the chamomile in the morning for the best flavor and to lessen the stress on the plant. 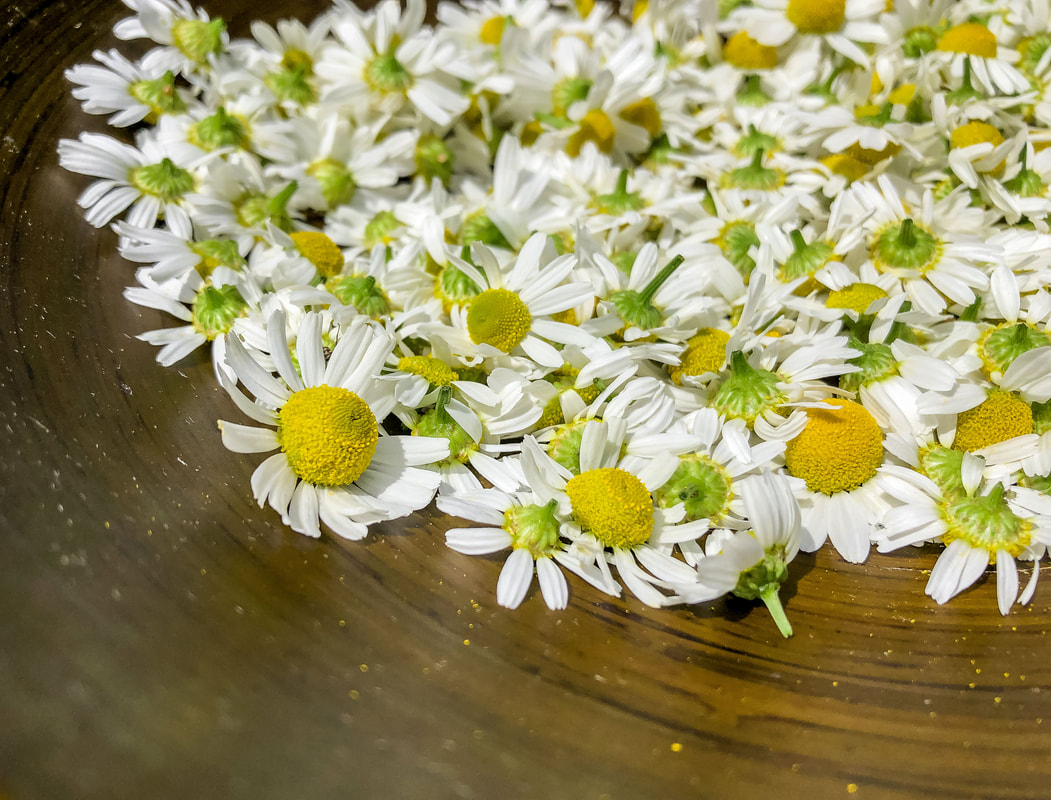 Freshly picked chamomile flowers. Photo by Diane M. Lilly, 2022. How to prep and store chamomile… Chamomile can be used fresh, but, in my experience, the flavor seems better when it is left to dry out first. Dried chamomile can become the seeds for next year’s crop (in case your plant does not self-seed) or can be used in amazing recipes. There are a couple of ways you can dry out the flowers. One way is to spread the flowers on a baking sheet and put them in the oven at a very low temperature (no more than 250˚) for a few minutes. Another way is to lay the buds on a tray and leave them in a dark, dry place for one to two weeks. Some people splurge and buy a dehydrator—which can be purchased for as little as $70—to speed up the drying process. After the chamomile is thoroughly dried out, it is ready to be stored in a glass container. Ensure there is no moisture before sealing in a container--otherwise, mold can develop, and we don’t want that! How to make homemade chamomile tea… According to my research, there are many benefits to drinking chamomile tea. The best option is always to use your homegrown process-free chamomile. Chamomile tea is said to be a calming beverage that can help you get to sleep. I have personally found that this tea relieves the menopausal bloating I’ve been experiencing lately. And it is said that drinking chamomile tea regularly significantly reduces anxiety. I am no doctor (do your own research and draw your own conclusions), but it sounds like this little daisy-like flower is more than just a pretty face! Oh, and did I mention that the same recipe you used for tea can be used as a hair rinse and lightener? The process of making chamomile tea is quite simple…You will need 2-3 tsp dried chamomile to one cup of boiling water for your tea. (If using fresh chamomile, you’ll need 6-8 tsp to one cup boiling water.) Steep the flowers for 3-5 minutes (you can steep for longer if you want a more potent brew), then pour the tea through a strainer to eliminate the heavy particles. So, for my first few attempts at making this herbal tea, I rinsed the flowers off, then spread them out to dry for slightly less than an hour before steeping them in boiling water. I used a coffee filter with a small sieve to separate the heavy particles, which worked well. One of the things I did notice—which I was not thrilled with—was that the tea seemed bitter. On subsequent attempts, I made sure to leave out any stems and leaves and lessened the time the brew steeped (from around ten minutes to more like 5 minutes), which seemed to help reduce the bitterness. 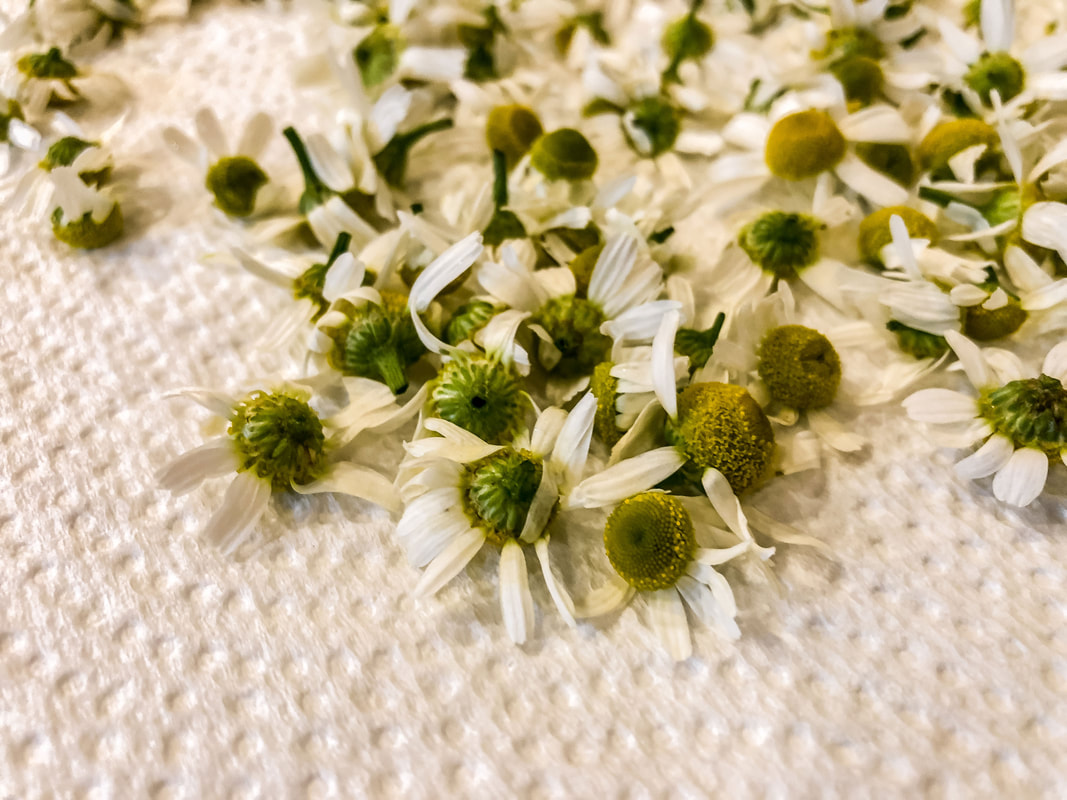 Chamomile flowers drying on a paper towel. Photo by Diane M. Lilly, 2022.  Chamomile seeping in hot water. Photo by Diane M. Lilly, 2022. Through my most recent attempts at making homemade chamomile tea, I have discovered that dried chamomile works much better in terms of taste. This time, the flowers were dried in the oven on low heat (which also helped kill tiny bugs) and left to sit out covered with a paper towel for a day before use. Once the flowers were dried, they were steeped for almost 5 minutes in hot water and then strained. I added a few spritzes of fresh lemon and store-bought honey for additional flavor. I’d say the third time was the charm! The tea tasted just right! The next time I make this homemade tea, I may let it steep for two extra minutes because I want just a smidgen more of the chamomile flavor. But, I must say, this last time, I got much closer to achieving a terrific-tasting homemade chamomile tea! Once I get my recipe down pat, I will share it as a separate blog post, so stay tuned!  Chamomile on a baking sheet after drying in the oven. Photo by Diane M. Lilly, 2022.  Another batch of chamomile seeping in hot water. Photo by Diane M. Lilly, 2022.  Lemon wedge for my freshly brewed chamomile tea. Photo by Diane M. Lilly, 2022.  Cup of freshly brewed chamolie tea with a lemon wedge. Photo by Diane M. Lilly, 2022.  A visitor on my chamomile! Photo by Diane M. Lilly, 2020. Related blogs you may want to read: Learning how to harvest and use fresh mint from the garden Tips for planting seeds indoors How to repot a pothos plant How to propagate bromeliad pups Six herbs I planted indoors Growing tomatoes and cucumbers for my garden It’s planting season again This article may contain a few items or commercial mentions, but I only used them for demonstration purposes only. I am not endorsing any particular product or receiving any monetary gain for this blog.  Mint growing in my garden. Photo by Diane M. Lilly, 2021. A few years back, I bought this packet of mint seeds to plant in my yard for fresh mint. Not only did I have no idea how to grow mint, but there was no thought given to how I would use the stuff when it started to grow…and grow it did! So, the first thing you should know is that mint is prolific! No, seriously, you'll have to keep on top of it so this plant doesn’t spread all over your yard. But it needs little care to keep it alive, and you get a lot of it for whatever uses you have in mind. Which brings me to my second point…What can you do with fresh mint? It’s been growing in my yard for a while now, and you’re probably like…how have you not yet figured out how to use this herb? It just comes down to time—as in not enough of it. So, this year, I am committed to learning how to use the plant for something other than pretty photos!  Mint leaves. Photo by Diane M. Lilly, 2021. I’m embarrassed to admit that I had allowed my mint to make itself at home in my yard for so long, not using it for anything, that I had forgotten exactly what type of mint I had grown. So the burning question became, how do I figure out what kind of mint I have? Well, a little research has turned up an answer—give it a taste. If it has a sharp, almost spicy taste, it’s probably peppermint. If the taste is more subtle and sweeter, it’s more likely to be spearmint. So I popped off a leaf and gave it a chew, and—sure enough—it had a sharp, almost peppery flavor! So, I can assume I am growing peppermint. Good to know! Now that I know what type of mint I have and how to grow it, it's time to learn how to harvest and use this leafy green herb. And so this will be the beginning of a continuing journey to delve deeper into how to grow, harvest, and use common herbs like mint. I’m no herbalist, but I like the idea of finding more natural ways of living, and growing herbs plays into that mode of thinking. So let's see if we can get our heads wrapped around a few beginner’s tips… How and when to harvest mint… While the mint plant benefits from frequent harvesting (increasing the yield of new growth), this is also an opportunity to keep the herb in check, pulling runners from spots where you don’t want the mint to grow. The actual act of harvesting is pretty simple—simply clip (with scissors, do not break) the top buds with the younger, more flavorful leaves (cut above the second set of leaves near the bottom), pluck a leaf at a time as needed, or cut large bunches just before the plant blooms (never harvest more than 2/3 of the plant). The mint plant can be harvested any time after maturity, but the best time is before it flowers. After the flowers bloom, the taste of the leaves gets more bitter. Also, as with most other herbs, harvest in the morning for the best concentration and flavor.  Mint flower. Photo by Diane M. Lilly, 2020.  Mint leaves harvested from my garden. Photo by Diane M. Lilly, 2022. How to store mint… Dried mint loses some flavor, so using mint when fresh from the garden is the optimal way to get the most flavor. That being said, there are still benefits to using properly dried mint. The best way to dry out this herb is to tie your cuttings together and hang them in a cool, dry, dark place (do not dry with heat). Store dried mint in a glass container, and make sure no moisture is left that could create mold (you can use absorbing packets). Wrap them in a damp paper towel or place them in a container with water and place them in the fridge for a week to 10 days if using within a few days. Mint leaves can also be frozen in freezer bags (freeze on wax paper first) or chopped up and frozen in ice cubes, ready for your next delicious beverage! Your mint will be kept in the freezer for up to three months.  Image by kerdkanno from Adobe Stock. How to use mint… Last year, I decided to try making homemade mint tea with fresh clippings from my yard. The results were somewhat unsatisfactory, but it was--after all--my first attempt! At some point, I’d like to try making mint tea again…but maybe iced tea this time. Once I play around with it a little more, I’ll post another article with the recipe…but in the meantime, I have discovered lemon and mint leaves in water. I started drinking water with lemon slices and some freshly squeezed lemon juice. Then I remembered I have fresh mint in my yard…so, of course, I had to throw in some fresh mint leaves, right?! This is an incredibly refreshing drink that screams summer! I make mine by the glass, but you can find recipes for making a pitcher of this wonderfully light and refreshing beverage. I’ve become seriously addicted to this drink! It’s a perfect excuse to drink more water.  Water with fresh lemon and homegrown mint leaves. Photo by Diane M. Lilly, 2022.  Image by Africa Studio from Adobe Stock. Another delicious way to use fresh mint leaves is in a salad. Today’s lunch consisted of mixed salad greens, celery, cucumber, shredded cheese, fresh chive flowers and stems (from my garden), mint leaves (also from my garden), and balsamic vinaigrette. The peppermint has a sharp flavor that wakes up the rest of the greens and compliments the vinaigrette quite nicely. So that was a darn good lunch! And I will experiment with different kinds of salads during the summer months. If I stumble across something particularly delicious, I will post a blog about it so you can try it out yourself! In the meantime, you can check out this terrific blog post I uncovered during my research that is packed full of uses and benefits for using mint. Let me know if you have tried any recipes using fresh mint. And comment below with any recipe ideas or tips you have learned!  Mixed green salad with freshly picked mint leaves from my garden. Photo by Diane M. Lilly, 2022.  Same mixed salad with mint leaves...with more shredded cheese please! Photo by Diane M. Lilly, 2022. Related blogs you may want to read: Tips for planting seeds indoors How to repot a pothos plant How to propagate bromeliad pups Six herbs I planted indoors Growing tomatoes and cucumbers for my garden It’s planting season again This article may contain a few items or commercial mentions, but I only used them for demonstration purposes only. I am not endorsing any particular product or receiving any monetary gain for this blog.  My cherry tomatoes from last year. Photo by Diane M. Lilly, 2021. Last year, I grew tomato and cucumber seedlings in styrofoam cups on my kitchen's southwest windowsill. After a couple of weeks, they were a couple of inches tall! My cucumbers are once again rapidly growing. This year's cucumber and tomato seedlings (along with other herb seedlings) are sitting on my living room windowsill, which roughly faces southwest.  This year's seedlings growing on my windowsill. Photo by Diane M. Lilly, 2022. So this year, I'm sharing my gardening journey, pitfalls, mistakes, triumphs, and tips. This will probably be the first in a series of articles following my journey from planting the seeds to using my homegrown vegetables in recipes. Planting my tomato & cucumber seeds If you haven’t read it, you can read my blog on planting seeds, including tomatoes and cucumbers. The seeds are sown in small pots covered with plastic to help them sprout.  Pots and seeds for this year's tomato and cucumber plants. Photo by Diane M. Lilly, 2022. I tend to plant too many seeds in one pot, so now I’m stuck with the problem of which plants to cull or whether I can safely transplant some to other pots. Cucumber seeds are supposed to be planted no more than two per pot. Well, I planted probably 8-10 seeds in one six-inch pot! It’s a rookie mistake I make every year in my haste to plant seeds and get as many plants to grow as possible.  Cucumber seedlings after about two weeks. Photo by Diane M. Lilly, 2022.  Cucumber plant getting its true leaves. Photo by Diane M. Lilly, 2022. So I called my dad—an avid gardener—for some advice. There’s good news, and there’s some bad news. The bad news is that cucumber plants don’t like to be transplanted or messed with, and I really shouldn’t have planted more than two in a pot anyway (so I could cull the weaker one). An even better option would’ve been to simply wait until the weather got warm enough to plant the seeds directly into the ground. The good news is that cucumbers sprout fast, and seeds are cheap! So if my little cucumber sprouts die, I can always purchase new seeds and replant. No harm done. As for the tomatoes, according to my dad, they are incredibly hardy and will most likely tolerate being separated and transplanted. He told me to plant two seeds per pot and only plant what I have room for in my garden. (As it is now, I have no idea what to do with the extra ten or eleven plants EACH of cucumbers and tomatoes! Maybe they'll be put in pots outside.)  Tomato seedlings after about two weeks. Photo by Diane M. Lilly, 2022.  Tomato plants after about four weeks. Photo by Diane M. Lilly, 2022. How to separate the seedlings Which brings me to the next issue…How—and when—do I separate the tiny plants in the pots? Can I do that safely without damaging my fragile plants? Some sources say not to pull out the tiny plants but to cut them at the soil level so as not to disturb the roots of the other plants. So it may well be that I’ll have to cut at least half of my new seedlings. The newly sprouting seedlings will soon crowd each other, so there needs to be a plan to separate some or cut most of them down. But I should determine how many plants I can fit in my garden. It may well be that I don’t need all of the plants that came up. I still feel bad about killing off half (or more) of my new plants! And I may just pop some in pots, just so I don’t have to feel guilty about killing little plants. When to transplant outside Cucumbers can be planted outside when they have 3-4 leaves on them, and there is no danger of frost. The tomatoes should be about 4-6” tall before planting outside, with nighttime temps staying more or less above 50 degrees Fahrenheit. Small metal fence partitions (used as a lattice) are leaned against a wall in my garden so my tomatoes and cucumbers can climb. My dad helped me dig up the ground and add some better gardening soil in preparation for planting, so I’m hoping for better results this year.  My tomato seedlings outside waiting to be planted. Photo by Diane M. Lilly, 2022.  Tomato seedlings planted in the ground. Photo by Diane M. Lilly, 2022.  More tomato seedlings planted in a pot. Photo by Diane M. Lilly, 2022. Issues with growth from last year I have not gotten decent results the past couple of years growing cucumbers and tomatoes in pots. One of the things I will be on the lookout for this year is the blossom end rot on my tomatoes. There's been an issue with rot in the last couple of years. It’s an issue with the soil, the pH levels, and nitrogen. The soil needs less nitrogen and more phosphorous, and I need to regulate the water levels better. Also, growing these plants in pots is not optimal. Wherever possible, it’s better to grow them in the ground. I don’t have an issue with cucumbers, except that sometimes the fruit is small and gourd-like instead of oblong. This may also be a symptom of being grown in a pot with water level issues and insufficient nutrients. Changes will be made in the planting process (with help from my dad) to improve the soil, light, and watering needs. I would like to have a decent crop this year! I will try to provide updates, so keep checking back for more on this year’s garden projects!  Yellow cucumber flower. Photo by Diane M. Lilly, 2021.  Last year's cucumber growing on the vine. Photo by Diane M. Lilly, 2021.  Last year's grape tomatoes growing on the vine. Photo by Diane M. Lilly, 2021.  Last year's cherry tomatoes growing on the vine. Photo by Diane M. Lilly, 2021. Related blogs you may want to read: Tips for planting seeds indoors How to repot a pothos plant How to propagate bromeliad pups Six herbs I planted indoors It’s planting season again This article may contain a few items or commercial mentions, but I only used them for demonstration purposes only. I am not endorsing any particular product or receiving any monetary gain for this blog.  Mint in my back garden. Photo by Diane M. Lilly, 2021. Herbs…They are fun to grow AND useful for many things! This spring's goal is to increase the variety of my existing indoor and outdoor herbs. A second—but equally important—goal is to learn more about the care of these plants so I can get the most out of the growing experience. In my front window, there is a pot of leggy parsley. It had been growing outside last year quite beautifully, but I brought it indoors for the winter, and it’s become…well…a little spindly! It needs some TLC…  Parsley plant in the front window. Photo by Diane M. Lilly, 2021. This past fall, I also brought in a pot of thyme. The plant was lush and fragrant and doing quite well…and then it suddenly crashed! I have a couple of theories about that, mostly involving low light and forced dry heat. I guess that means I’ll have to plant more for this year’s crop and try again! There are a few herbs in the back garden from several years ago—chamomile, mint, chives, and sage. Everything has been growing incredibly well back there, but unfortunately, over-enthusiastic pruning may have accidentally killed the sage, so this year, I started some new plants from seeds. Lesson learned, I hope!  Summer herbs growing in my back garden. Photo by Diane M. Lilly, 2020. A few new additions are joining the garden—lavender, rosemary, basil, dill, and cilantro. All were planted from seed and are sprouting well so far. Today’s blog will discuss more efficient ways to grow these herbs, harvesting, storage, and how to use them for teas, cooking, and other household stuff. But--before we get ahead of ourselves--we have to help them to grow! My seedlings have begun to sprout, and it’s time to assess each plant's needs. So, let’s get on with it! Basil Basil is one of those herbs that is just so delightful, especially in tomato sauce. I planted basil for this purpose in my back garden a couple of years ago. It seemed to do well, but then it died off, and I never replanted it. I didn’t know then that basil is an annual (meaning it does not come back every year). This year, the pot on my windowsill with basil seedlings is destined to be an indoor herb plant. I’d like to see if I can keep it alive indoors (like I did with the parsley).  Basil sprouts on my windowsill. Photo by Diane M. Lilly, 2022. I’m getting off to a bit of a rocky start, though…I discovered (after the fact) that I planted too many seeds in the same pot, meaning I will need to cut back some of them to get one healthy plant. Basil doesn’t like to be transplanted, so it won’t do me much good to try to transplant the extra seedlings elsewhere…although it wouldn’t hurt to try! The worst that can happen is they die off. But I am worried I could accidentally damage the plant I want to keep, so culling the extras may be my only option. I just hate deliberately killing off perfectly good seedlings!  Image by tookapic from Pixabay. More growing tips for basil… Basil plants grow 12-24” tall, and basil seedlings need to be spaced 10-12” apart to give each plant space to bush out. The seeds for this plant will take 5-10 days to germinate. Basil needs a lot of sun and warmth—6-8 hours. This herb plant dislikes the cold (in nature, it grows in much warmer climates), so it will be essential to keep it out of drafts while in the house and bring it inside if outdoor temperatures get below 50˚F. This fragrant herb also needs plenty of water and nicely balanced soil levels to thrive. It likes moist, well-draining soil with pH levels between 6.0-7.5 (neutral to slightly acidic). Basil doesn’t need a lot of fertilizer, maybe a 5-10-5 plant fertilizer (a topic I’ll be covering in my next blog) every so often. You can begin pruning after about six weeks, clipping the center shoot to allow the plant to get bushy and produce more leaves. Pruning regularly—like with any herb—will force your plant to push out more leaves and keep it from flowering and going to seed too quickly. Essentially, pruning extends your harvesting season (another topic I will cover later in this series). You can start harvesting the leaves once the plant is 6-8” tall. Chamomile Chamomile is an incredible herb to plant in your garden, but you will need a lot of it--which won’t be a problem if it's outside because chamomile is one of those plants that like to self-seed. You could end up with a garden full of chamomile without even trying! I even found a chamomile plant growing out of a brick wall down the side of my driveway, far away from the original plant! So be aware that this plant spreads and could take over your garden eventually if you are not vigilant (unless that is your intention).  Chamomile growing in a planter in my yard. Photo by Diane M. Lilly, 2021. Last year’s chamomile plants were left outside all winter. They not only survived but kept green leaves through the entire wintry season. The foliage for this herb is quite feathery and dense, and the flowers for my variety grow tall (I may have planted the German variety), towering over the green foliage below. And let me tell you, this is the most aromatic plant in my garden! You get just a few feet away, and the gorgeous scent wafts your way, beckoning you to come closer! Bees and ants love it! Some general growing tips for chamomile… The chamomile plant is considered an annual—meaning it should only grow once a year and then die off. But if it is allowed to self-seed, more plants will come up the following year. Let me clarify…There are a couple of varieties of chamomile—a German annual variety and a Roman perennial variety. Both are hardy and aromatic plants that can potentially come back year after year.  Chamomile leaves from this spring's plant. Photo by Diane M. Lilly, 2022. This herb likes partial shade and just a little water. It’s drought resistant (but prefers cooler weather), so it’s not needy, like some other plants in your garden. This plant will grow wild (if conditions are right) and low maintenance. Don’t overwater it, and it doesn’t need fertilizer. Just give it the right spot and a little water, and let it do its thing! Chamomile blooms in the summer, and the flowers can be harvested for tea and other culinary uses. Picking the flowers regularly (plucking off the sweet flower tops, not the bitter leaves) will ensure more growth and more flowers to harvest. Pick the flowers in full bloom with no drooping petals. Chives Chives are another herb plant in my back garden, and so another plant I didn’t need to start from seed this year. The chives in my garden are still going strong, even after three years. The one thing I will need to do this year (sometime soon, as it is early spring) is to divide the clumps to get more yield from my plants.  Purple chive flowers blooming in summer in my back yard. Photo by Diane M. Lilly, 2020. Some general growing tips for chives… My plant grows about 10-12 inches tall, but some varieties may grow taller. This plant is a perennial that is related to onions, garlic, and lilies. Plant the seeds 4-8” apart, and within six weeks, you’ll have new sprouting plants! This has proven to be a pretty hardy plant, surviving several heat waves with upwards of 100˚F for several days (with daily watering, of course), and it sits in full daytime sun in the summer. I water every day, either in the morning or in the evening. It likes well-draining soil with pH levels between 6.0-7.0. The plant produces purple flowers (though not in the first year) around early summer, which I tend to let go to seed so my little patch can spread. You can start harvesting chives 60 days after seeding by cutting small clumps a couple of inches from the ground. Cilantro I haven’t been entirely successful at growing cilantro. I planted coriander (cilantro seeds) two years in a row, and the plants looked promising at first. Unfortunately, though, the cilantro plants didn’t produce a lot of leaves, became leggy, and then just withered and died. So this year, I’m starting this herb from seeds again to learn what I’ve been doing wrong! I already discovered that cilantro does not like to be transplanted, which I did last year as I transitioned the new plants outside. I also just threw them outside, skipping the gradual process of “hardening” (or slowly acclimating) the plant. This year, I will probably keep this plant in a small pot inside, moving it outside now and then.  Image by Hans Braxmeier from Pixabay. Some more growing tips for cilantro… Cilantro is an annual (meaning you have to replant each year). It’s no accident that it looks like parsley, as it is in the same family. I often get my parsley and cilantro plants confused if I don’t mark them! It even has a taproot-like parsley, so it needs enough space underneath to accommodate that type of root system. (A taproot is a long, thin root that reaches several inches under the soil.) The seedlings for cilantro germinate in 7-10 days and reach maturity in 45-70 days. A healthy cilantro plant can grow 12-24” tall. New seeds can be replanted every 2-3 weeks in summer, the height of its growing season. This plant likes full sun but not too hot; you may have better luck with a spot in partial shade. It needs well-draining soil but does not like to dry out. To harvest, cut the outer stems when the plant is at least 10-12” tall. Harvesting regularly will extend the life of the plant. Dill This feathery herb has me a little perplexed. I planted it from seed last year, then transplanted it outside into a garden planter. The plant came up nicely but got very tall and leggy. (I’m noticing a trend here with my herbs growing long and leggy instead of bushy.) I have yet to grow a bushy dill plant, which I want. So, I planted dill seeds again this year, intending to grow this herb in a pot mostly inside.  Image by Hans Braxmeier from Pixabay. Some general growing tips for dill… Dill likes full sun and heat and should grow 2-3 ft tall, producing yellow flowers in summer. Grown from seed, it will take 7-10 days to germinate and about 90 days to mature. This herb doesn’t like to be transplanted, and when you plant the seeds, they should be spaced 12-15” apart. The dill plant develops a taproot-like parsley, so the pot has to be deep enough to allow for that long root column. This herb likes well-draining soil with a pH level of 5.5-6.7. Water well, and do not let dry out. Dill—like chamomile—can self-seed in the right conditions, providing you with new plants next year. (Technically, this is an annual plant.) Otherwise, you can harvest the leaves just before the plant flowers and go to seed. Lavender Okay, so who doesn’t love lavender plants?! I have tried (unsuccessfully) to grow lavender from seeds for the past two years. So, I’m trying again this year to figure out where I keep going wrong. It is said to be very difficult to grow lavender from seed, and most people buy a young plant to get them started. But I am nothing if not stubborn…and seeds are cheaper than buying a plant!  Image by Sabrina Wisian from Pixabay. General growing tips for lavender… Lavender is a perennial that likes full sun but low humidity. Soil quality isn’t an issue, but lavender does need soil with good drainage. Do not overwater! The seeds take 4-6 weeks to germinate and should be planted 18-24” apart. Lavender can be transplanted at about 3” high and will grow to 12-36” tall. This fragrant herb blooms between June and August, pushing out stalks of colorful purple flowers. Harvest lavender by cutting above the woody growth on the stems. Mint The one herb I have absolutely no problem growing is mint! I planted this in my garden a few years ago, and if I’m not careful, it will take over the whole yard! Growing this plant requires some diligence. If you don’t want it to end up all over the place, strangling other plants, you’ll need to take time out—frequently—to pull runners and cull back areas that are becoming invasive.  Mint taking over my summer garden. Photo by Diane M. Lilly, 2021. Some general growing tips for mint… Mint likes full sun—surprise, surprise—and makes good ground cover. The plant grows 1-3 ft tall and has beautiful purple flowers in the summer. Mint needs little to no maintenance except to keep it from growing too much. Just don’t overwater it, and it will take care of itself. Seedlings should be planted 18-24” apart. Harvest just before the plant flowers or when the leaves are at least 4” tall. Parsley As mentioned, I have a parsley plant from last year growing in a pot on my windowsill. It’s a bit leggy (there’s that word again), but otherwise, it’s growing well. I think it prefers being outside, so maybe once the weather warms, I’ll put it out in my garden so it can grow bushier again. As for the legginess, I found some interesting information on pruning and pH levels that might help me with this problem. (My next blog on herbs will deal with harvesting, so I’ll take that opportunity to cover this topic in more detail.) My research indicates that parsley is a biennial, so this might be its last year, and I should see it flower.  Leggy parsley growing in a pot by the window. Photo by Diane M. Lilly, 2022. Some general growing tips for parsley… Parsley will germinate between 21-28 days and mature in 70-90 days. Plant seeds 9-12” apart in soil with a pH level of 6.0-7.0. This herb can be transplanted 5-6 weeks after sprouting and grows to 12-18” tall. Parsley is a thirsty plant that requires a lot of watering, but just don’t let it sit in soggy soil. Harvest by cutting from the outer leaves to promote new growth and lessen the chance of bolting too early. Rosemary Rosemary (like lavender) is one of those herbs that I have been utterly unsuccessful at growing from seed…but I keep trying! I love the smell of rosemary, especially when cooking. They say it’s a simple plant to grow and harvest, but most people go the easier route and buy a plant because getting a seedling to grow successfully is very tricky.  Image by Hans Linde from Pixabay. Some general growing tips for rosemary… Rosemary takes 15-25 days to germinate and likes well-draining soil with a pH of 6.0-7.0. Plant 18-24” apart to give this plant the space it needs to grow. Rosemary is a perennial that can grow 3-4 ft tall. This herb is drought tolerant, likes Mediterranean-type conditions, is fragrant, and has blue flowers in summer. Rosemary (like sage, lavender, and thyme) draws moisture from the air; an indoor rosemary plant will need frequent misting. With that being said, don’t overwater the soil. But make sure it doesn’t get overly dry. In other words, only water when needed and don’t let the soil get soggy. Give it fresh soil once a year and fertilize it in spring. Sage The leaves of this plant are so aromatic! I love running my fingers over them to smell their gorgeous scent. I use sage in cooking, especially with chicken, and I’m experimenting with sage tea. Sage has been growing in my garden for three or four years, but I may have accidentally killed the plants last year by pruning back too much in early spring. Since I wasn’t sure if the plant would come back this year, I planted new seeds for an indoor pot and my outdoor herb garden.  Sage bud on last year's plant. Photo by Diane M. Lilly, 2021. Some general growing tips for sage… Sage is a perennial that can grow 2-3 feet tall, with gorgeous purple flowers in the summer. The seeds take 10-21 days to germinate. Give this herb plenty of spacing (24-36” apart) when planting because it spreads out and gets bushy!  Purple flowers blooming on my sage plants. Photo by Diane M. Lilly, 2020. This hardy herb is drought tolerant and can handle temperature extremes like in the Southwest desert (hot days and cold nights). Like rosemary, allow the plant to grow in the first year and then begin harvesting in the second year. Thyme I had this pot of gorgeous, fragrant bushy thyme last year growing quite hardily in my side yard. I wanted to preserve it over the winter, so I brought it inside in the fall. The plant grew fairly well…until about mid-winter, when it suddenly crashed and was dead. This spring, I planted more seeds…and we’ll see what happens. The plan is to have some plants inside and some outside, experimenting with both to see what this plant likes best.  My thyme plant brought indoors fall 2021. Photo by Diane M. Lilly, 2021. Some general growing tips for thyme… Thyme can grow 8-12” tall and likes to spread out, making it a terrific aromatic ground cover. It takes 8-20 days to germinate, and you can transplant once the plant is 4” high and has four true leaves. Thyme spreads out, so plant 18-24” apart in the ground. Thyme plants are ready to harvest in 80-85 days. This herb likes full sun and well-drained soil. If growing indoors, it will need to be misted frequently and needs the bright sun of a windowsill.  Image by Marta Jonina from AdobeStock. So, what are your thoughts about growing herbs? Have you grown herbs, and if so, what is your favorite? Share your tips and advice in the comments below! For my part, I look forward to watching these herbs sprout and grow, as well as learning how to care for and harvest these incredible plants. There’s something magical about witnessing new life! This will be a journey of exploration to learn about growing herbs and using these herbs for all sorts of household and culinary needs. As these plants grow, I will explore how and when to harvest them and how to use each in my home. I’ll explore uses for the home, ways to scent my home, ways to use them in arrangements, herbal teas, and healthy recipes. So, let’s see how this process plays out, and don’t forget to check back periodically to see my progress and get more tips and tricks for growing these herbs! Related blogs you may want to read: Tips for planting seeds indoors How to repot a pothos plant How to propagate bromeliad pups Six herbs I planted indoors It’s planting season again This article may contain a few items or commercial mentions, but I only used them for demonstration purposes only. I am not endorsing any particular product or receiving any monetary gain for this blog.  Finished upholstered dining room arm chair. Photo by Diane M. Lilly, 2022. It’s been a year since we bought our dining room set from an upscale consignment shop in our area. It’s a beautiful set, but the chair upholstery was not looking its best. I tried cleaning it (I even did a blog about it last year), but ultimately, I was unhappy with the fabric. Anyway, the padding is so worn it feels like you’re sitting on a board--time for a reupholstery project!  Dining room chair before reupholstering. Photo by Diane M. Lilly, 2022. Here’s where I put in a disclaimer--I am a complete upholstery novice! But I did a lot of research on upholstery methods and watched tons of videos on “YouTube University”! It’s not hard to do simple chair seats, but I did learn a few things by actually doing the project, things you can’t learn from simply watching a few videos. There’s nothing like real life to teach you…So today’s blog shows you my process and offers some tips I learned along the way… Tools needed for this project: electric screwdriver upholstery staple remover electric staple gun pliers scissors utility knife glue/adhesive (opt) marker/pencil foam batting duster (opt) fabric  Upholstery tools I will be using for this project. Photo by Diane M. Lilly, 2022. Before I get into the steps I took for this project, I'll say a few words about tools. Upholstery takes elbow grease! You will be working for your arms and hands intensely, and if you have any shoulder or back problems (like myself), be aware of that and work accordingly. A couple of tools that will help with this issue are an electric screwdriver and corded stapler. I started this project with all old-fashioned hand tools…and I was laid up for two days with pain in my spine from irritating an issue in my neck. So, be aware that upholstering is quite physical, so use power tools where you can because it is hard work! Step 1…removing the seat Removing the chair seat from the chair frame was easy. I turned the chair upside down and unscrewed the screws in each corner bracket that attaches the seat to the chair frame.  Underneaththe dining room chair where the seat is attached to the frame. Photo by Diane M. Lilly, 2022.  A view of the underneath of the chair seat before reupholstering. Photo by Diane M. Lilly, 2022. Step 2…remove all the existing staples This part can be tedious and a bit tough on the hands. But saying that, it’s not hard to do, depending on how your predecessor went about upholstering the seat. Turn the seat upside down and use a staple remover tool (you can find one cheap on Amazon) to remove as many old upholstery tacks or staples as possible. You will want to start your new project with a clean surface so your new staples go in easily. In my case, the old staples were thin and neatly done, so there wasn’t a huge mess to clean up. And that was a good thing because removing staples from fabric and wood is tedious work and hard on the hands! Just make sure you work in an area where you can easily collect the extracted staples so you or your pets don’t step on tacks or staples.  Removing the old fabric and staples from the seat board. Photo by Diane M. Lilly, 2022. Step 3…measuring and cutting the padding The existing padding for my chairs was worn, thin, and needed to be replaced. The chairs needed more lift, so I chose 2” thick padding for this project. I discarded the old padding, except for the small square piece for the center of the chair board. (There is sometimes a smaller piece of padding in the center to add extra support.) I made sure to cut the new padding just a touch larger on all sides of the board so that the new padding could sink and wrap around the edges of the hard board underneath.  A view of the old chair padding that will be replaced. Photo by Diane M. Lilly, 2022.  Tracing the old padding on the new padding. Photo by Diane M. Lilly, 2022.  A view of where the small chair pad will sit on the seat board under the new padding. Photo by Diane M. Lilly, 2022. Step 4…measuring and cutting the batting The next step is to measure out and cut the batting. My existing chairs didn’t have batting, but the seats needed that extra padding. You could probably skip this step depending on your chair type and preference. Anyway, measure enough batting that the fabric wraps around the entire seat (padding included) and can be easily attached underneath the board. You’ll want to cut it a few inches longer on each side (I think mine was about 4-5 inches because of the two-inch padding) to allow plenty of room for pulling taut and stapling to the underside of the board.  Using the old fabric to measure out the new batting (adding a few inches on each side). Photo by Diane M. Lilly, 2022. Step 5…attaching the batting When you start stapling the batting, place one staple in the center on each of the four sides, making sure to pull it as tight as you can without tearing the batting. Pull and secure it tight, for a properly supported and tailored-looking cushion. Once you have the batting attached with one staple, staple the rest of the fabric on each side, making sure to pull the fabric as taut as you can while you go. Stop a few inches from the corners--they will be dealt with last.  Placing one staple in the middle of each side to start attaching the batting. Photo by Diane M. Lilly, 2022.  New staples along one side attaching the batting to the seat board. Photo by Diane M. Lilly, 2022. Once all the sides are stapled, you can staple the corners. See my images below for how to do that…  Start attaching the batting to the corner by folding the batting in and attaching with one staple, then making folds on either side of that staple to securely attach. Photo by Diane M. Lilly, 2022.  A view of the bottom of the seat board with batting securely stapled on all sides and corners, and excess batting material trimmed. Photo by Diane M. Lilly, 2022.  A view of the chair seat with finished padding and batting. Photo by Diane M. Lilly, 2022. Trim off all the excess batting to clean up the seat and prep for the upholstery fabric. Step 6…measuring and cutting the fabric For the fabric, use the same steps as the batting. The only difference in this step is to make sure your thread weave (called warp and weft) is straight (horizontally and vertically) across the chair seat. Center any pattern on your chair seat because an off-centered pattern will be very obvious in the finished piece. So, take your time to get this part right!  Using the old fabric to measure out the amount of new fabric needed, with a few extra inches on each side to accommodate the thicker padding. Photo by Diane M. Lilly, 2022.  Align the pattern on the fabric with the seat before attaching to the bottom of the seat board. Photo by Diane M. Lilly, 2022. Step 7…attaching the fabric The rest of the stapling process is the same as when we attached the batting, so follow those instructions to attach the new fabric. Trim excess fabric on the bottom of the board.  Place one staple in the center of each side (making sure to pull the fabric tight) to start attaching fabric to the seat board. Photo by Diane M. Lilly, 2022.  After the sides are stapled, start securing the corners by folding the fabric in and securing with a staple. Fold fabric down on either side, pulling taut to create a smooth corner and secure with staples. Photo by Diane M. Lilly, 2022.  A view of the bottom of the cair seat after new padding, batting, and fabric have been attached and secured. Excess fabric has been trimmed for a clean look. Photo by Diane M. Lilly, 2022. At this point, I discovered a way to cut my stapling process in half. I found that it was possible—if I was careful—to staple both the batting and fabric at the same time. The only issue I had with that technique is that the corners must be done individually, meaning the batting needs to be secured first and then the fabric on top. (If you try to staple both the batting and fabric in the corners at the same time, you'll be fighting with too much material.) So, stapling both the batting and fabric at the same time is a convenient way to cut down time (and work) on a simple seat upholstery project like this one. Step 8…attaching the duster When I started this project, I decided I didn’t need a dust cover since the existing chairs did not have dust covers. That was a bit of a mistake on my part--as it helps cover all the stapled fabric and makes for a cleaner finished look--but it won’t be difficult to fix later. Being a novice at upholstery, the underneath of my chairs didn’t look quite as neat as the original upholstery and a duster would’ve finished it off and made it all look more professional…but I hadn’t purchased that material. Sometime in the future, I will have to unscrew the seats and staple on a dust cover. It’s a simple process of cutting material to just a bit smaller than the bottom of the chair board, using enough material to cover the upholstery edges and stapling. Make sure to fold over the edges—leaving no raw fabric edges showing—and the bottom of your chair will look finished and polished. Step 9…reattach the seat And the last part of the process is to reattach the seat and admire your handiwork! This part of the process is much easier with an electric screwdriver, by the way… Secure the chair frame and new chair seat with screws, making sure there are no gaps. This may take using clamps or another person to help you hold the two chair parts together tightly while you screw them back together. I had an issue with my first attempt; the screws would not hold, and there was a gap, so I needed my husband to help me hold things down while I screwed the seats back together. Other than that, you’re done!  Finished side chair, freshly reupholstered. Photo by Diane M. Lilly, 2022.  Dining room chair newly reupholstered. Photo by Diane M. Lilly, 2022.  My finished reupholstered dining room chairs. Photo by Diane M. Lilly, 2022. So, as I said, this is a relatively straightforward process, but it is very physically demanding, so be aware of that before you start. My advice is to practice on a few simple chair seats first if you have more complicated pieces to upholster (like I do). I have an antique settee that needs upholstering, but I wanted to do these dining room chairs first to get some experience before jumping into the deep end! And I’m glad I did because I now feel more prepared for the big project. But that’s a DIY for another day…so stay tuned! Related blogs you may want to read: Comparing DIY upholstery cleaning methods A little project with jute twine and an old foot stool DIY refurbishment of a dining room cabinet A fun DIY project with paint and a thrifted mirror part 1 A fun DIY project with paint and a thrifted mirror part 2 Creating a kitchen coffee bar How to replace a clock mechanism On a mission to recycle this neglected vintage stool The stain stripping stage of rescuing my vintage stool Staining my vintage stool with brewed tea My tattered vintage stool transformed into a beautiful plant stand Affiliate Disclosure Some of the posts in this article contain affiliate links. This means if you click on the link and purchase the item, I will receive an affiliate commission at no extra cost to you. I will only recommend products or services I use personally and/or believe will add value to my readers, so there is no conflict of interest.  Pots with planted seeds sitting on my windowsill facing southwest. Photo by Diane M. Lilly, 2022. Over the years, I have looked forward to planting seeds indoors. I love watching the fragile green seedlings push their way up through the moist soil and begin to sprout. We live in a rental home, so digging up the yard is not an option and limits my ability to grow vegetables and herbs. We have a small raised garden for growing mint, sage, and chives, and there are also usually a few containers on the back patio where herbs like cilantro, parsley, dill, and chamomile grow over the spring and summer. So this year, I wanted to plant more herbs in containers, with the idea that they can be placed outdoors on the patio or indoors on a windowsill, keeping my houseplants company.  My raised garden from 2020 with sage, chives, and mint. Photo by Diane M. Lilly, 2020. What type of containers you will need In previous years, the seeds were planted in small grow pots or even styrofoam cups, then transplanted into larger containers once they were strong enough. This year, however, I’m going to try something a little different…I will plant them directly in the pots so I don’t have to worry about stressing them during the transplant process. It may become necessary to eventually transplant them anyway, but for now, that’s the plan! Honestly, I don’t do a lot of fancy stuff when I plant seeds. I’ll use any small pot or container on hand and cover it with plastic when the seeds are planted to keep in the moisture and warmth the seeds need to grow. When to plant seeds Generally speaking, early spring is a ideal time to start, anytime between March and May. Certain seeds—like tomatoes—need to be planted earlier, so that you get your fruit during the summer growing season. It’s a good idea to read all the information on the packet. This will provide information about when to plant, how deep to plant, how to space your plants, lighting and watering needs, etc. It’s also a good idea to do a little research first. Figure out what types of plants will work best for your own space, lighting, and experience, and start with just a few pots when you are first getting started. Each year you’ll learn more about planting and grow better plants! What I’m planting this year This year I have a wide range of seeds I’d like to try. For my vegetables I decided to plant cherry tomato and cucumber seeds—even though I am really planting them a bit late in the season, but better late than never! As for my herbs, this year’s seedlings will consist of cilantro, dill, basil, lavender, thyme, sage, and rosemary, all of which I’ve grown previously. The packet instructions for thyme, rosemary, and sage say to plant the seeds in May, but these will possibly end up as indoor herbs anyway, so I’m going ahead with planting them now along with everything else. I have to say, I’ve never had any luck with lavender and rosemary, but my stubborn streak won out and I’m trying again this year. If these herb plants don’t grow for me I can always buy a plant at my local home and garden store…but I am determined to have lavender and rosemary in my life! There is one last thing I want to plant—catgrass—but I need a special flat pot for that plant. It’s something special for my cats and they will want to eat it and roll in it…at least that’s the plan. You never know with cats! 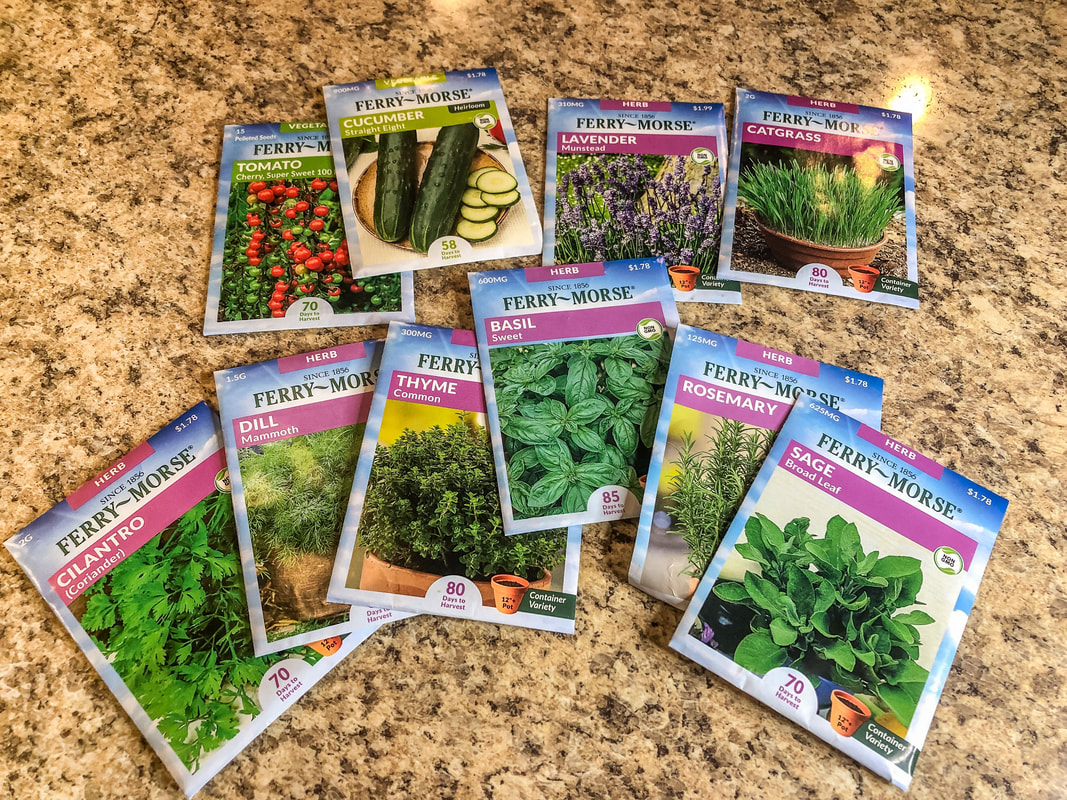 My seed packets for this year. Photo by Diane M. Lilly, 2022. What type of soil to use So this might be the most intimidating part of the process! Different gardeners have their own secrets for creating good soil for specific types of plants. There are many different ways to mix soils to get perfect balance of nutrients and drainage, and that becomes really important when the plant matures. But that’s a topic for another day! Today I simply want to plant my seeds in small pots with basic soil with little fuss. Basically you just need a good quality soil that drains well and has a good ph level (6.0-7.0). Important to note—read the descriptions on soil bags carefully. Some potting mix is specifically made for in-ground gardening, whereas some soils are used exclusively for growing in containers. For my needs, I am using MiracleGro Seed Starting Potting Mix (good for containers) to get my seedlings started, and I’ll mix up my own soil later when (and if) I transplant them. 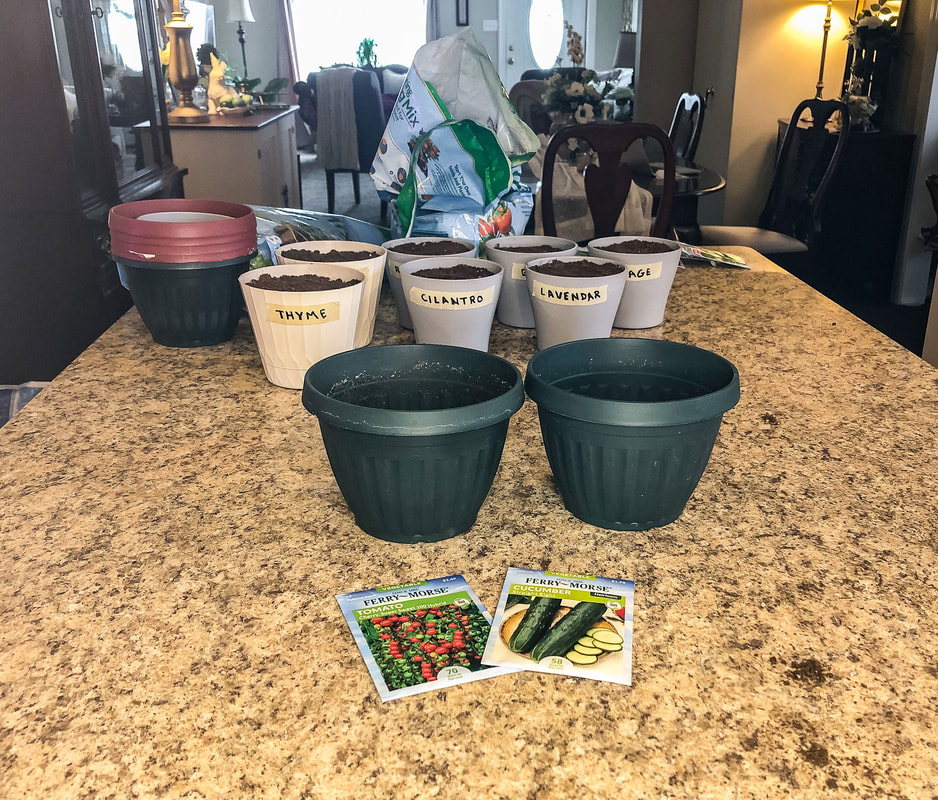 Slightly larger pots for tomato and cucumber seeds. Photo by Diane M. Lilly, 2022. 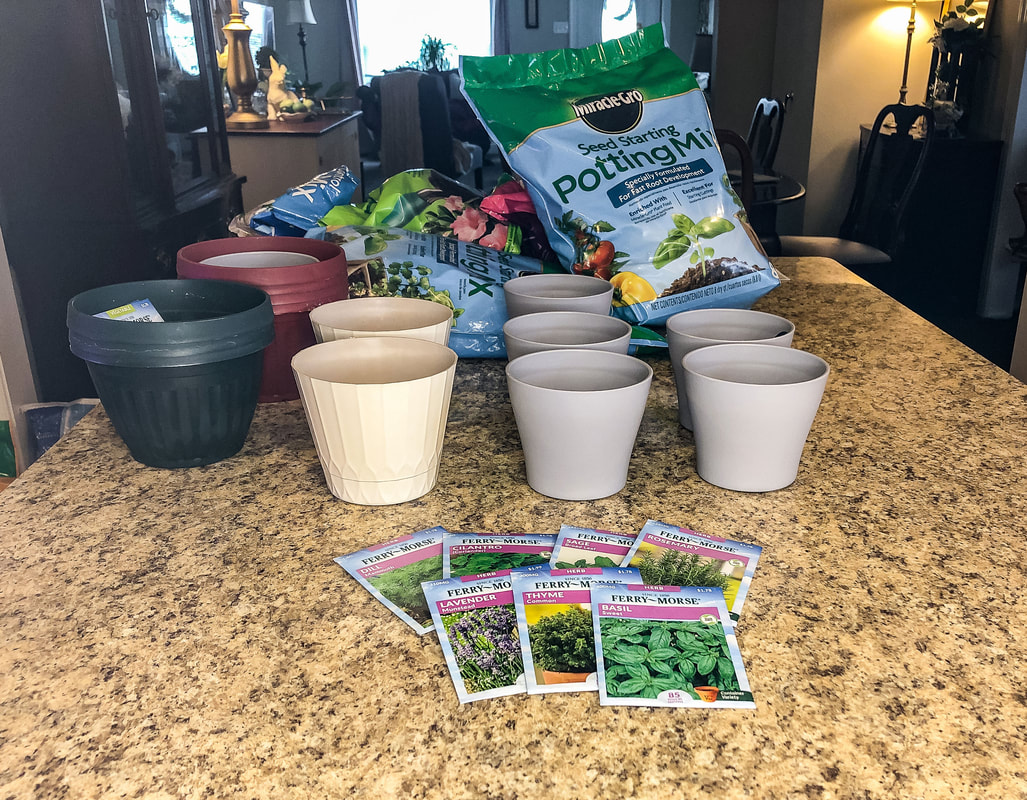 Smaller pots for herb seeds. Photo by Diane M. Lilly, 2022. 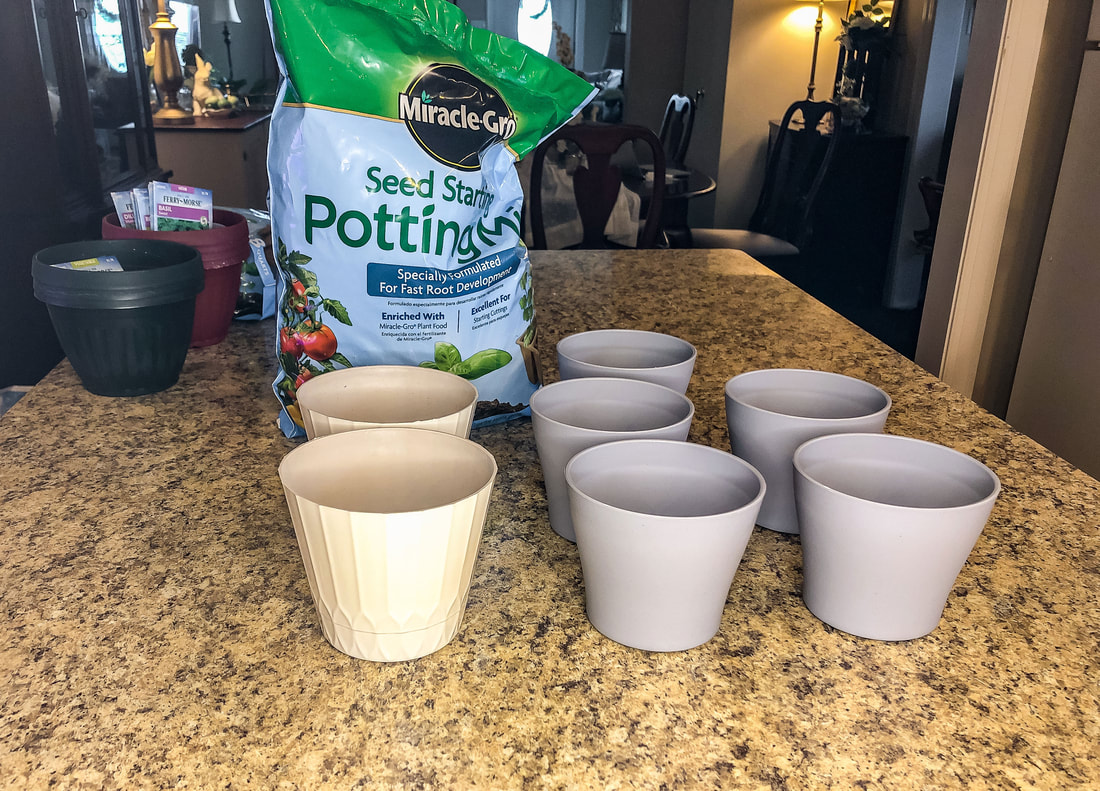 Empty pots ready for potting soil. Photo by Diane M. Lilly, 2022. How to plant the seeds Planting seeds really isn’t hard. Basically, you just put some soil in whatever starting pot you’d like, tap the bottom a few times to get rid of air pockets, then fill more soil if necessary. Then follow the planting instructions on the label for your particular seed. Pay attention to planting depth and spacing requirements. All of the seeds I planted this year required a depth of 1/4 inch, and this can be done in a couple ways. You can either poke small holes in the soil and drop the seeds in, covering up the holes afterwards, or you can place the seeds on top of the soil and cover with more soil. I’ve done it both ways. It really doesn’t matter, as long as the seedings are able to find their way to the surface when they begin to sprout. Once you have your seeds planted, it’s time for watering. 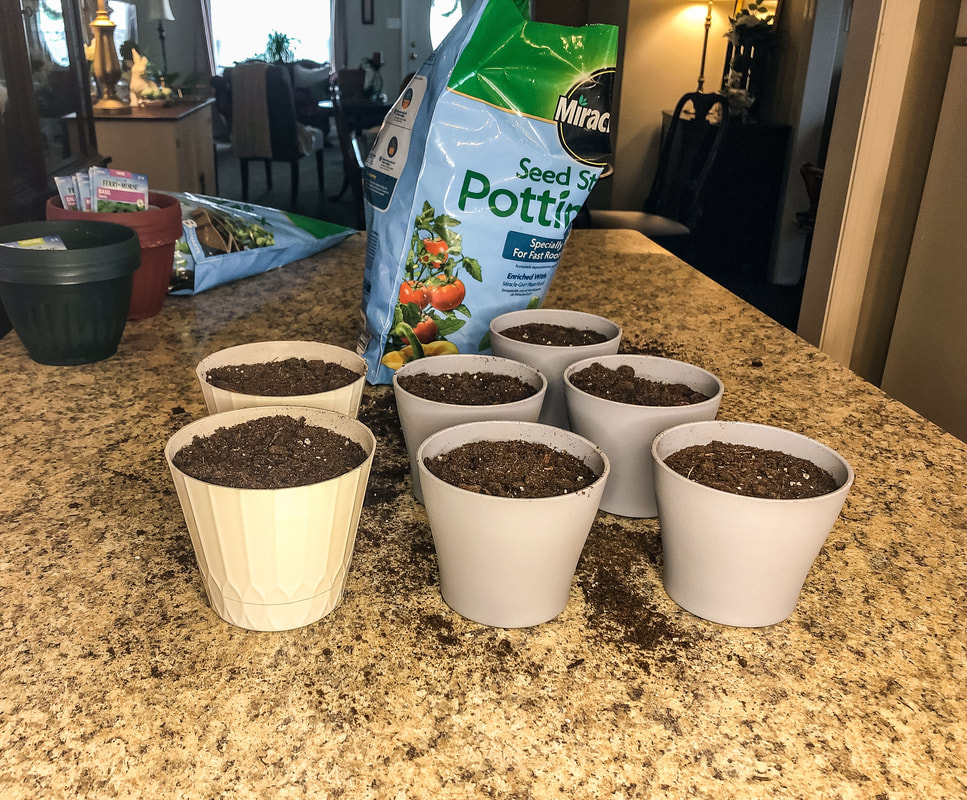 Pots filled with soil. Photo by Diane M. Lilly, 2022. 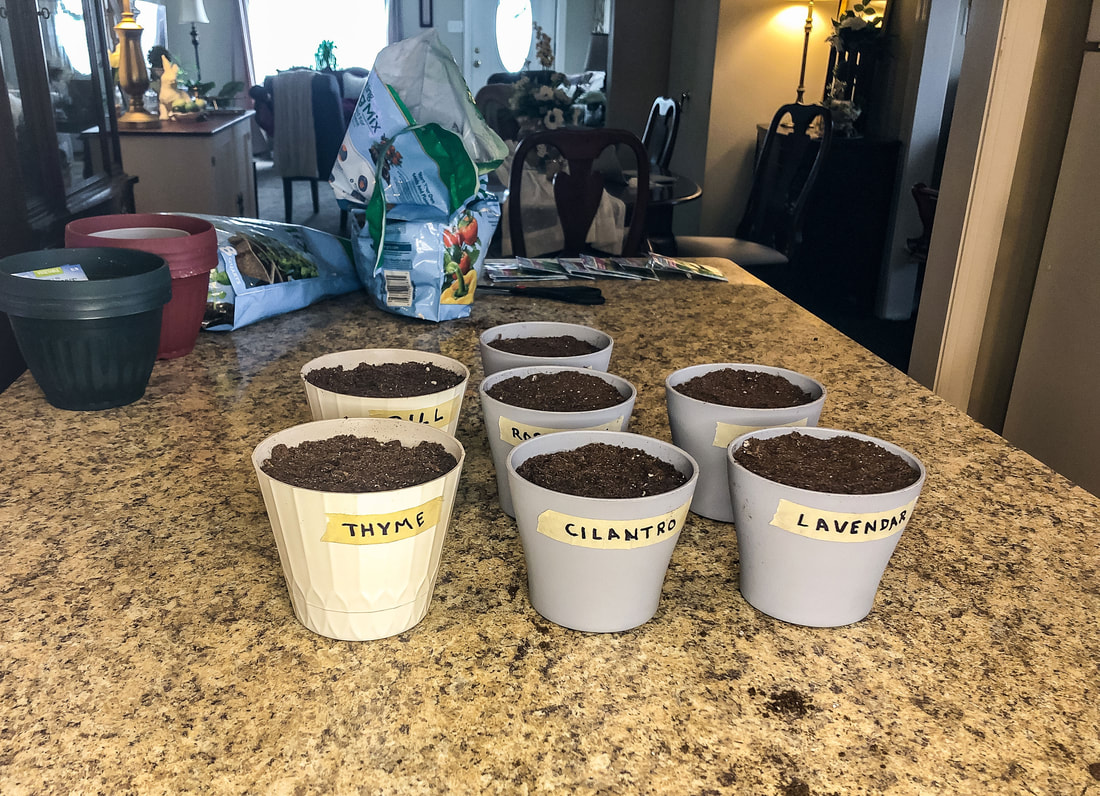 Pots for herbs, seeds planted and pots labeled. Photo by Diane M. Lilly, 2022. 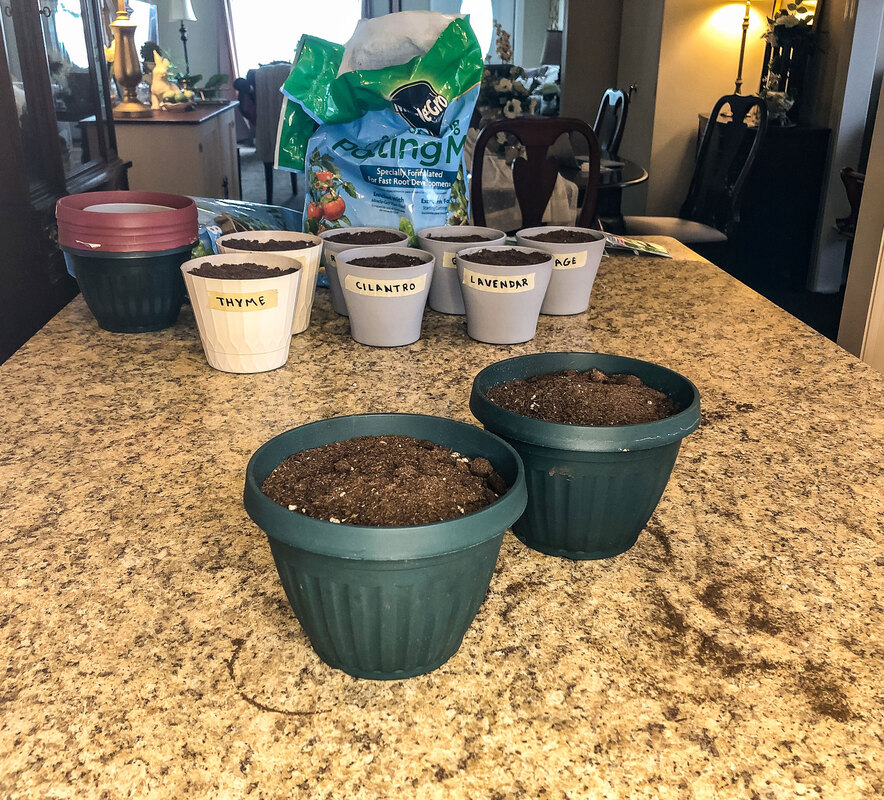 Pots for tomaties and cucumbers filled with soil. Photo by Diane M. Lilly, 2022.  Tomato and cucumber seeds planted in pots and labeled. Photo by Diane M. Lilly, 2022.  All of my newly planted seed pots ready for watering. Photo by Diane M. Lilly, 2022. Watering the seedlings Water enough that the surface of the soil down to the depth of the seeds is wet, but do not drown the seeds. If you water too much you’ll just end up with soggy soil that can rot your seeds before they get a chance to grow. My method has been to water, the cover the pots with plastic wrap to keep the plant moist and somewhat warm, then every couple of days I’ll check each plant to see if it needs more water. I’m just looking to keep the soil moist but not wet. This usually means I water carefully with a teaspoon or a spray bottle at first, a little at a time so I don’t accidentally overwater. Once the seedlings start to sprout enough that they almost touch the plastic, I remove it so they can grow free. The bigger the plants get, the more water they will eventually need.  Seed pots and watering can. Photo by Diane M. Lilly, 2022.  Pots watered and getting a plastic wrap covering. Photo by Diane M. Lilly, 2022.  All my newly planted seed pots, watered and securely covered in plastic wrap. Photo by Diane M. Lilly, 2022. Finding the right light For most seedlings they really just need a lot of light to help them germinate and sprout. Plant specific light levels become more important once the plant matures a little, so when I first start my seeds I place the pots on a southern facing windowsill. (In my house, my windows face southeast and southwest.) This way the seedlings can make the most of the daylight and sun while they are trying to germinate. I don’t have fancy grow lights either. The plan is to buy a couple eventually (because they are a great investment for growing seeds indoors), but for now I just let the natural light on my windowsill do the job. When to transplant Transplanting can be a stressful time—for you and your plant! The key is to go slowly be careful, and read up ahead of time any instructions for separating and replanting your new plants. Doing research will result in better knowledge and answer questions like: What type of soil does this plant need? What are its lighting needs? Will it be too hot? Or too cold? Learning the basic needs of your new plant will give it the best shot possible to survive. And they don’t all survive! It’s just the way it is. Just keep trying and celebrate the ones that make it! (I will do a separate blog later on in the transplanting process.)  Another shot of my seed pots sitting on my living room windowsill. Photo by Diane M. Lilly, 2022. I’ll more than likely create another separate blog later for cucumbers and tomatoes, as they get big and will need bigger pots. A few of the herbs may get transplanted as well, depending on what they need later in the spring (and how much space I have). There is a lot to know about soil types and ph levels (and a lot I am still learning), but I think I will tackle that topic in a later blog as well. There are some common mistakes to avoid when starting seeds—such as over watering, seeds planted too deep, not enough light, wrong temperature, etc.—but it’s really not hard to plop a few seeds in some dirt and see what happens! Just remember this…There are people out there who have been doing this for years, and have every step of the process down to a science…but seeds and plants grow perfectly well on their own out in nature much of the time, without our interference! Just have fun planting and see what happens! Related blogs you may want to read: How to repot a pothos plant Small houseplants that love bathroom humidity A spring decor makeover for my small rental bathroom How to propagate bromeliad pups Eight health benefits of decorating with plants Six herbs I planted indoors Let’s talk about houseplants Biophilia in interior design This article may contain a few items or commercial mentions, but I only used them for demonstration purposes only. I am not endorsing any particular product or receiving any monetary gain for this blog.  Upclose view of faux orchids. Photo by Diane M. Lilly, 2022. It's springtime! Time to make another faux floral design for my front door wreath. Every season, I re-use a pre-made wreath base, which serves as a template for whatever seasonal floral design I want. I couldn’t tell you where I got this old wreath from—I’ve had it so long now! The twisted vines conveniently allow me to insert stems into gaps between the entangled branches. Most of the time, the stems stay in place, but occasionally, floral wire is needed for extra stability. (Because I change out florals for this wreath, I never use glue.)  My pre-made vine wreath. Photo by Diane M. Lilly, 2022. If you don't have one of these grapevine wreaths, you can find whatever style and size you need on Amazon, Michaels, Hobby Lobby, or most craft stores. This spring season, I'll share my process and offer helpful tips for anyone who wants to create their own wreath design. To be sure, I’m no expert! There are floral designers out there who could run circles around me, but this is meant to be a fun project, and a simple design is something anyone can do. So here goes… Laying out the design So what about this spring’s floral design? Well, I originally intended to use a combination of white and yellow lilies, orchids, and ornamental grass--that is, until I realized that the lilies and orchids were competing. So, I made the decision to use only the orchids. The pros say to lay out your design before starting your project, but--for better or worse--sometimes, I skip this step and go with my gut instincts. Since I do not glue anything permanently into place, it’s easy to make adjustments. I started this project with a vision of an asymmetrical floral design, grass to the one side, and orchids layered on top as a focal flower, so I dug in and went with it.  Spring faux floral ideas--orchids, lilies and grass. Photo by Diane M. Lilly, 2022. Materials I used The structure I will be using for this design is the pre-made twisted vine wreath base I spoke about earlier, which will be hung (when finished) with a gold metal door hanger. Since I didn’t need floral wire, the only tool used in this project was a pair of wire cutters. (I have an all-purpose tool with a wire cutter attachment.) The decorative bits will be the faux orchids, the ornamental grass, and the sheer white ribbon. So, this will be a simple design project this time around!  Gold metal door wreath hanger. Photo by Diane M. Lilly, 2022.  Faux orchid stem. Photo by Diane M. Lilly, 2022.  Faux ornamental grass with small white berries. Photo by Diane M. Lilly, 2022. Inserting the greenery You’ll often see floral designers start their arrangements with greenery first. This helps to establish some structure and texture and helps to make the arrangement fuller. The greens also provide a backdrop that allows the focal flowers to pop. For this design, I wanted the greens to create a sense of dynamic diagonal drama, onto which I could just “lay” my orchids. I worked my way down toward the bottom of the wreath, layering each stem and keeping them evenly spaced with no strange gaps.  First stem of ornamnetal grass inserted. Photo by Diane M. Lilly, 2022.  A few more faux grass stems inserted into wreath. Photo by Diane M. Lilly, 2022.  All of the faux ornamental grass inserted into wreath. Photo by Diane M. Lilly, 2022. Inserting the focal florals Finally, it’s time for the focal florals! These are the flowers that make the whole design pop! They should compliment the greenery and filler flowers but still visually jump out, as these are the flowers you want people to notice! They are your showcase flowers and generally should be larger than the fillers, and there should be a nice balance of contrast in color, shape, and size throughout the arrangement. When making your floral designs, experts say to use similar shades and tones or even complementary colors (colors across the color wheel from each other). In my case, I’m sticking with a white, pale yellow, and green palette. The greenery already had some small cream-colored berries mixed in. The focal florals were layered in, starting about mid-way through the greenery, working my way down towards the bottom of the wreath, avoiding unwanted gaps.  Faux orchids being layered into the wreath. Photo by Diane M. Lilly, 2022.  Another view of faux grass and orchids. Photo by Diane M. Lilly, 2022.  All of the faux orchids layered into the wreath. Photo by Diane M. Lilly, 2022. Wrapping the wreath with ribbon A beautiful sheer ribbon was used to cover the stems at the bottom of the wreath. I visualized a bouquet attached to the wreath with ribbon wrapped around the base of the flowers and gracefully hanging down. You can experiment with different types of bows or even wired-edge ribbons. For my design, however, I just wanted a simple sheer ribbon that does not take anything away from those gorgeous orchids!  Sheer ribbon to be wrapped around the wreath. Photo by Diane M. Lilly, 2022.  Ribbon gets tucked into a gap in the back of the wreath to hold it in place. Photo by Diane M. lilly, 2022.  Wrapping the ribbon around the stems and wreath. Photo by Diane M. Lilly, 2022.  Ribbon wrapped around the wreath base. Photo by Diane M. Lilly, 2022. Hang the finished wreath on your front door! I’ve had these gold metal door hangers for a while—I honestly can’t remember where they were purchased! They were possibly bought at Kohl’s, but it could just as likely have been Michaels. Anyway, you can find inexpensive door hangers in many retail stores. There are a wide variety of styles, so make sure to choose one that suits the style of your home. The style on your front door should reflect what visitors will find inside! Depending on your style of wreath and door hanger, you may need a little wire or even a piece of ribbon to attach the wreath to the hanger. My wreath already has a bit of a wire loop at the top, so I can hook it onto my door hanger and hang the beautiful finished piece on my front door! And the project is done!  New faux orchid spring wreath with dangling ribbon on my front door. Photo by Diane M. Lilly, 2022.  Another view of my new faux floral spring wreath hanging on the door. Photo by Diane M. Lilly, 2022.  Another upclose view of my beautiful faux orchids. Photo by diane M. Lilly, 2022.  New Welcome door mat to compliment my new faux floral wreath! Photo by Diane M. Lilly, 2022. So have you created a door wreath of your own yet? Do you have any tips you’d like to share? Feel free to drop a comment below! Related blogs you may want to read: Spring indoor fairy gardens Eight tips for creating a spring vignette How to care for faux florals DIY with faux florals, birds, and repurposed thrift store finds Repurposed vintage candy dish and cocktail glasses Affiliate Disclosure Some of the posts in this article contain affiliate links. This means if you click on the link and purchase the item, I will receive an affiliate commission at no extra cost to you. I will only recommend products or services I use personally and/or believe will add value to my readers, so there is no conflict of interest.  My new pothos plant recently misted. Photo by Diane M. Lilly, 2022. A couple of months ago, I bought this gorgeous little pothos plant from my local home and garden store that had too little soil in too small a pot. So I knew the poor thing would need to be repotted sooner rather than later. Now that the warmer weather has arrived, it’s time to give this struggling plant baby a better plot of earth.  From left to right: snake plant, pothos plant, bromeliad. Photo by Diane M. Lilly, 2022. When to repot your pothos According to Joy Us Garden (check her out for houseplant care tips), the best time to replant a pothos is spring or summer. Pothos are resilient plants, so you may only need to repot once every 1-3 years, depending on growth. When the roots get dense and tangled, it leaves less than ample room for the soil that contains the necessary nutrients. If you see the plant roots getting dense and escaping the bottom of the pot, it’s time to transplant! How to remove the plant from the pot Following a tip from Joy Us Garden, I watered my pothos plant thoroughly before trying to remove it from the pot. Saturating the soil before transplanting reduces stress on the plant and increases root flexibility. This makes them pliable so they do not break during the transplanting process. Turn the plant on its side and gently squeeze around the sides to remove it from the existing pot. This loosens the soil’s grip so that the plant slides out. Use your fingers to massage around the plant to gently loosen the soil and roots if they are too tight. Be careful not to yank or dump the plant or break the roots. Gently slide the plant out of the pot and lay it on the counter. The key word to remember here is gentle.  Pothos before replanting. Photo by Diane M. Lilly, 2022. 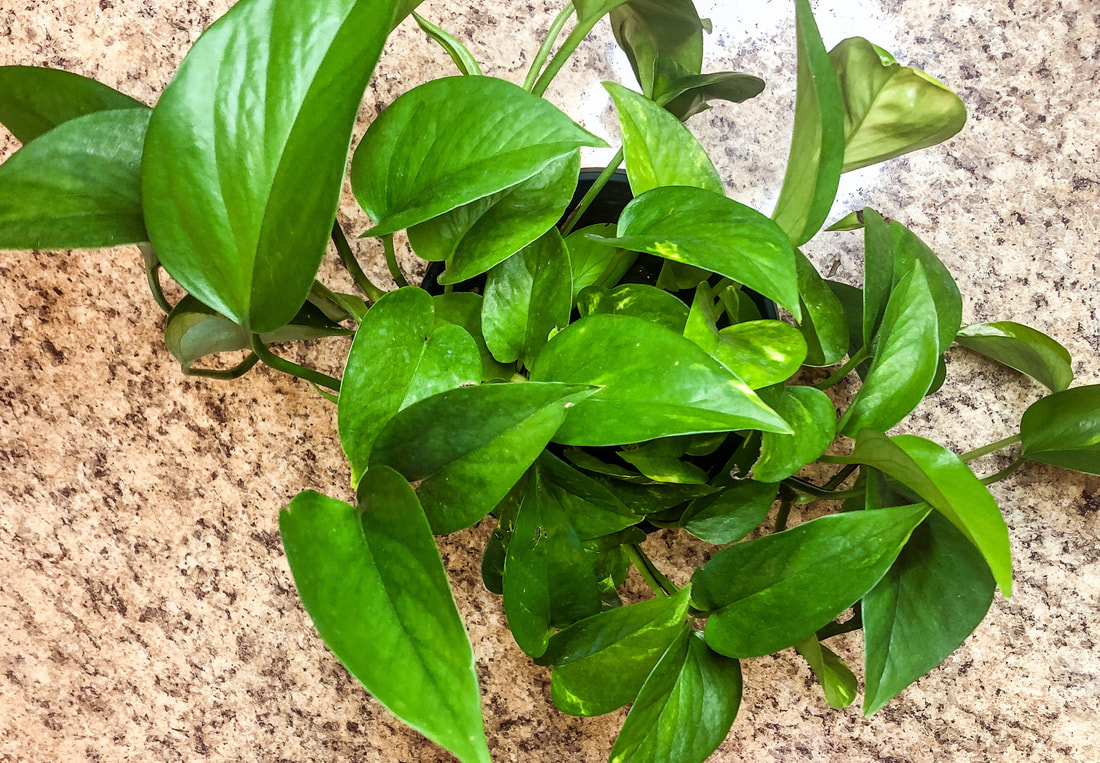 Pothos from above, waiting for transplant. Photo by Diane M. Lilly, 2022. Choosing the new soil Pothos plants are not picky but need well-draining soil (not garden soil). Lately, I’ve been experimenting with my mix—based on some research—and I came up with a soil mixture that seems to be helping a few of my other plants (my bromeliads and peace lilies), so I decided to give it a try for this plant as well. It’s a mixture of 1/2 good quality potting mix (well draining, moisture balancing), 1/4 sphagnum peat moss, and 1/4 orchid bark. 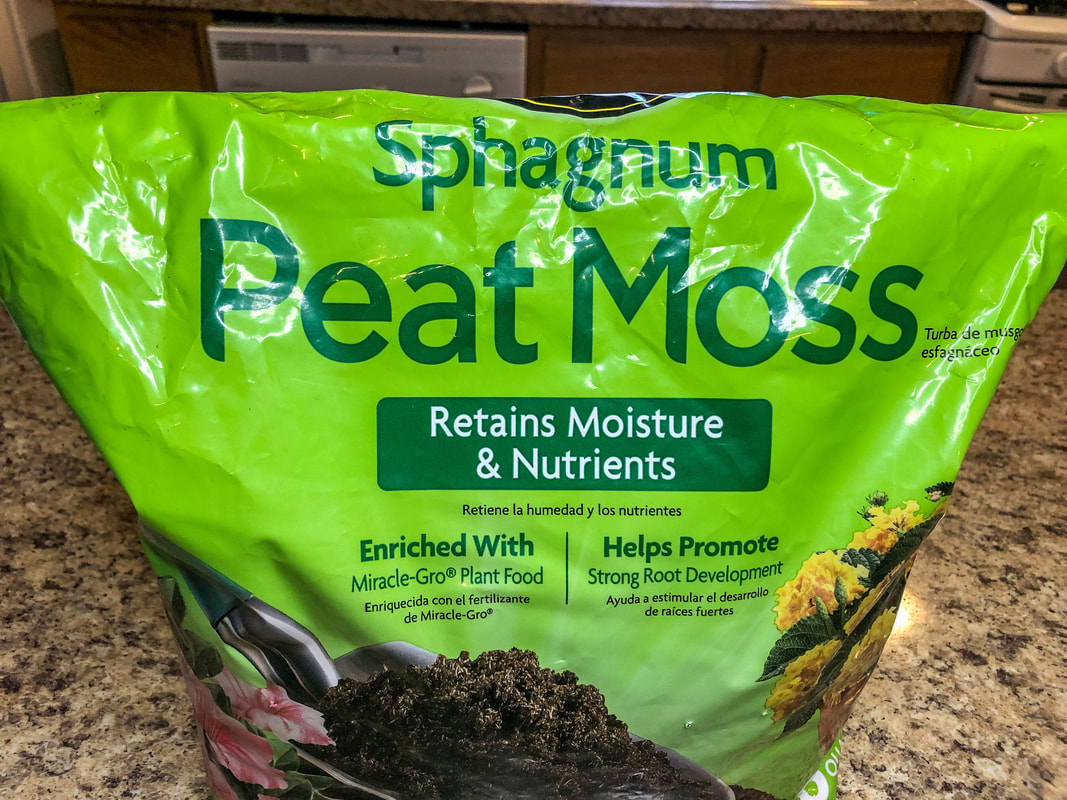 Sphagnum peat moss. Photo by Diane M. Lilly, 2022. 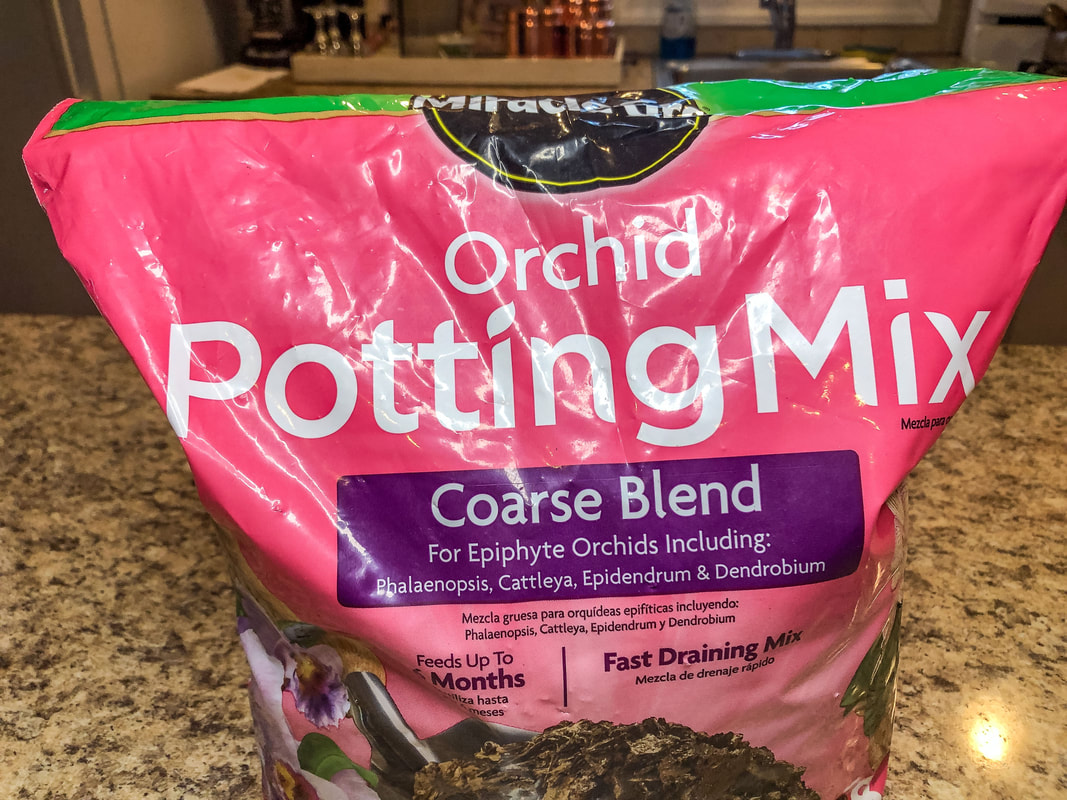 Orchid potting mix. Photo by Diane M. Lilly, 2022. 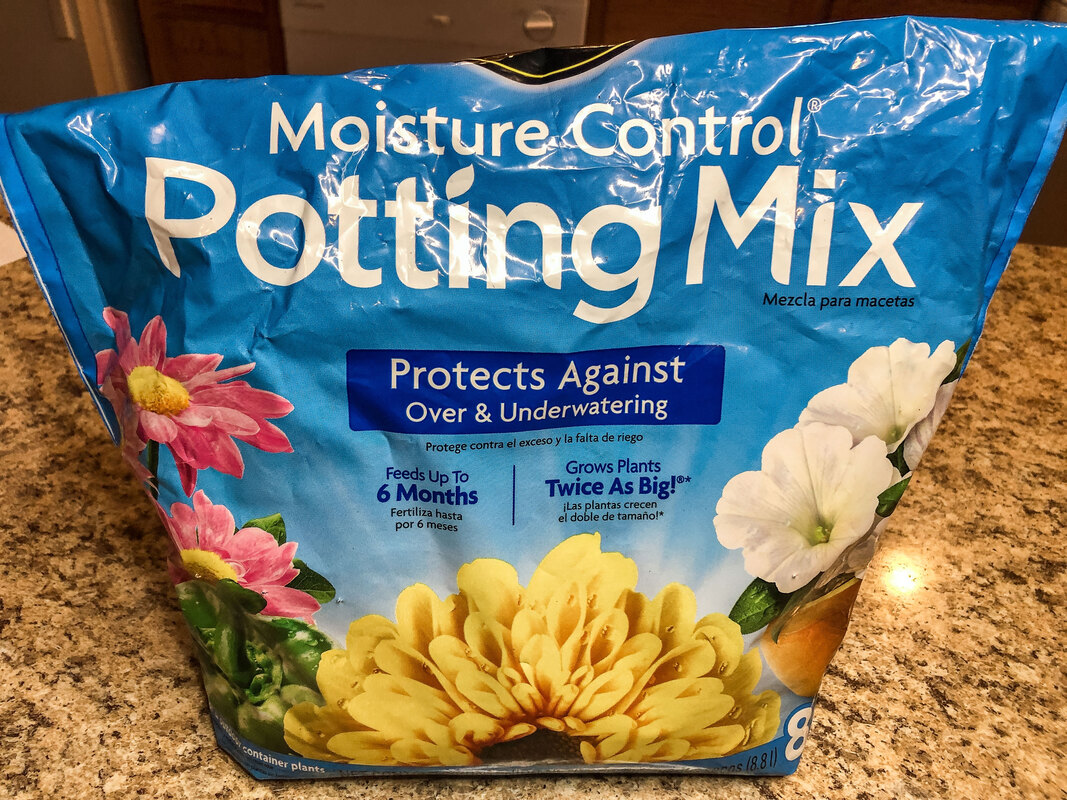 Potting soil. Photo by Diane M. Lilly, 2022. Choosing a new pot Choose a new pot that is a few inches larger to give the plant space to grow. As you see below, the first pot I chose was too small, so I had to find a slightly larger one that could accommodate the width and depth of the new plant. Also, the pot I chose first did not have the drainage holes essential for balancing moisture in houseplants. Pots with drainage holes tend to look utilitarian, which is a buzz kill for decorative style in a space, right? The simple solution to this problem is to buy a decorative pot (one that matches your style) and drop the newly repotted plant inside. Now you have the best of both worlds! 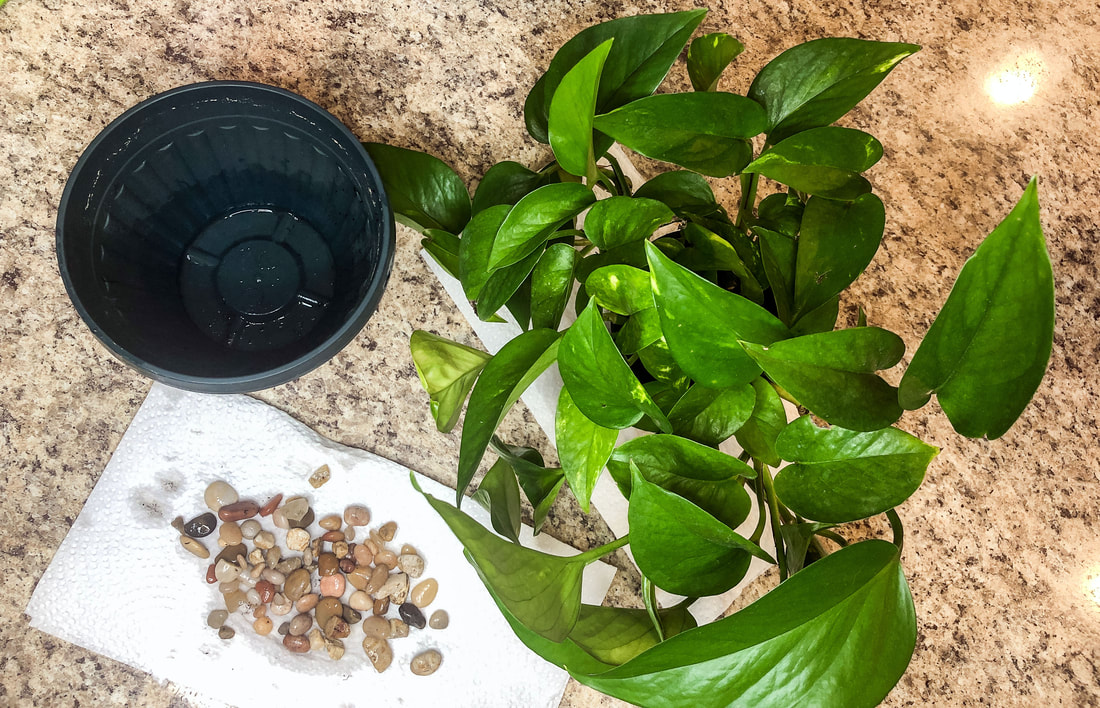 New pot is too small. Photo by Diane M. Lilly, 2022. You’re finally ready to plant! Now we get to the fun part—getting our hands dirty! Put some new soil mixture along the bottom of the pot, enough so that the new plant will sit more or less a little lower than the pot rim (about 1/2-1”). Hold the plant in place to judge how much soil to place at the bottom to get it to the right level at the top. Be careful not to plant too low or too high in the new pot. The idea is that you want to be able to water the plant without water and soil overflowing over the sides, but at the same time, you want the bottom leaves to get the proper light and air circulation. Once the plant is at the right height, you can fill the gaps around it with new soil. Once you’ve filled with the desired amount of soil, gently tap the pot a few times on the counter to help the soil settle into any air gaps. If the soil level has dropped, add more soil before watering. I use my fingers to gently tamp the dirt down, not to compact the soil but to secure the plant. 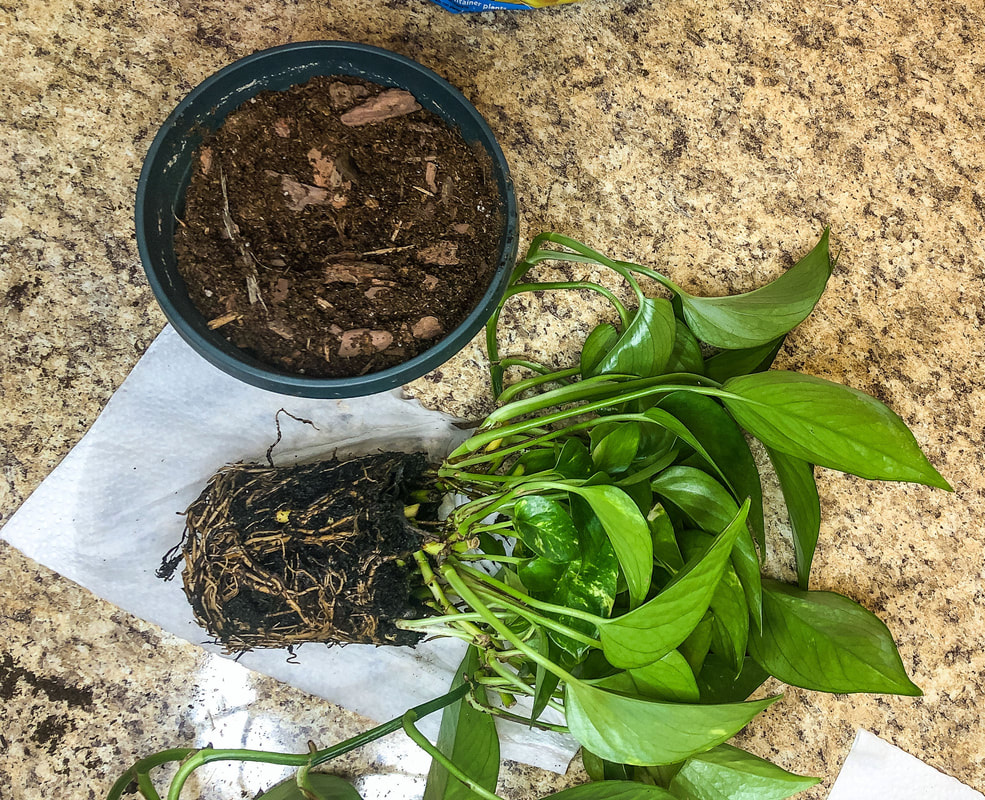 Pothos plant freshly watered with tangled roots sits next to a pot with its new soil mixture. Photo by Diane M. Lilly, 2022. 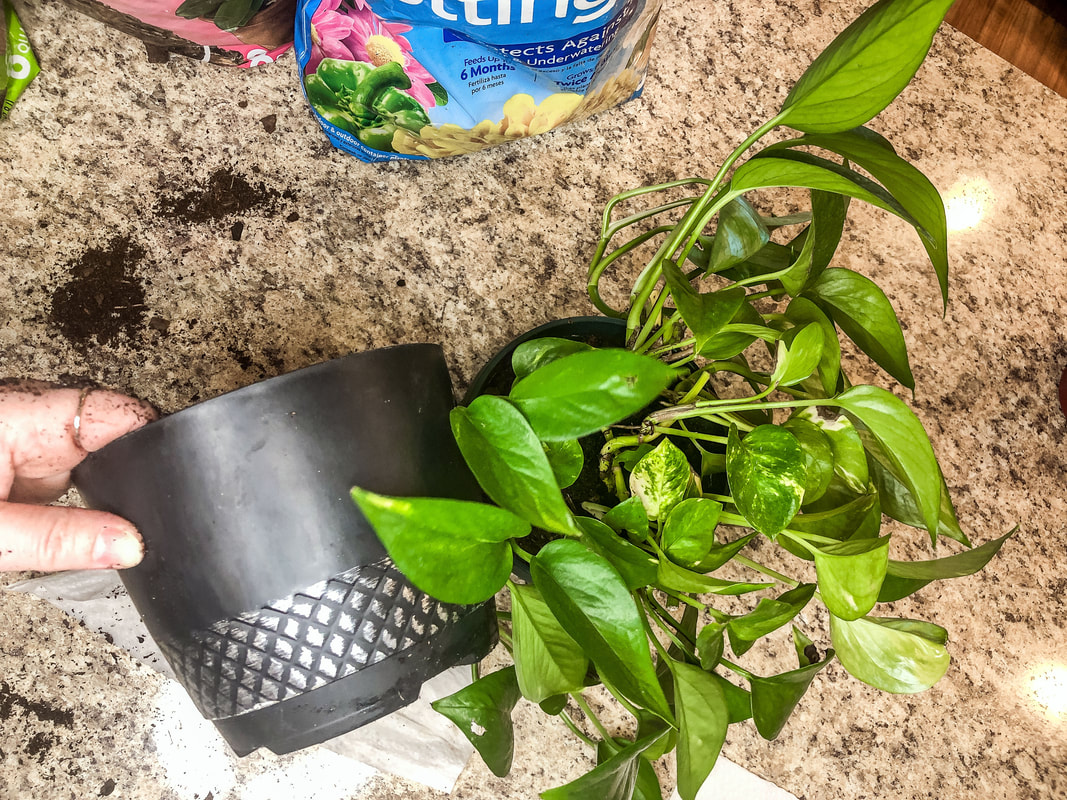 Bigger new pot for the pothos plant. Photo by Diane M. Lilly, 2022. 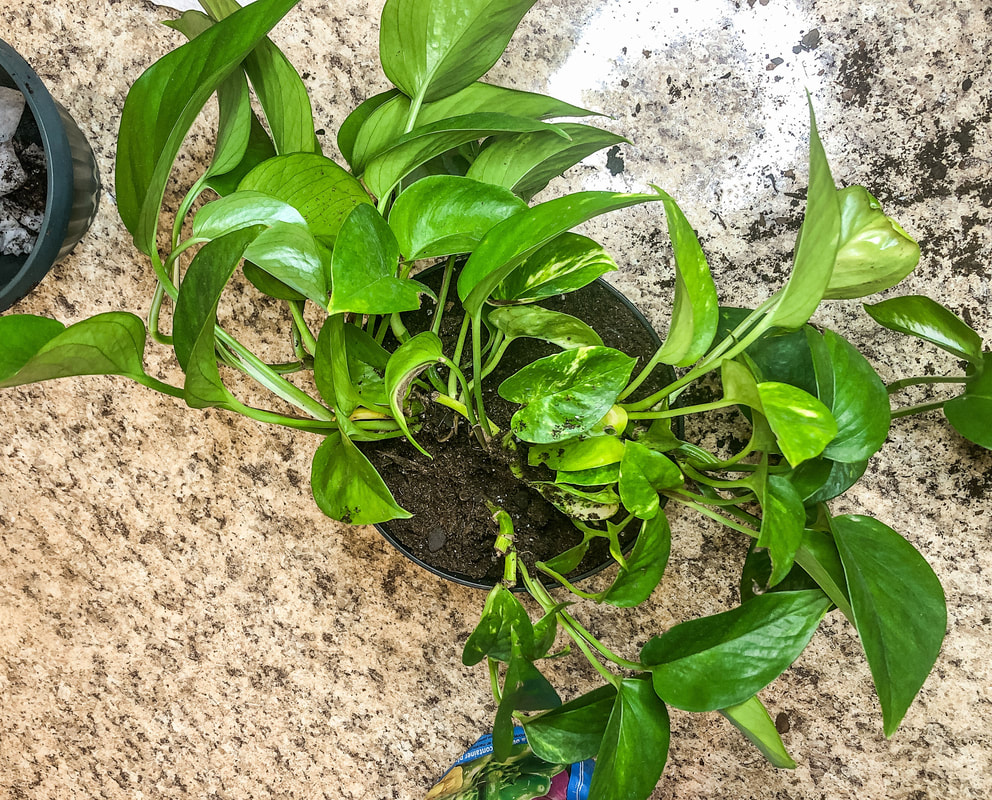 Pothos plant replanted in bigger pot. Photo by Diane M. Lilly, 2022.  Newly planted pothos plant with decorative stones. Photo by Diane M. Lilly, 2022. How to water your pothos Most plants need to be watered after they are transplanted to settle them into the soil and help alleviate the stress of the transplanting process. Now that your pothos is in its new home, water deeply until the water runs out of the drainage holes in the bottom. If the soil settles too much, add more to top it off. And that’s it! Place your plant in a well-lit area (see the next section) and keep an eye on it. You can try a little fertilizer in a month if it needs a boost. Pothos (like most houseplants) will benefit from being in a humid space (like a bathroom). Light needs for pothos plants As I’ve mentioned before, pothos plants are resilient. They are said to be a pretty good plant for those who may not have the greenest thumb or the perfect environment. Pothos like moderate light but will tolerate low light. I placed my new plant on a northeast-facing bathroom window, so it does get a small amount of direct sun in the morning, but for most of the day, it gets bright indirect sunlight. And it seems to love its new home! It’s already stretching its limbs and getting viny, which I love!  My newly planted pothos plant outside. Photo by Diane M. Lilly, 2022.  Another shot of my pothos plant outside. Photo by Diane M. Lilly, 2022.  Pothos plant on my back door step. Photo by Diane M. Lilly, 2022.  My pothos plant one week after replanting on bathroom windowsill. Photo by Diane M. Lilly, 2022. I’d love to hear in the comments if you have a pothos plant. Are any of you in the process of repotting your houseplants? Drop a line in the comments below if you have any tips for repotting houseplants to share! Related blogs you may want to read: Small houseplants that love bathroom humidity A spring decor makeover for my small rental bathroom How to propagate bromeliad pups Eight health benefits of decorating with plants Six herbs I planted indoors Let’s talk about houseplants Biophilia in interior design This article may contain a few items or commercial mentions, but I only used them for demonstration purposes only. I am not endorsing any particular product or receiving any monetary gain for this blog.  Top down view of my bromeliad mother plant and her newly planted pups. Photo by Diane M. Lilly, 2022. About bromeliads… Without getting too technical, bromeliads are a type of air plant or epiphyte, meaning the plant draws what it needs from the humidity in the air. This plant doesn’t technically need soil, but the soil does provide a way to anchor the plant into a pot and provide an extra boost of nutrients and water. In nature, an epiphyte’s roots attach to trees or other plants, anchoring them to a good place where they catch the best nutrients and humidity from the surrounding air.  Top down view of bromeliad plant in bloom with its vivid fuchsia leaves. Photo by Diane M. Lilly, 2021.  Bromeliad leaves. Photo by Diane M. Lilly, 2021.  Bromeliad plant in my front window. Photo by Diane M. Lilly, 2021. Some bromeliads are green and leafy plants that will begin to develop vividly colored leaves in the central part of the plant when the plant matures (which takes at least a couple of years). The plant will retain its vibrant color until it gets ready to fade and die. Once that time comes close, the mother plant will shoot out pups from the base of her bottom leaves. These pups will grow and draw nutrients from the mother plant, becoming the next generation of plants. The pups need to be at least a third of the size of the mother plant before they can be pulled apart and transplanted on their own. The longer they stay attached to the mother plant, the stronger they will be, and the sooner they will flower and develop roots. If they are removed when smaller, however, the mother plant will have enough time to put out more pups before she inevitably dies. Last year, I bought a gorgeous bromeliad with vibrant fuchsia leaves in the center. Sadly, she is now faded and dying, but before she goes, she has gifted me with four pups, which will become new plants for my home. And it is now time to transplant each pup into its own pot!  Bromelaid mother plant starting to fade. Photo by Diane M. Lilly, 2022.  Closeup of pups growing from the base of the bromeliad mother plant. Photo by Diane M. Lilly, 2022. Materials needed for this project: 4 small pots (about 3-4” in diameter) fungicide/rooting hormone sterile knife potting mix peat moss bark bin or container to mix soils 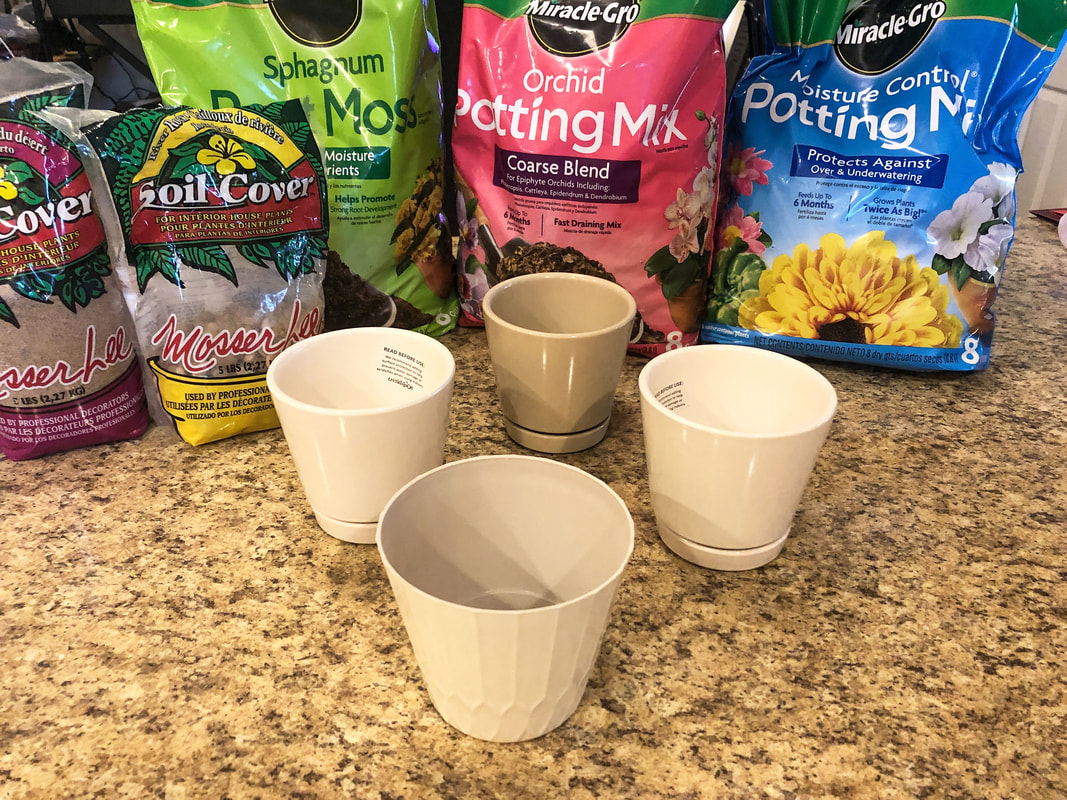 Pots and potting mix. Photo by Diane M. Lilly, 2022. Let’s talk about soil for bromeliads… Choose well-draining soil for bromeliads, as these plants—like most plants—don’t like sitting in soggy soil. Soil mediums like sphagnum peat moss, sand, and orchid bark may work well. Good potting soil with a mixture of bark and sand can also work well with bromeliads. Once your bromeliad is in the proper soil, the plant will not typically need repotting unless you propagate pups. Some soil mixtures suggested by the pros: Simple moist peat mix soil Sand mixed with a good draining potting soil Mix of 1/2 potting soil and 1/2 orchid bark Mix of 1/3 sand and 2/3 peat Soil mix in equal parts of perlite, peat moss, and bark Soil mix of 1/2 potting soil, 1/4 perlite, 1/4 bark The mixture I decided to use was based on what I had on hand. I used 1/2 potting mix, 1/4 sphagnum peat moss, and 1/4 orchid bark. I feel like this mixture will give my pups a good draining soil with just a little boost of nutrients to help them survive the trauma of separation.  My potting mix--potting soil, sphagnum peat moss, and orchid bark. Photo by Diane M. Lilly, 2022. Removing the pups from the mother plant… Before you start, you may want a sterilized knife for cutting the small plants away from the mother. (Make sure it’s sterilized--you don’t want to introduce any bacteria that could make the fragile plant sick.) First, gently coax the plant out of its pot by turning and squeezing the pot to loosen the soil from the sides. Once the plant is free of the pot, start to loosen the soil a bit by gently massaging around the base of the plant. This will help you find the roots better, see where the plants are connected, and find the shield leaves between the mother plant and pup. I do not cut into the plants unless necessary, so I use my fingers to continue to loosen the soil and gently—and slowly—nudge the pup away from its mother. If you really must, you can use the sterilized knife to cut the two apart, keeping a piece of the mother plant attached to the pup. 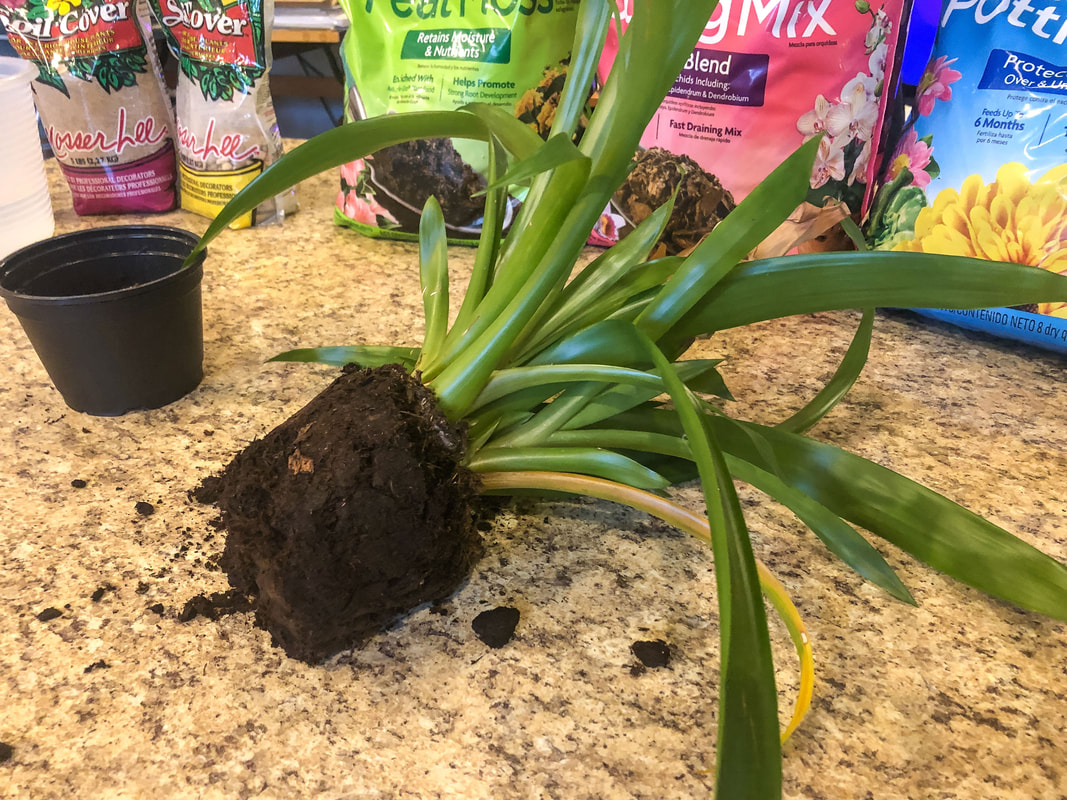 Bromeliad plant removed front its pot. Photo by Diane M. Lilly, 2022. The pup may have roots by now, but it may not, and that’s okay. (Only one of three of my pups had a root of its own.) The plant will grow roots once planted in its pot. You should dip the base of the pup in a fungicide and rooting hormone before placing it in the soil to get this process moving. (See below for notes on rooting hormones.) Do not plant the pups deep; prop up top heavy plants with sticks. If the mother plant is not too far gone, she can be placed back in the soil in a pot, and she might grow more pups. Water the plants well and wet the leaves. 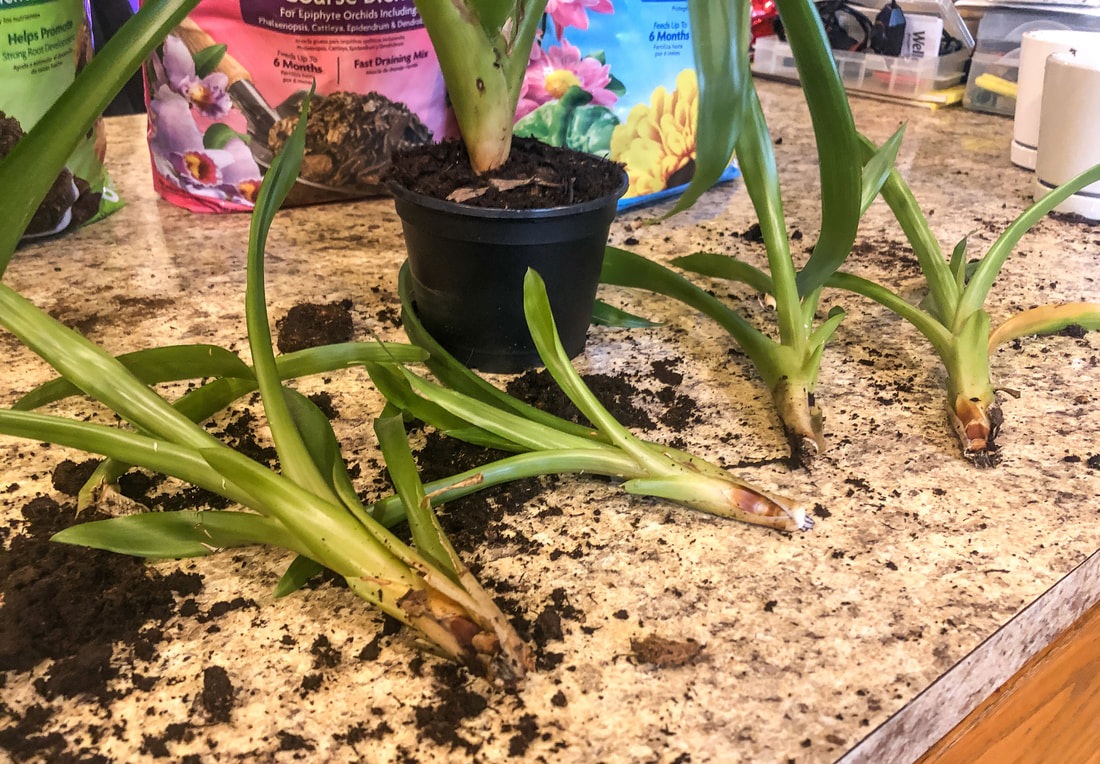 Four bromelaid pups separated from the mother plant. Photo by Diane M. lilly, 2022. Rooting hormone conundrum… So, in my haste, I forgot to buy rooting hormone and fungicide! Many plants need this step to help kill any fungus or bacteria from the cutting/separation process and to help them grow roots. So…I had to do a little quick research on how to make my homemade rooting hormone. Some ideas I found on Gardening Know How for homemade rooting hormone: Apple cider vinegar and water used sparingly. (Apple cider vinegar is used to kill weeds in the garden, so you don’t want to use too much.) Human spit…Ewww! Sounds a little disgusting, but apparently it works! Natural honey, not store-bought. Honey has anti-bacterial benefits, which is good for the new plants. Aspirin dissolved in water. Willow water or willow tea. Cinnamon in powder form to form a coating on the root area. It is an anti-fungal, antibacterial agent, and an insect repellent. Pulp from an aloe vera plant. I used apple cider vinegar and water as a rooting hormone and fungicide for this project, applying a thin coating to the plant base. Then, I popped the pups into the soil mixture and watered all the plants. The rooting hormone problem is solved! 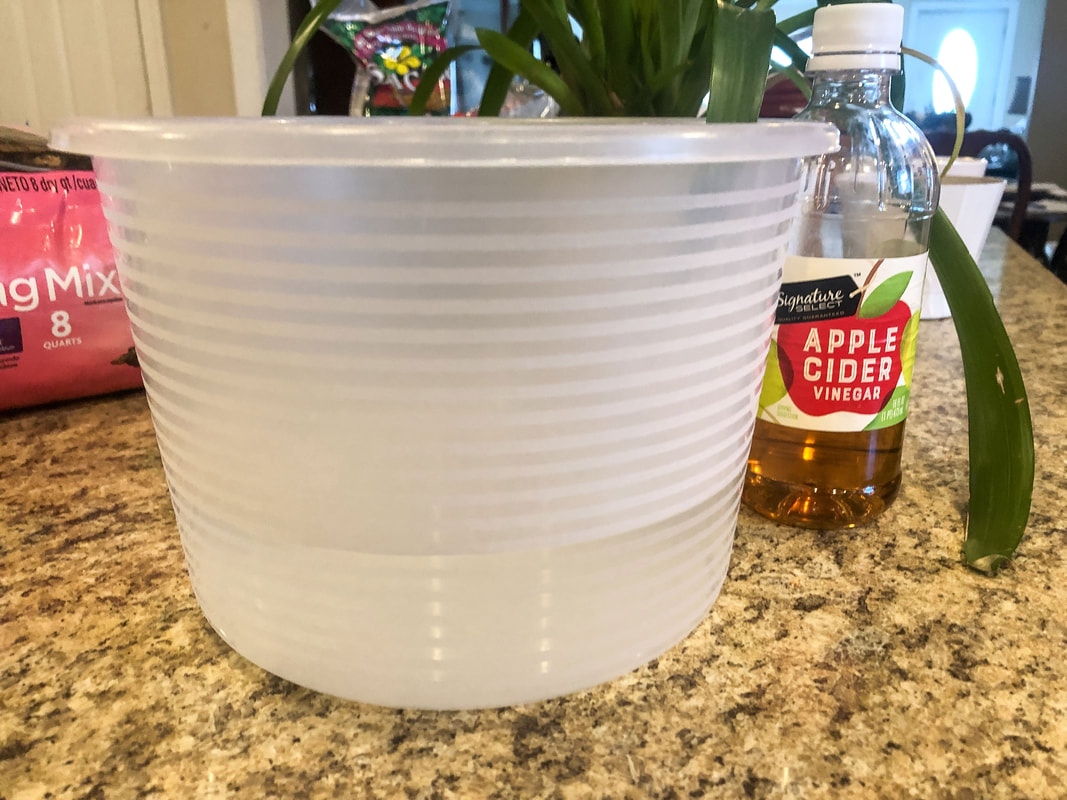 Apple cider vinegar and water, homemade rooting hormone. Photo by Diane M. Lilly, 2022. 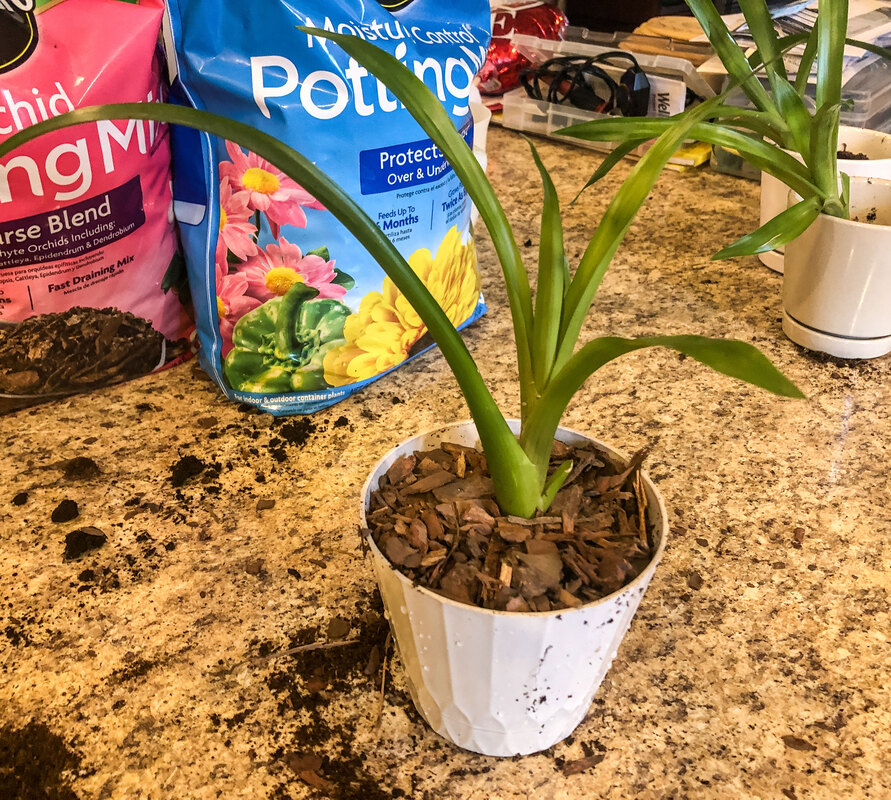 Newly planted bromeliad pup. Photo by Diane M. Lilly, 2022. 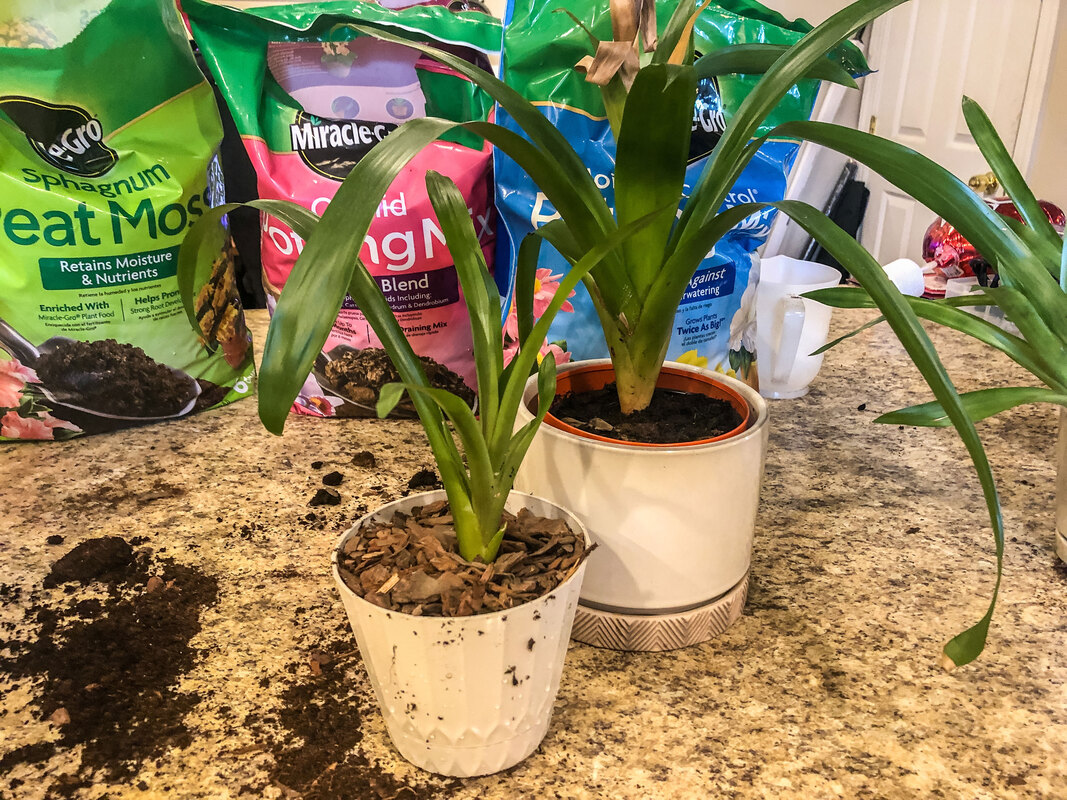 Newly planted bromeliad pup with mother plant. Photo by Diane M. Lilly, 2022. Water & light needs for bromeliads… The bromeliads are watered by pouring water into the cups or spaces between the bottom leaves rather than in the soil. They can be misted as well to create a little more humidity. Water the plants infrequently and only when needed in the winter. This plant does not like sitting in wet soil. It will rot and die! Distilled or purified water is best, but I use tap water that sits for a day or two to let harmful sediments settle to the bottom of the watering can. Bromeliads don’t necessarily need fertilizer, but you can mist the plant with orchid fertilizer in the warmer months (diluted by half). Your new bromeliad plants need bright indirect light and keep newly planted pups out of direct sunlight for a while. 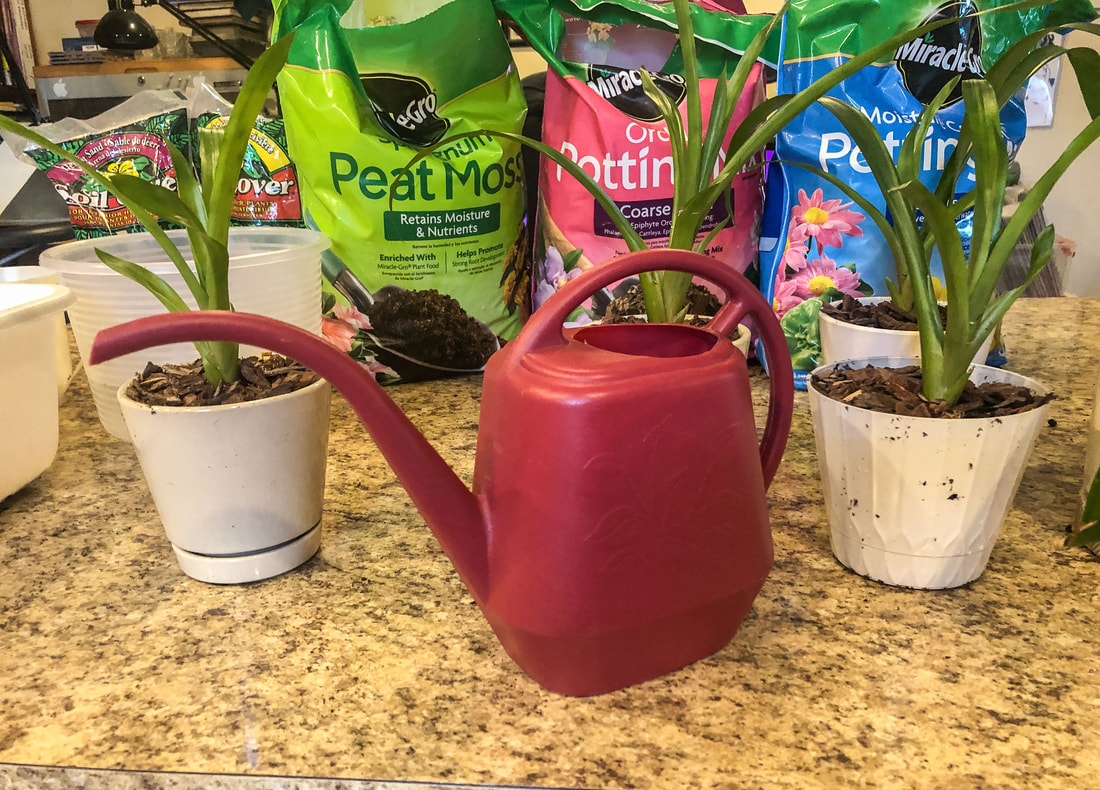 Watering can and newly planted bromeliad pups. Photo by Diane M. lilly, 2022. 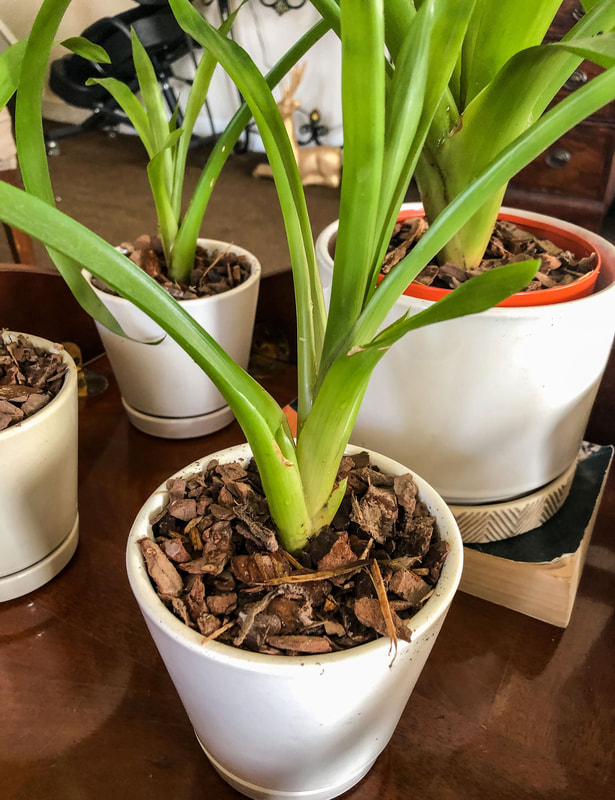 Closeup of newly planted bromeliad pup. Photo by Diane M. Lilly, 2022.  My new bromeliad family--mother plant and her four newly planted pups. Photo by Diane M. Lilly, 2022. Was this helpful to some of you? Drop a comment below with any more tips for handling these gorgeous plants! Related blogs you may want to read: Small houseplants that love bathroom humidity Eight health benefits of decorating with plants Six herbs I planted indoors Let’s talk about houseplants Biophilia in interior design A spring decor makeover for my small rental bathroom This article may contain a few items or commercial mentions, but I only used them for demonstration purposes only. I am not endorsing any particular product or receiving any monetary gain for this blog.  Pothos plant just misted. Photo by Diane M. Lilly, 2022. I have been refreshing the decor in my master bathroom and decided to add some greenery to the mix. Adding plants in a bathroom is a win-win for everybody. The plant gets plenty of humidity (which many tropical plants love), and we get a sense of healing and calm. If you’re using your shower regularly (which I hope you are!), your plants will benefit from the humidity in the air. If you have a window for natural light, that’s even better. Typically, tropical plants are the best for bathrooms or areas with high humidity. So, while redecorating my bathroom, I explored options for houseplants in that space. This is a small space that cannot accommodate large plants. The goal was to find two or three “smallish” plants that could sit on a small windowsill and possibly on the counter. I wanted one of those plants to be a vine. This bathroom gets some light but nothing direct. It is on a northeast axis, so the brightest light is in the morning hours.  Snake plant in my bathroom. Photo by Diane M. Lilly, 2022. Do your homework before incorporating plants into your space. Take the time to learn what type of plants will thrive in the intended environment. A happy, healthy plant should occupy a space that is more or less suited to the environment they might find in their native environment. This means you will need to learn a thing or two about plant care to help your plant babies thrive! Below are 15 humidity-loving plants I considered for use in my bathroom, and I’ll tell you at the end which ones I chose… Air Plant (Tillandsia, aka Tilly)—This plant is an epiphyte, or air plant, that pulls its moisture from the air (they don’t need soil). These little plants need to be soaked in water once a week so they don’t dry out. This plant likes bright indirect light.  Air plant on coffee table. Photo by Diane M. Lilly, 2021. Aloe Vera—Aloe is a type of succulent that thrives in bright light. It may even flower if in direct light. This plant does not need a lot of water. It tolerates a little neglect but will appreciate the humidity just the same. As a bonus, the extract from leaves heals sunburn and other skin issues!  Aloe vera plant on my windowsill. Photo by Diane M. Lilly, 2021. Bromeliad—This very tropical-looking plant is related to pineapples and likes medium to bright indirect light. It’s perfect for the bathroom because it likes humidity, so don’t let it dry out. It’s not a plant that needs a lot of care or watering. To water it, fill the cups formed at the leaf base. (The soil does not need water, as the plant is an air plant and does not need soil to survive.)  Bromeliad bloom in vivid fuchsia. Photo by Diane M. Lilly, 2021. Calathea—This leafy plant needs a lot of humidity and likes moderate indirect light, making it a good option for most bathrooms.  Image by Christina Dahl on Pixabay. English Ivy—Ivy is such a dangly, viny plant! It is a resilient plant that can grow in many environments but prefers medium light and humidity.  Image by veera on Adobe Stock. Eternity Plant (aka ZZ Plant)—This plant is easy to care for and can tolerate a little neglect. It is ok in low light, prefers bright indirect light, but leaves curl if it gets too much light. Don’t overwater, just water when the soil dries out. Be aware this plant is toxic for pets.  Image by fabrizio on Adobe Stock. Fern—Ferns love humidity and indirect light. They are an easy plant to care for and will thrive in many environments. Mist them and keep them in moist loamy soil. They are also nontoxic to cats.  Image by Bruchex Benoit on Adobe Stock. Haworthia—Like the aloe, this is a type of succulent. It needs bright light and can tolerate humidity in the bathroom.  Top down view of my Haworthia plant. Photo by Diane M. Lilly, 2022. Lucky Bamboo—This plant is not bamboo but a type of dracaena. It can grow in soil or water and is a very low-maintenance plant. It can grow in low light, but like any plant, it will do better in medium to bright indirect light (although not direct sunlight). This plant does like a little humidity, and the leaves will brown when not consistently watered. Lucky Bamboo is toxic to pets and children. (Ferns N Petals has an interesting article on the symbolism and history of this tall leafy plant.)  Leaves on the Lucky Bamboo plant sitting on my coffee table. Photo by Diane M. Lilly, 2021. Peace Lily—This leafy dark green plant flowers when healthy (about two times a year) and has good bright indirect light. It is a tropical evergreen plant that likes humidity and being in moist—but not soaked—soil. This plant will tell you when it wants water—its leaves droop when the soil is too dry. Just give it a deep watering, then let the soil dry out before watering again. Peace lilies like shade and indirect light, and the leaves curl when exposed to too much direct light. This is another plant that is toxic to pets and children.  Image by Belight on Adobe Stock. Peperomia—This is a tropical plant that likes bright to indirect light. The humidity in the bathroom will appeal to it for sure.  Image by ChrWeiss on Adobe Stock. Philodendron—This vine plant is easy to care for, likes humidity, and will tolerate neglect and sporadic watering.  Image by hartono subagio on Pixabay. Pothos (aka Devil’s Ivy)—Another vine plant, this green tropical baby is easy to care for and does well in low to bright indirect sunlight. It needs humidity to keep the tips of its leaves from drying out, so a bathroom is a good home for it. Just water when the plant dries out (when the plant leaves droop). This one is also toxic to pets and children.  Pothos plant on my coffee table. Photo by Diane M. Lilly, 2022. Snake Plant (aka mother-in-law’s tongue)—A succulent that stores water in its leaves. It is a very hardy plant and easy to care for, good in most environments, and will thrive in a bathroom with humidity. Water once every couple of weeks when the plant dries out. Snake plants like low to bright indirect light and will flower if the conditions are right. Toxic to pets and children.  My new snake plant at home in my bathroom. Photo by Diane M. Lilly, 2022. Spider Plant—These fun plants can grow in low light but thrive more in bright light, although they burn in direct light. Spider plants are versatile and can grow in any environment but will thrive with humidity. This plant will put out babies—or spiderettes. Water well when dry. Spider plants are also non-toxic to pets.  Image by AHatmaker on Adobe Stock. So, which ones did I choose for my project? I wanted to use as many plants already in my possession as possible for this project to save money. I already had a Bromeliad, a Tillandsia, peace lilies, Lucky Bamboo, a Haworthia plant, and an aloe plant. I decided the Peace Lilies and Lucky Bamboo were too big for the space and were not a good option for my bathroom needs. I did have a Bromeliad plant with four “pups” to be propagated, so I decided one of those pups would go in the bathroom. And the little Tillandsia plant—which struggles in my living room—will love sitting with its plant buddies on my windowsill, soaking up the humidity!  Top down view of bromeliad plant that has lost its bloom. Photo by Diane M. Lilly, 2022. I found a snake plant at my local garden store that perfectly fit my windowsill. And while I was there, I discovered my vine plant—a pothos. I’ve heard pothos are easy for even the blackest thumb, but this plant is supposed to love the humid conditions in bathrooms, so it checked off two boxes for me. And that’s my bathroom redecorating project done!  Snake plant, pothos, and bromeliad sitting on my bathroom windowsill. Photo by Diane M. Lilly, 2022. Are you thinking of incorporating plants into your bathroom decor? Or do you already enjoy plants in that space? Leave a comment below and let me know… Related blogs you may want to read: How to propagate bromeliad pups A spring decor makeover for my small rental bathroom Eight health benefits of decorating with plants Six herbs I planted indoors Let’s talk about houseplants Biophilia in interior design This article may contain a few items or commercial mentions, but I only used them for demonstration purposes only. I am not endorsing any particular product or receiving any monetary gain for this blog.  Burning finished homemade soy candle with eucalyptus and spearmint fragrance. Photo by Diane M. Lilly, 2022. There’s nothing like homemade, right? I used to work in a store where I merchandised candles and could never resist the urge to smell every new scent I unpacked. There’s just something about the allure of scented candles that’s irresistible! There’s just one thing about store-bought candles, though…They are full of pollutants I don’t want in my house. I decided to learn how to make homemade candles several years ago...and I was hooked! Making scented candles is not hard, but it takes some trial and error to get the process right. When the process is perfected, you end up with a candle that burns steady with a nice pool and has a hot throw. Today’s project is to make soy candles with this incredible fragrance oil (FO) from Nature’s Garden Candles called Eucalyptus and Spearmint. This is a wonderfully fresh scent that honestly would smell amazing in homemade soap! But today’s project is candle making…So here is my process and recipe for homemade eucalyptus and spearmint soy candles…  The Eucalyptus and Spearmint FO used for this project. Photo by Diane M. Lilly, 2022. The materials you will need… Scissors, hot glue gun, syringe for the FO, eye dropper for the candle dye, candy thermometer, wax melting pot, two pots for water (one for hot and one for cold), stirring sticks, more sticks to prop up the wicks, rubber bands, a heat gun (or hair dryer), pre-tabbed wicks (or wicks and tabs that you assemble yourself), your fragrance oil of choice (make sure it is candle safe), candle safe colorant, your wax of choice (I will be using soy wax), and a candle safe container for your homemade candle.  Materials for melting the wax: melting pot, green candle dye, stirring stick, candie thermometer, eye dropper, small glass bowl, glass syringe, Eucalyptus and Spearmint FO. Photo by Diane M. Lilly, 2022.  Popsicle sticks and rubber bands work well for holding the wick in place during pouring. Photo by Diane M. Lilly, 2022.  Heat gun. Photo by Diane M. Lilly, 2022.  Hot glue gun for wicks. Photo by Diane M. Lilly, 2022. About the wax, wicks, fragrance oil, and candle dye… When I make homemade candles, I usually use 464 soy wax. I measure out about a pound—give or take—of dry wax flakes, which will melt down to about 18 fl. oz.  464 soy wax for this project. Photo by Diane M. Lilly, 2022. As a rule, you should use 1-1.5 fl. oz. of fragrance oil for each pound of soy wax. For this project, I measured out 40 ml—just over 1 oz—of Nature’s Garden Candles Eucalyptus and Spearmint fragrance oil. (The amount of FO you use will depend on your wax and the properties of the fragrance oil, such as flashpoint.) The wick type chosen for this project is the 1400 hemp core wick, used for 2.5-3.5 diameter containers. My glass tea cups fall into those parameters nicely, so this wick should be perfect. Different types of wicks work for different varieties of waxes and candles, or even just personal preferences, and what you choose will come down to trial and error and learning what works best for you.  Hemp core wicks for this homemade candle project. Photo by Diane M. Lilly, 2022. And finally, candle dye. Hunter Green Nature-Friendly Candle Dye is what I will be using for today’s candles, about two drops (green is a saturated color).  Green candle dye for this project. Photo by Diane M. Lilly, 2022. Choosing and prepping your container… I love buying from thrift shops and repurposing, so for this project, I'm making homemade candles with a few beautiful glass tea cups purchased from a local second-hand store. Use anything you like to make homemade candles--just as long as the container is candle-safe--and never leave your burning candle unattended.  Thrifted glass tea cup to be used for this homemade candle project. Photo by Diane M. Lilly, 2022. Prep your clean room-temperature containers using a hot glue gun to secure the wick tabs to the bottom. The wicks can be held in place (to prevent them from moving during the pouring process) with sticks and rubber bands.  Glass tea cups with wicks set. Photo by Diane M. Lilly, 2022. Prepping the work surfaces… If you value your counters or tables (or whatever surfaces you will be using for this project), do yourself a favor and spend a little time carefully covering them with layers of newspaper, cardboard, or plastic tablecloths. Fragrance oil and candle dye can be challenging to remove from certain surfaces! And have plenty of paper towels, old rags, and newspapers for cleanups and spills. If you spill any wax, FO, or dye, clean it immediately with soap and water. Try to be mindful of how you handle your materials to prevent drips and spills. Melting the candle wax… Fill a large pot halfway with water and place it on the stove. Pour your dry wax flakes into the wax melting pot and place this container into the large pot on the stove. It’s ok if it floats a little. Boil the water and keep an eye on the melting wax. (Do not leave unattended.) Once all the wax is melted, monitor the temperature with a candy thermometer. The melted wax is ready for fragrance oil when the temp reaches 185 degrees F. (This is the temperature for my particular type of wax and FO. You will follow any directions for your own choices.) Turn off the burner, and stir the wax and FO well. Add candle dye, stirring frequently, until everything is thoroughly blended.  Soy wax flakes in metal melting pot inside a larger pot partially filled with water. Photo by Diane M. Lilly, 2022. Let the candle wax cool (mixing occasionally) to 110 degrees F or less or until slushy. I like to let the wax cool in the hot water for a few moments, then transfer it to a second pot with a couple of inches of cool water. Continue stirring the wax as it cools. Add a few ice cubes to speed up the process and continue stirring. (Do not cool down the wax too quickly--you won't get a good pour.)  Wax melted down and green dye and FO added. Photo by Diane M. Lilly, 2022.  Ice cubes added to cold water to help cool down the wax a little faster. Photo by Diane M. Lilly, 2022. Pouring the candle wax… Pour cooled, slushy wax into your containers VERY SLOWLY, keeping an eye on the wick so it stays centered. Take your time--don’t be in a rush. Pouring too quickly can cause air bubbles and cave-ins around the wick. If this should occur, remelt the top and pour more wax into the holes. Some prefer to do this step in two pours, but lines sometimes appear if you don’t get it right. If I have any extra wax left in the pot after filling my containers, I will pour the remaining wax into votive or wax melt molds sprayed with vegetable oil. This project yielded enough wax to fill six tea cups and three molds.  Eucalyptus soy candles just poured. Photo by Diane M. Lilly, 2022.  Eucalyptus scented soy candles just poured and setting. Photo by Diane M. Lilly, 2022.  Glass tea cups and metal wax molds just poured. Photo by Diane M. Lilly, 2022. Let your candles cool and cure… Once your candle wax has been poured, leave the candles alone for an hour or so while they cool down and set. When the wax is thoroughly cooled and hardened, you can trim the wicks and store them for 48 hours to two weeks before burning. You will not be able to burn your new candles immediately! The candles need time to cure. The curing time will depend on the type of wax used. You can use this curing time to assess the cold throw—the scent in the room when the candle is not burning.  Eucalyptus and Spearmint candles curing alongside Mountain Hazelnut Cafe candles (from another project). Photo by Diane M. Lilly, 2022.  Homemade eucalyptus and spearmint soy candle curing. Photo by Diane M. Lilly, 2022.  Glass tea cups and metal molds filled with homemade soy wax with a eucalyptus scent. Photo by Diane M. Lilly, 2022. Cleanup tips… Be very careful not to dump wax residue down the drain. Wipe pots and utensils with paper towels, rags, or newspaper to remove excess wax. You can rinse all your supplies in soapy water once all the wax is removed. Stubborn wax can be remelted with a hair dryer or heat gun and then wiped down. Wash anything with fragrance oil with soap and water immediately. It may take a few washes to get rid of the scent. As for the candle dye, be very careful with this stuff! It does stain, and the stain is usually permanent. Use soap and hot water to clean anything with candle dye on it. My new homemade eucalyptus and spearmint soy candles… It took an hour to make these eucalyptus and spearmint soy candles! What do you think? Have you made any of your own, and do you have tips to share? Have I inspired you to get in that kitchen and make your candles? Leave a comment below and let me know!  Glass tea cup with eucalyptus scented soy wax curing after a pouring. Photo by Diane M. lilly, 2022.  Wax warmers from my homemade soy wax candle projects. Photo by Diane M. Lilly, 2022.  Hand made soy wax candle in a glass teac cup, first burn. Photo by Diane M. Lilly, 2022.  Interesting top-down shot of the eucalyptus soy candle burning. Photo by Diane M. Lilly, 2022. Related blogs you may want to read: Homemade candle recipe with a hazelnut fragrance Winter color palette ideas for your home decor Nine design trends for 2022 Eight ways to create cozy winter interiors after the holiday decor comes down Nine hygge decor ideas This article may contain a few items or commercial mentions, but I only used them for demonstration purposes only. I am not endorsing any particular product or receiving any monetary gain for this blog.  Burning a homemade candle with hazelnut fragrance. Photo by Diane M. Lilly, 2022. It’s cold outside…and I’m on a mission to make the inside of my home feel cozy. If you’ve read any of my recent blogs, you’ll know by now that I am currently embracing a common theme—hygge. Hygge is a Danish concept of finding joy and coziness in your everyday life, and candles are a core part of that life view, especially in winter. And as it turns out…I know how to make my candles! It’s been several years since I’ve made homemade candles, and I’ve been seriously missing the way my whole house used to be filled with beautiful scents for days and days. It’s been so long since I’ve made candles I wasn’t entirely sure I would remember the process, but thankfully, it all came back to me! And—spoiler alert—they turned out amazing! So, for this project, I decided to break the ice with a simply delicious fragrance called Mountain Hazelnut Cafe. I decided to talk you through my process, step by step, so you can follow along and see how homemade candles are made. So here goes… The materials you will need First, you will need a container that is candle-safe. I am using glass tea cups for this project purchased from a local thrift shop.  Glass tea cup from a thrift store. Photo by Diane M. Lilly, 2022. You'll also need to purchase candle wax. I use soy wax because it is more environmentally friendly. Candle wax can be bought at places like Michaels, but I purchase most of my candle supplies online from Natures Garden Candles because I love their products.  464 wax. Photo by Diane M. Lilly, 2022. You'll need wicks and tabs for a burning candle (as opposed to a wax melt). Michaels sells wicks and tabs, but better quality supplies can be sourced elsewhere. You can buy wicks and tabs separately and assemble them yourself, but I prefer pre-made hemp core wicks with attached tabs from Natures Garden.  Hemp core wicks. Photo by Diane M. Lilly, 2022. Use fragrance oil and additives specifically for candles. Contrary to what you see on Pinterest, you can't just throw anything into a candle, as it can be a fire hazard. (I learned this the hard way!)  Mountain Hazelnut Cafe Fragrance Oil. Photo by Diane M. Lilly, 2022.  Brown candle dye. Photo by Diane M. Lilly, 2022. Misc. materials needed—Scissors, hot glue gun, syringe (for FO), eye dropper (for dye), candy thermometer, metal pot for hot water, metal pot for cold water, pot for melting wax, stirring sticks, sticks and rubber bands for propping wicks, heat gun or hair dryer, glass bowl or cup to hold FO, paper towels, newspaper, cardboard, plastic tablecloth.  Counter prepped for today's candle making project. Photo by Diane M. Lilly, 2022. Prep your workspace Prep all of the surfaces you will be using for this project! FRAGRANCE OIL IS DIFFICULT TO REMOVE FROM SURFACES, AND CANDLE DYE DOES PERMANENTLY STAIN! Protect your counters and work surfaces with plastic tablecloths, newspaper, and cardboard, and have plenty of paper towels and disposable rags on hand for quick and easy cleanup. Clean any drips or spills immediately with soap and water. Prep your candle containers Start with clean containers that have been washed with soap and water and are at room temperature. Use a hot glue gun to secure wicks to container bottoms. Prop the wicks in place using sticks and rubber bands (or any other technique that works for you).  Glass tea cup with wick prepped and propped. Photo by Diane M. Lilly, 2022. About the wax… You can use any desired wax, but I am using 464 soy wax. Each wax (and fragrance oil) has specific temperature criteria, which we’ll talk about in a minute. There are different types of soy wax, but 464 soy sets creamier than, say, 415 soy wax. I used to use 415 but hated the frosting when the candles set. For this project, I used two full measuring cups of dry wax flakes (equal to 1 lb 3 oz). These flakes will melt down to half, or about 18 fl. oz. (The melted wax goes a lot further than it looks!) About the wick… There are many options for candle wicks, and the ones you use will depend on your wax and chosen scent. My wick type is a pre-tabbed 1400 hemp core for use in a 2.5"-3.5" diameter container (my container is 3 1/4” diameter). About the fragrance oil… I used 30 ml (equals 1 fl oz) Mountain Hazelnut Cafe FO for this project. (Always use candle-safe FOs.) This is a strong scent, so I am not exceeding 1 fl. oz. Generally speaking, you should use about 1-1.5 oz of FO (30-40 ml) for each pound of soy wax. The amount of FO you will use for our project will depend on your wax type, the amount of wax used, your candle dye, and the specific properties of your FO. This is not a cut-and-dry process, as each part depends on a combination of factors and often requires trial and error to get it right. Just be careful not to add too much FO due to fire hazards. About the candle dye… My candle dye is Brown Nature Friendly Candle Dye from Natures Garden Candles. I intended to use three drops but accidentally added four or five! But the finished product came out perfect...So, no harm, no foul! The melting process… And now we begin! Fill a large pot halfway with water. Place on the stove. Have a second pot nearby filled with a couple of inches of cold water. Pour your dry wax flakes into your wax melting pot and place this pot right into the large pot on your stove.  Wax melting pot placed into larger pot partially filled with water. Photo by Diane M. Lilly, 2022. Boil the water until all of the wax melts down to a liquid.  Wax melted down with fragrance oil and colorant added. Photo by Diane M. Lilly, 2022. Use the candy thermometer to monitor the temperature of the melted wax. For this specific wax type and FO, the temperature should reach 185 degrees F.  Small glass bowl is handy for measuring out the fragrance oil. Photo by Diane M. Lilly, 2022. NEVER LEAVE MELTING WAX UNATTENDED. Add fragrance oil and mix well, then turn off the burner. You can add the candle dye now and stir well. Let the candle wax cool to 110 degrees F or less—or until slushy—mixing occasionally and monitoring with the thermometer. I use a second pot with cold water (with ice cubes added if necessary) to cool down the wax to an ideal pouring temperature (110 or below, or when it’s like slush) but don’t cool too quickly, or your pouring process may not go well. The pouring process… So take a deep breath and don’t be in a hurry during this step. Pour cooled wax into your containers to the desired height. Pour VERY SLOWLY to prevent cave-ins and air bubbles, keeping an eye on the wicks so they stay centered and don’t move. If the wax starts to set in your pouring pot, quickly dip it into your pot of hot water to remelt and continue pouring.  Shortly after pouring, wax is setting and looking good. Photo by Diane M. Lilly, 2022.  Wax setting in the glass tea cup. Photo by Diane M. Lilly, 2022. I always have a little extra wax after filling my candle containers. This wax gets poured into a few votive holders or wax melt molds sprayed with vegetable oil to prevent sticking.  Metal floating candle molds and votive holders for the extra wax. Photo by Diane M. Lilly, 2022. Five tea cups and seven wax melt molds were filled in this project.  Candles setting about an hour later. Photo by Diane M. Lilly, 2022. If you see holes and cave-ins, you can do a second pour, but a line may show where the second pour began, so it’s always better to do it right the first time! Pour slowly (and at the right temp), and you should be fine. The cooling process and curing It will take a couple of hours for the candles to set enough to be moved, so just let them alone until you see that the candles are pretty much solid, and then you can move them somewhere out of the way to cure for up to a couple of weeks before you burn them. You could try to burn them after 48 hours, but the longer you let them cure, the better they will burn.  Candle is setting beautifully, with no cave-ins and a nice smooth finish. Photo by Diane M. Lilly, 2022. Once the candles are set well, trim the wicks to 1/4-1/2 inches and clean up any drips around the edges. The cleanup Do not dump wax residue down the drain! Melt the wax (with a hair dryer or heat gun) until it’s manageable enough to wipe off with paper towels or newspaper. Wipe containers until no more wax is on the surface, then rinse in water and towel dry if you like. Wash anything with fragrance oil with soap and water immediately. Use soap and hot water to clean the dropper used for the candle dye. Tip for cleanup…I highly recommend having a hair dryer or heat gun on hand. It is much easier to clean up the wax when it is melted! Final product! So here is my final product… I noticed an issue with adhesion with some of my glass tea cups, where some of the candle looks darker in places through the glass. This is usually because the containers weren’t warm enough when the wax was poured. It doesn’t affect the burn at all, but it messes up the appearance of your pretty candle due to the wax not adhering uniformly. A heat gun can be used to remelt the areas that need more adhesion if the defects bother you. It has been my experience that remelting the wax can sometimes cause frosting and discoloration, so I just left my finished candles alone.  Candle set with a little issue with adhesion to the inside of the glass. Photo by Diane M. Lilly, 2022.  Candle is set, and now waits at least 48 hours to cure. Photo by Diane M. Lilly, 2022.  Wax melts are set and curing for at least 48 hours before use in a warmer. Photo by Diane M. Lilly, 2022.  About a week later and the candle is ready to burn. Photo by Diane M. Lilly, 2022.  This homemade hazelnut candle has burned beautifully, with a fragrant hot throw, no smoking, and a nice pool. Photo by Diane M. Lilly, 2022. I am so happy with my new candles…And my house smells incredible! Let me know in the comments below if you have ever made candles. Feel free to post any tips or questions about making homemade candles! Related blogs you may want to read: Homemade candle recipe with a eucalyptus fragrance Winter color palette ideas for your home decor Nine design trends for 2022 Eight ways to create cozy winter interiors after the holiday decor comes down Nine hygge decor ideas This article may contain a few items or commercial mentions, but I only used them for demonstration purposes only. I am not endorsing any particular product or receiving any monetary gain for this blog.  Corner closeup of finished stool. Photo by Diane M. Lilly, 2021. A few years back I bought a beat up second hand vintage foot stool with the idea that I would reupholster it and give it a new lease on life. Once it was taken apart, however, I came up with another idea… It was 2018, and I was toying with an idea of wrapping jute twine around the horizontal rails of this second hand foot stool to create a plant stand. For the life of me, I can’t remember from where the idea came, but somehow the universe inspired me to try out something a little “boho” (which is not my usual style, which leans more toward the Traditional end of the style spectrum). The “vision” was to create a plant stand with a weave effect using durable jute twine. The finished stool made for a perfect plant stand for my living room! As time went by though, the twine became stained from careless watering (shame on me)…  Finished stool from 2018. Photo by Diane M. Lilly. Fast forward to now (2021)…It was high time that stool got some love, right?! I bought some fresh jute twine (about 4 skeins) from Amazon and got to work giving this stool a facelift. Previous experience showed me just how monotonous and repetitive this type of project can be. The ultimate effect looks great, but—like most things creative—it’s not fun in the moment! My work area became my living room floor, conveniently situated in front of the television so I could be entertained while I wrapped…and wrapped…and wrapped…and wrapped. And my fur babies were equally entertained! They got excited, thinking I was making them a new toy, silly kitties! Try doing anything with string around cats…Shit gets interesting!  My two fur babies playing with my twine. Photo by Diane M. Lilly, 2021.  My fur baby trying to eat the twine! Photo by Diane M. Lilly, 2021. Anyway, after wasting time amusing myself watching my cats be amused, I steeled myself for the inevitably tedious task of wrapping, pulling, pushing threads tightly together, and looping around again, over and over and over. I started with the longest side first, pulling the twine taut to prevent sag when sat on or when something with weight is placed on it.  Starting to wrap twine along the long axis. Photo by Diane M. Lilly, 2021.  The long axis of the stool finished being wrapped in twine. Photo by Diane M. Lilly, 2021. For the short side, I simply wrapped the twine over top of the long side, creating just a simple double layer. This reincarnation was to be a stool for us to sit on when we are putting on or taking off our shoes at the back door, so it didn’t need to be fancy, just functional. There was no need to do the weave effect like last time (which, incidentally, was incredibly laborious), saving me time and sanity.  Starting to wrap the short axis of my stool. Photo by Diane M. Lilly, 2021. After several hours of wrapping I finally had my finished stool! The jute twine seat is definitely sturdy enough to hold our weight when we sit on it (and we’re not little people anymore!). This second hand stool just keeps getting resurrected! I wonder what the next rendition will be?!  Finished stool for 2021. Photo by Diane M. Lilly, 2021.  Another pic of the finished stool. Photo by Diane M. Lilly, 2021. I know I complained about how “tedious” and “monotonous” and “repetitive” this project was, but to be honest, it was rather therapeutic. You are not just mindlessly looping…It takes care and close attention to make sure the threads are packed together tightly and pulled taut enough that the finished piece has the strength needed to function properly. There is something strangely satisfying in seeing it all finished! So let me know what you think of my little project in the comments below, and feel free to drop a line about any similar projects of your own! If you’d like to be notified of new blog posts or merchandise sales you can sign up for my monthly newsletter (coming soon) on my contact page. And if you’d like to see what I’m up to on social media, click on the links below! This article may contain a few items or commercial mentions, but I only used them for demonstration purposes only. I am not endorsing any particular product or receiving any monetary gain for this blog. Related blogs you may want to read: On a mission to recycle this neglected vintage stool The stain stripping stage of rescuing my vintage stool Staining my vintage stool with brewed tea My tattered vintage stool transformed into a beautiful plant stand How to replace a clock mechanism How to rewire thrift buy lamps Creating a kitchen coffee bar  Finished and decorated dining room cabinet. Photo by Diane M. Lilly, 2021. Overview: Back in mid-Summer I found myself itching to do another DIY project. I had just finished a few other projects and my dining room was beautifully styled—except for this one miserable looking smaller cabinet. This sad looking piece of furniture had been sitting in my dining room for a few years waiting for me to find the time to give it a face lift and some style. We bought it several years ago from someone who must’ve been using it in their garage. It had no feet, no base, and the body was made of plywood with a pine wood top. Despite the haphazard materials, the piece was well constructed with classy looking door pulls and hinges. I knew I could make this cabinet look beautiful for my dining room. Besides, it was only $40 and I desperately needed storage! Fast-forward to this past summer, and I finally got around to giving this cabinet some much needed attention.  Rustic wooden cabinet before refurbishment. Photo by Diane M. Lilly, 2021. For those of you who are curious how I did it, I’m going to walk you through my DIY process, step by step, below… Step 1: Deciding on a finished look So the first thing I did was have a think about paint colors and style. The finished piece needed to blend in with the rest of my dining room, which I recently redesigned in a traditional style with cherry wood finishes and cream accent colors. I spent a considerable amount of time searching Pinterest and pondering how to make this cabinet look like a traditional piece of dining room furniture. My final inspiration came from a combination of the hardware on the cabinet doors and images of French Country furniture from online.  My redesigned dining room. Photo by Diane M. Lilly, 2021.  Traditional style hinges and door pulls on cabinet. Photo by Diane M. Lilly, 2021. Step 2: Color choices and purchasing the paint, stain, and finishes As I mentioned before, my new dining room colors contain dark red wood with cream color accents, so this smaller cabinet needs to echo that color scheme so that it looks like it is part of the overall set of furniture. My local Home Depot has a nice selection of Varathane furniture stains, and it was so hard to choose just the right shade! I finally settled on the Cognac stain for the cabinet top and legs. It is a nice dark cherry-toned stain that closely matches that of the rest of the furniture. The final protective coat is a Varathane Polyurethane in a satin finish, purchased on Amazon. The reason it’s a polyurethane has to do with the fact that the Cognac stain—being a dark red color—is an oil-based stain, meaning it needs an oil-based polyurethane finish, rather than a polycrylic (water-based) finish that will cause the color to dull or turn brown. The choice for the satin sheen was just a personal choice—I wanted to keep the entire furniture piece more of a matte finish with a slightly rustic feel.  Dark red wood dining room table with cream decorative accents. Photo by Diane M. Lilly, 2021. Step 3: Attaching the wood base We also bought an extra 24 x 48 x 1 inch particle board to attach to the cabinet bottom to give it a more finished look and to provide something into which to screw the furniture feet. Ultimately, I wanted to keep the look simple, matching the existing style of the cabinet. Any base that was too “stylized” would look out of place on this piece of DIY furniture. So the choice was made to keep it simple, understated, and rustic.  Bottom corner of rustic cabinet. Photo by Diane M. Lilly, 2021. Step 4: Painting and attaching the feet The choice for the feet was fairly easy. I already had a vision of what I wanted in my head based on some of the research I had been doing on furniture feet and French Country interior style. I wanted turned feet, low to the ground with a squat sturdy appearance, a bun foot design. Home Depot had these perfect and inexpensive basswood turned bun feet to give this cabinet the lift it needed to get it off the ground and add support. All four feet were treated with the same Varathane Cognac furniture stain and polyurethane as the cabinet top. Each one was then screwed into the bottom base a few inches from each corner.  Unfinished turned bun foot. Photo by Diane M. Lilly, 2021.  Newly stained turned bun foot. Photo By Diane M. Lilly, 2021. Step 5: Painting the cabinet body and doors I prepped the surface of the cabinet by giving it a once over with 100 grit sandpaper to remove any dirt and rough surfaces. The doors were taken off and painted first, with three coats of Rust-oleum Chiffon Cream chalk paint on each side, then the rest of the cabinet body was painted. It took three coats of paint to get the coverage I liked. (No matter what people online say, in my experience it always takes at least three coats of chalk paint to properly cover a surface, unless you prime it first.) The plan was to apply a clear wax finish to the chalk paint once it dried, but I tried it and hated it! For some reason, it seemed to leave weird colorations in some areas, so I stopped after only doing one of the (not as noticeable) sides. In the end, the part I actually treated with wax dried clear, but I didn’t want to take the chance of spending a lot of time and effort to ultimately destroy all my hard work painting! (It has to be said, though, I could’ve just painted over it to fix it.) My thinking is that nothing wet touches this piece, and I can always touch it up or repaint it if it gets too scratched, but right now I don’t mind the “worn” look. I even distressed some of the edges, just a little, for a subtle aged look.  Chalk painted cabinet body. Photo by Diane M. Lilly, 2021.  Cabinet doors drying after chalk paint. Photo by Diane M. Lilly, 2021.  First coat of paint on cabinet doors. Photo by Diane M. Lilly, 2021.  Cabinet door after three coats of paint. Photo by Diane M. Lilly, 2021.  Cabinet door pulls and slight distressing of wood paint. Photo by Diane M. Lilly, 2021. Step 6: Lining the shelves with floral paper The inside of this cabinet need some love as well. I had this beautiful floral liner paper that I had been given and had no idea what to do with it. Then a light bulb went off—I could line the shelves of this cabinet with this beautiful paper, enhancing the quaint traditional style I was looking for in the finished piece. Each shelf was lined with this floral paper, which was attached with glue. When all of the detail work was done, the doors were reattached and the cabinet base was prepped for the next step—staining the top.  Floral paper for shelves. Photo by Diane M. Lilly, 2021.  Cabinet shelves lined with floral paper. Photo by Diane M. Lilly, 2021.  Closeup of cabinet shelves lined with floral paper. Photo by Diane M. Lilly, 2021. Step 7: Painting and finishing the cabinet top The cabinet bottom was wrapped in trash bags and secured with painters tape because I really did not want to get a red stain on my freshly painted white surface! After lightly sanding the top to clean off any dirt and grime, I applied two coats of stain. Boy does this stain dry fast! I was able to apply a second coat in less than an hour! I waited until the next day to apply the final satin finish (Varathane Polyurethane), and half a day later I unveiled my latest furniture piece for my dining room!  First coat of Cognac stain on cabinet top. Photo by Diane M. Lilly, 2021.  Cabinet top after fully stained and finished. Photo by Diane M. Lilly, 2021.  Cabinet refurbishment when done. Photo by Diane M. Lilly, 2021. Step 8: Dress it up! The big unveiling took my breath away! The finished piece looks amazing in my dining room and fits right in! My dining room has become a very nice space to work in, especially once I pulled out the decor and gave the space some much needed interior styling detail. I’ve created a space I love in the style that suits my tastes and inspires me to want to sit down and work in the morning…And that is priceless!  Getting ready to decorate the cabinet top. Photo by Diane M. Lilly, 2021.  The fully finished cabinet, refurbished and decorated. Photo by Diane M. Lilly, 2021. Let me know what you think of my little project in the comments below! If you’d like to be notified of new blog posts or merchandise sales you can sign up for my monthly newsletter (coming soon) on my contact page. And if you’d like to see what I’m up to on social media, click on the links below! Related blogs you may want to read: How to replace a clock mechanism How to rewire thrift buy lamps Creating a kitchen coffee bar Comparing DIY upholstery cleaning methods My dining room redesigned as a multi-functional space A fun DIY project with paint and a thrifted mirror, part 1 A fun DIY project with paint and a thrifted mirror, part 2 Affiliate Disclosure Some of the posts in this article contain affiliate links. This means if you click on the link and purchase the item, I will receive an affiliate commission at no extra cost to you. I will only recommend products or services I use personally and/or believe will add value to my readers, so there is no conflict of interest.  Living room side chair closeup. Photo by Diane M. Lilly, 2021. Today I decided to tackle a project that’s been on my mind for a couple of months now—cleaning the upholstery on my dining room chairs and two living room side chairs. I’ve never done this before (disclaimer!) so I did a quick search of Youtube to see if I could find any tutorials that would help me gain some insight into a couple of techniques that can be used at home. My budget cannot accommodate a bill for a professional cleaner, but I do own a shampooer that can be used as a backup. What I will be sharing with you below are upholstery cleaning techniques that I wanted to try for each set of chairs. So let’s get into it! But first, a disclaimer… Ideally, you should follow the cleaning recommendations on your furniture labels (more recent upholstered furniture pieces may have codes that tell you how that fabric should be cleaned). In my situation, my second hand dining room chairs have no such code on the label. The living room chairs don’t even have a label, so no code there either. In situations where you don’t know how a particular upholstery fabric should be cleaned—and you want to do it yourself at home—there is a gentle method that is similar to cleaning a lamp shade. In this scenario, you would be careful not to soak the fabric with water, but use a water with lots of suds and the suds are mainly what cleans the fabric. You then rinse carefully with water. Always spot check in an inconspicuous place before trying to clean the entire piece of furniture. Now on to my project of the day…  My wet vac/rug shampooer used for part of this project. Photo by Diane M. Lilly, 2021.  Some of the cleaning supplies needed for this project. Photo by Diane M. Lilly, 2021. Dining room chair pads For my dining room chair pads I wanted to try out an at-home upholstery cleaning technique that uses a spray on OxyClean. I went out to the local grocery store and bought a spray bottle of OxyClean, then came home and gathered up the rest of the materials and ingredients needed for this cleaning project—a scrub brush, a sponge, Dawn dishwashing liquid, white vinegar, and my shampooer. This could be done with a small compact shampooer, but I couldn’t find mine so I lugged the large shampooer out and assembled all the upholstery attachments for this project.  Light stain on dining room chair. Photo by Diane M. Lilly, 2021.  A darker stain on dining room chair. Photo by Diane M. Lilly, 2021. Steps for this method: Spray the fabric with OxyClean and let soak for a couple minutes. Using a hard bristle brush, scrub the fabric really well. (Note: I don’t know if this technique will work with more delicate fabrics, so try a test spot first.) Repeat these steps if needed until the stains in the fabric are gone. To get the cleaning solution and any remaining stains out of the fabric, use a shampooer with a couple ounces of white vinegar and a couple drops of liquid dish soap added to the clean water. Shampoo and suction until water runs clean and fabric looks to be free of stains and dirt. So how did this technique go? Well…the first chair went ok. It seemed like most of the dirt came out. A couple small spots remained stubborn, but overall that chair went well, so I moved on to the next chair. A couple stained spots remained, but the rest of the chair looked ok. But the third chair was a mess with a lot of staining, and this method just didn’t clean it. I’m sure if I kept spraying with OxyClean and scrubbing the stains would eventually come out or lighten, but I didn’t want to ruin the fabric or run out of spray cleaner, so I finished the remaining chairs with the second technique I wanted to try. The fourth chair was sprayed with hot water, then the water/stain remover mix (see below for my living room chairs) and scrubbed with a scrub brush. I hit stubborn spots a second time and scrubbed, then used a rag to scrub out the wetness…It was very dirty! I sprayed the cushion with the tonic/vinegar mix (also below for my living room chairs), scrubbed with a scrub brush, and blotted with a towel. I then used the suction-only function on my shampooer to finish it off. In the end I used a combination of two methods to get my dining room chairs bright and clean. Here are the after shots for my dining room chairs…  Dining room chair after cleaning. Photo by Diane M. Lilly, 2021.  A closeup of the freshly cleaned chair pad. Photo by Diane M. Lilly, 2021.  Another closeup shot of the freshly cleaned chair pad. Photo by Diane M. Lilly, 2021. Living room side chairs For this DIY project, I wanted to try using a technique for my living room chairs from one lady who has worked in the upholstery business for years, so I trust this source more than some other sources. The materials I used for this method were Clorox 2 laundry stain remover (the color safe version), tonic water (hopefully that’s a good substitute for the sparkling water mentioned in the video), and a few small spray bottles. Instead of the white painters rags suggested, I have light colored kitchen towels to use for scrubbing and blotting. There are two things mentioned in the video that I do not have—a contraption that shaves the pills (hopefully I won’t need one!) and Scotch Guard, which I will have to pick up later.  Living room side chair closeup of dirty fabric. Photo by Diane M. Lilly, 2021.  Closeup of dirt spots on living room side chair. Photo by Diane M. Lilly, 2021.  Closeup of the dirty roll top back on my living room side chair. Photo by Diane M. Lilly, 2021. So here are the steps I followed… Spray fabric with very hot tap water. Spray wet fabric with a solution of 1/3 laundry stain remover to 2/3 water. Use a lint free rag to scrub the fabric. Use another lint free rag (preferable a light color to see the dirt) to scrub the dirt and cleaning solution out of the fabric. Once all of the rags come up clean, spray with a solution of a cup of sparkling water (I have tonic water instead) to 1/2 cup white vinegar. Scrub fabric again to get out any leftover dirt, odors, and stain remover suds. Spray with two thin coats of Scotch Guard (which I have to buy later). So how did it go?  The dirt pulled out of the fabric with a dish towel. Photo by Diane M. Lilly, 2021. So after a long day of scrubbing dining room and living room chairs, I eventually decided instead to use a good cleaner in my shampooer (for pet stains and odor removal), and use the laundry stain remover solution to try to get out stubborn stains. I used a spritz of the tonic water and vinegar solution to help with heavy traffic areas, and then used the suction-only function on my shampooer to draw out excess water. This is what my side chairs looked like when I was done…  Both living room side chairs freshly cleaned. Photo by Diane M. Lilly, 2021.  Closeup of side chair seat freshly cleaned. Photo by Diane M. Lilly, 2021.  Photo of side chair roll top back freshly cleaned. Photo by Diane M. Lilly, 2021. Final thoughts… I have to say, it took quite a lot of elbow grease to do this DIY cleaning project, and I’m not entirely sure just using a good cleaning solution with a shampooer wouldn’t have been easier, using a stain remover to get out the stubborn spots. Between the two, I personally liked the Clorox2 method better. The cleaning solution went way further, making the laundry stain remover cleaner less expensive than the spray OxyClean, by far. What I will say about both of these techniques is that they worked wonders with small furniture pieces, but I can’t even imagine working that hard to clean a much larger piece of furniture with either of these techniques! Someone my age with back problems would have a tough time cleaning a sofa, for instance. What I do like is that these methods provide a way to clean small pieces without lugging out my very large and very heavy shampooer. I do like the sparkling water and vinegar application. I may do that more often when I clean other carpet and upholstery items so I can get rid of odors and help bring out the brightness. One more word of advice…There is no such thing as “spot cleaning” a piece of furniture. When a piece of fabric gets wet and then dries, usually there is a water stain left behind. So if you are cleaning a piece of upholstery, you must evenly wet it from seam to seam, evenly scrub it, then evenly remove the dampness. This way the entire section dries with no water marks. There is no sense going through back breaking work scrubbing only to be left with water marks! So that was my experiment in cleaning two different types of upholstery in what ended up being three different ways—or more accurately, a combination of three different cleaning methods, depending on what my fabric needed. What are your thoughts? Have you cleaned any of your own upholstery? Do you have any tips or tricks? Do you have a cautionary tale to tell based on your experiences? Feel free to leave your comments below! There are some product images and links used in this blog article purely as examples. I am not being compensated for any particular products mentioned in this article. Related blogs you may want to read: How to replace a clock mechanism How to frame small canvas art How to rewire thrift buy lamps Creating a kitchen coffee bar DIY refurbishment of a dining room cabinet In Part 1 of this project blog I repainted a frame from a mirror I bought at a local thrift shop for dirt cheap. My original intention was to paint a base coat for the reddish undertones I wanted to show through a crackled gold top coat. The end result looked ok…for a different room. The almost solid gold color just looked gaudy in my dining room, even though I have a lot of decorative things with gold accents. This mirror, unfortunately, was just too over-the-top gold. The end result was me painting over it with a new layer of crackle and white craft paint.  Painted frame from the previous DIY project. Photo by Diane M. Lilly, 2021. And this is where I left off in Part 1 of this project…My task now was to find a way to fix this mirror and make it work in my dining room. So I’m standing there—several hours of work and layers of paint later—wondering why this frame does not work. It just didn’t feel finished. I kept looking at it and trying to visualize how to get a more ornate look with gold accents. And then it hit me…This mirror needs a gold Celtic knot! I brainstormed and created templates of straight border knots that I would eventually trace onto the frame. I drew ideas on a sketchpad until I got a design I liked. This was a challenge—I knew I wanted to accentuate the corners and midpoints along the frame, so my border has broken to create visual interest, but I admit it took me some time to get the design right! Once I finally got the design I wanted, the pattern was redrawn at full scale on grid paper. The idea was to create a template that I would trace onto the frame so that it could be painted in…wait for it…GOLD!  Basic lifework for my new Celtic border. Photo by Diane M. Lilly, 2021.  Finished knot work for template of the Celtic border. Photo by Diane M. Lilly, 2021. The template I made only needed the top and left sides with three corners, so some of the work could be simplified. Once the top and left side were traced, I could flip the paper over and retrace the design on the bottom and top. Using a very dark pencil, I traced the finished design on the back side of the paper, turned it over, and then lined it up on the frame. The paper was carefully taped down, and I painstakingly traced my knot design onto the two-inch wide wood frame. With the design template drawn onto the frame, it was time to paint!  View of template on frame and some of it painted gold. Photo by Diane M. Lilly, 2021. The brush used was a very fine brush with bristles that came to a point, so that my very shaky hands could control the brush strokes! It took two very carefully applied paint layers to finish the gold knotwork, but this design element was the perfect touch and made all the difference in the world! I now have a work of art and a mirror that fits in well with all the other understatedly classy pieces of decor in that space. I love this piece, and it is versatile enough to use elsewhere should I decide to move it. But for now, it stands in pride of place above my new office drawers (which are in my dining room, but that’s another blog post!).  Finished painted knot work on frame corner. Photo by Diane M. Lilly, 2021.  View of the frame and mirror with gold painted Celtic knot work border. Photo by Diane M. Lilly, 2021.  Finished mirror in a dining room vignette. Photo by Diane M. Lilly, 2021.  Closeup of finished gold painted Celtic knot work border. Photo by Diane M. Lilly, 2021. Let me know your thoughts on this project in the comments below, and don’t forget to read Part 1 to see how this whole thing started! Let me know if you’d like to see more of this type of project in the future. If you’d like to be notified of new blog posts or merchandise sales, you can sign up for my monthly newsletter (coming soon) on my contact page. And if you’d like to see what I’m up to on social media, click the links below! Related blogs you may want to read: Part 1 of this project My top thrift finds this year How to replace a clock mechanism How to frame small canvas art How to rewire thrift buy lamps DIY Fall/Winter decorative branch box Creating a kitchen coffee bar My dining room redesigned as a multi-functional space DIY refurbishment of a dining room cabinet  Finished painted mirror in dining room vignette. Photo by Diane M. Lilly, 2021. During a recent trip to my local Goodwill, I found this really sturdy second hand mirror with a nice wood frame. The mirror was marked 9.99, but I think I only paid 4.99 for it, which is quite a steal because mirrors this size (26” x 18”) go for close to $100 or more brand new. There was just one issue—it was the wrong color for my dining room! But no worries…That’s what paint is for!  Original frame before painting. Photo by Diane M. Lilly, 2021. I spent a few weeks thinking things over, trying to decide the right look for this mirror to help it blend into the decor style and color scheme of my space. Do I make it a white or cream? Would chalk paint work on this piece? Or do I paint it a dark reddish brown to match my furniture? Ultimately I thought that a cream would be too “samey” (since I’m already working on other pieces that are cream) and the dark brown would be too dark, so an aged gold look sounded perfect.  Frame ready to be prepped for painting. Photo by Diane M. Lilly, 2021. For this small project I experimented with a craft crackle medium called “Weathered Wood”—a medium I hadn’t used in (literally) years, so this project became a bit of a crap shoot, if you’ll excuse the expression. So let me walk you through my process… Step 1: Prep the frame for painting The screws, backboard, cardboard, and mirror were removed and put aside.  Removing the screws from the back to take out the mirror. Photo by Diane M. Lilly, 2021.  Mirror screws being stored in a plastic zip lock bag for safe keeping. Photo by Diane M. Lilly, 2021. I then lightly sanded the shiny finish with 100 grit sandpaper. (I didn’t need to sand off all the color because I didn’t necessarily mind if some of the darker aspects came through.) Step 2: Apply the base coat The first coat of paint was a reddish brown “primer” coat (it’s not technically a primer, but it’s more like the under color for the aged gold and copper effect I wanted to achieve.) One coat of that was sufficient.  The base colors for my frame. Photo by Diane M. Lilly, 2021.  Frame with a base coat of reddish paint. Photo by Diane M. Lilly, 2021. Step 3: Apply the crackle medium The next step was to apply a thin layer of the weathered wood crackle glaze. I usually use Elmer’s glue to create a crackle effect in my painting projects, but I wanted to try something different this time, so I pulled out this crackle medium that’s been sitting in my closet. The crackle medium took about an hour and a half to dry. 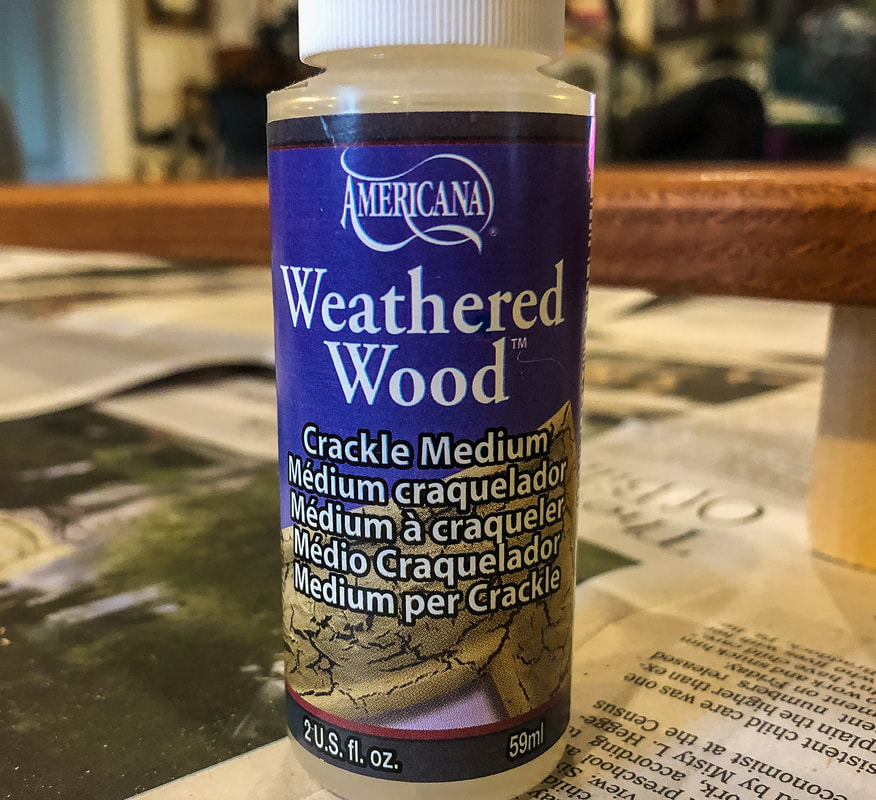 Weathered Wood crackle medium. Photo by Diane M. Lilly, 2021. 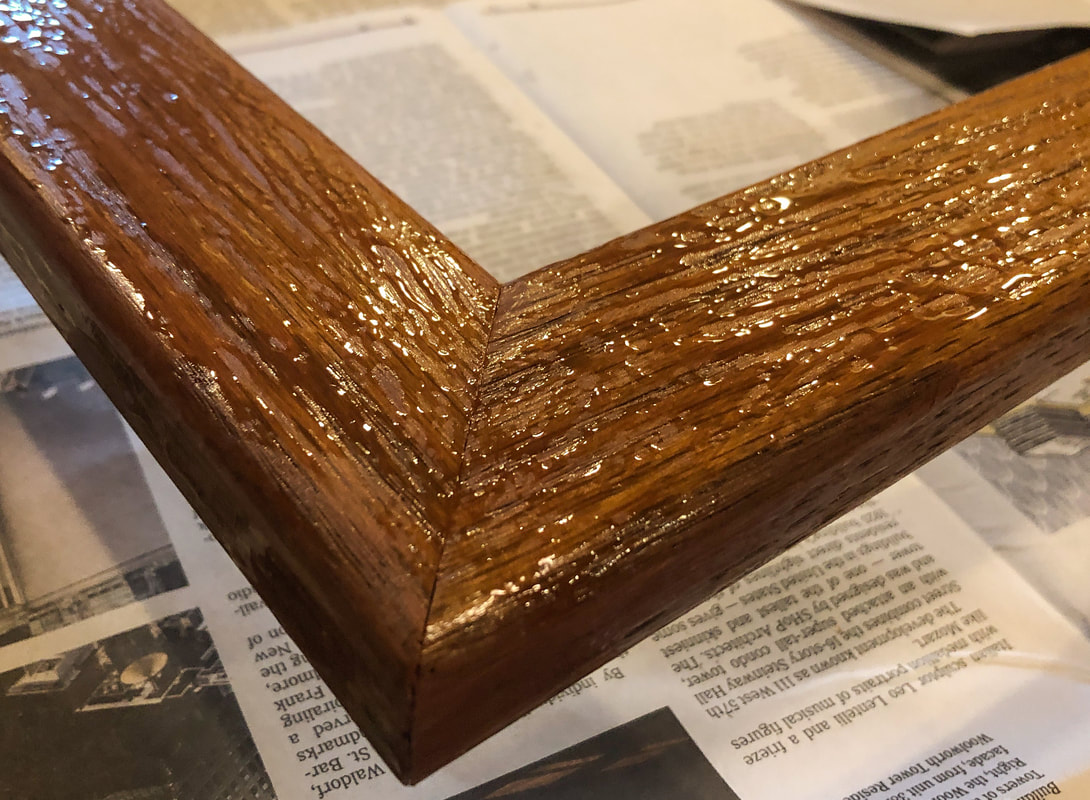 Crackle medium apply to frame. Photo by Diane M. Lilly, 2021. Step 4: Apply the gold paint I applied a “thin layer” of paint, as per the instructions on the bottle. As it was drying I really didn’t like the dark reddish color underneath that seemed to dominate the frame. I had been hoping for more of a gold hue, so I decided to apply a second coat of gold paint once the first coat had dried. 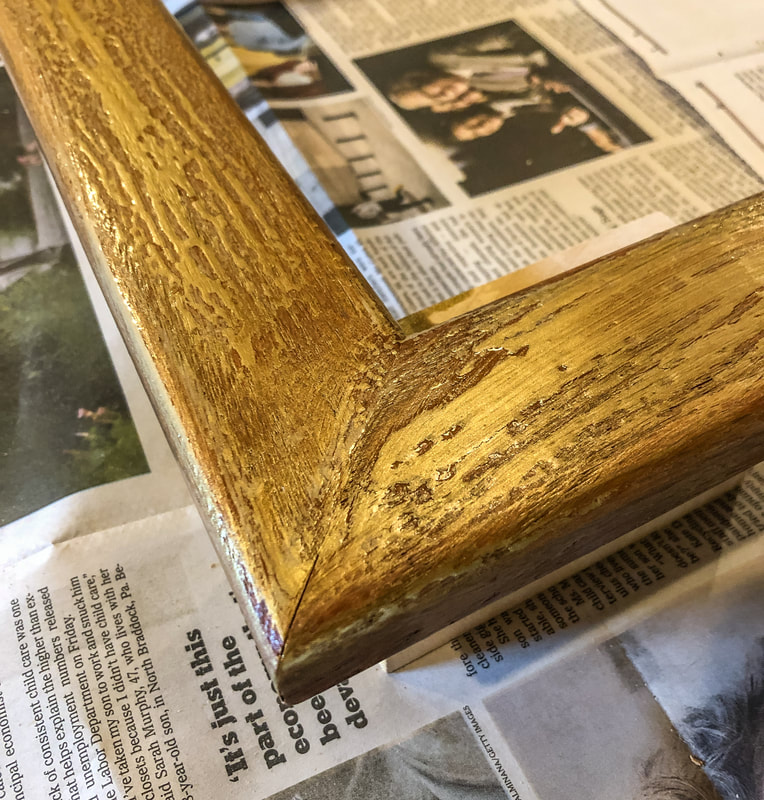 First coat of gold paint on frame. Photo by Diane M. Lilly, 2021. I like the crackle effect--and it is much easier (and more effective) than glue--but not the reddish-brown base color. In hindsight, I should’ve left the wood the original color and added crackle and gold paint. Thankfully, the second coat of gold paint did not ruin the crackle effect, and it did improve the color, but the reddish brown was still a bit too much for my liking. I applied a third—and last—coat of gold paint (sparingly) to bend out more of that copper color, and I did lose much of the crackle effect, but at that point it was more important to get the right color than to worry about the crackle effect.  Second coat of gold paint. Photo by Diane M. Lilly, 2021. Step 5: Re-assemble the mirror The mirror, cardboard, and backboard were put back in place and screwed in. Gave the mirror a good clean…And decided I hated it! It looked way too gold and gaudy… I hated the look so much I couldn’t leave it a DAY in my dining room! So I slapped on another coat of crackle medium, let that dry, then used some white craft paint as the top coat. To be honest, I still don’t love it, but I think it looks way better than the gold color. 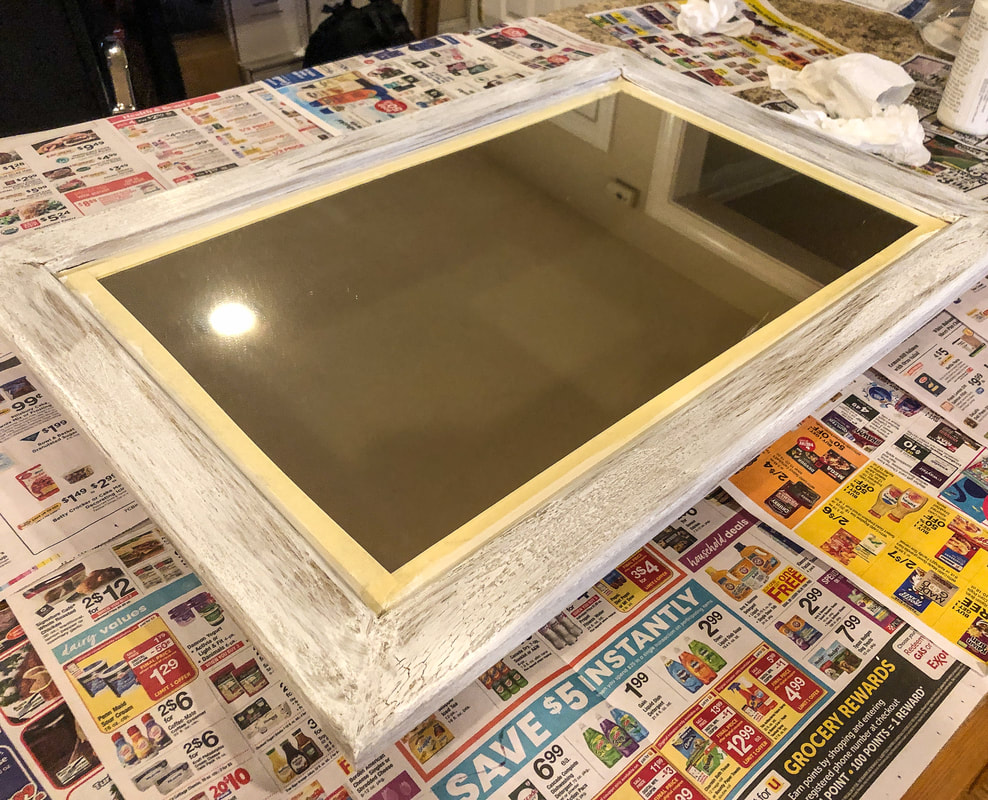 Final coat of white paint on mirror. Photo by Diane M. Lilly, 2021.  Closeup of white crackled paint on frame. Photo by Diane M. Lilly, 2021.  Mirror with newly painted frame. Photo by Diane M. Lilly, 2021. I think this project took about six hours fro beginning to end. If I had to do anything differently, I would’ve skipped the reddish brown base color and saved myself probably at least an hour. I wasn’t super precious about this project, because you can always paint over what you don’t like, right? It was a nice chance to experiment a little just to see what would happen. So what do you think about this project? Do you have any tips to share? Did you find this article useful? Let me know in the comments below and let’s see if we can get a conversation going! Just as an update…As it turned out, I had a Eureka moment a couple weeks later…What if I designed a Celtic knot border to paint on this frame? So I did! And what a difference that one idea made to this entire project! The end effect was beautiful and helped this mirror fit right in to the overall style of the room. You can read all about it in Part 2 of this project blog! If you’d like to be notified of new blog posts or merchandise sales, you can sign up for my monthly newsletter (coming soon) on my contact page. And if you’d like to see what I’m up to on social media, click the links below! There are some product images and links used in this blog article purely as examples. I am not being compensated for any particular products mentioned in this article. Related blogs you may want to read: Part 2 of this project with a Celtic knot border My top thrift shops finds this year How to replace a clock mechanism How to frame small canvas art How to rewire thrift buy lamps DIY Fall/Winter decorative branch box Creating a kitchen coffee bar My dining room redesigned as a multi-functional space DIY refurbishment of a dining room cabinet I love my coffee. It is the nectar of the Gods! You know what I don’t love? The mess! So I decided to jump on the proverbial bandwagon and create a proper coffee bar for my kitchen counter…  DIY kitchen counter coffee bar. Photo by Diane M. Lilly, 2021. A few neglected jewelry trays (which I had gotten from a previous employer) were collecting dust and cobwebs in my basement, so I thought this would be a great opportunity to get creative! Some textured paint and a couple of decorative handles, and I would have myself a tray that I could use on my counter as a coffee bar…So here’s how I did it… My coffee bar decor Let’s start with the decor…A few of the pieces pictured in the (above) image came from a recent haul of gorgeous decorative items picked up from a local thrift store. Thrift stores are amazing! If you are willing to be patient and trust the universe, you can come home with some really special finds that make your house look more like a home. Old things have character and a story, and that’s so important when you are creating vignettes. So of course my coffee bar had to have a few thrifted items. I mixed those items with some things I had laying around—or things I stole from somewhere else in the house—to create a tray that looks attractive on my counter, corals the mess, and has a function that fits my lifestyle. You’ll see that I have my little spot for wine, with a few wine glasses and a Tuscan style wine box and I have three copper canisters for my sugar, tea bags, and powdered creamer. A tiny vase of faux florals (for now) give the tray an organic feel and make it feel more engaging.  Thrifted copper canisters. Photo by Diane M. Lilly, 2021.  Thrifted Paris cafe plaque. Photo by Diane M. Lilly, 2021.  Thrifted wine box. Photo by Diane M. Lilly, 2021. Now here’s how I made this tray… Chalk painting a coffee bar tray I started off with a terrifyingly black jewelry tray that I knew was not going to just take the paint without some prep work. Yes, I know chalk paint is touted as not requiring a primer, but trust me—it does sometimes! Generally speaking you don’t need to prime surfaces when you use chalk paint (so they say), but since this tray is so jet black, I wanted to make sure I didn’t end up with really black areas coming through, so I painted it white first. My later self thanked me for thinking to “prime” this piece first, even if it was just with a thin coat of white craft paint. That thin layer of white craft paint was followed by three coats of Chiffon Cream chalk paint. Even with painting the tray white first, it still took three layers of chalk paint to get rid of the blackness underneath.  Black jewelry tray from my basement. Photo by Diane M. Lilly, 2021.  Chiffon Cream chalk paint (by Rust-oleum) for my project. Photo by Diane M. Lilly, 2021.  Tray after one coat of chalk paint. Photo by Diane M. Lilly, 2021. The next step I took was to use glue to create a crackled finish, but to be honest I wasn’t particularly happy with the results. It did create a lot of interesting crevices, though, so I thought I’d apply some brown wax to the surface to see what interesting textural effect I could create. But before I could apply the wax I wanted to do a little distressing and lighten up the finish. So I sanded the surface with 100 medium grit sand paper and distressed corners and edges to let a little of the black to come through. Then a brown finishing wax was applied to the tray…Let me tell you, when it first went on I panicked! It was brown wax, so I don’t have to say what it looked like smudged on my tray…that I had just worked SOOO hard on! I let it dry and then sanded the surface again, this time with 220 fine grit sand paper. And, oh my God, it was gorgeous!!! Talk about a sigh of relief!  Tray after three coats of chalk paint. Photo by Diane M. Lilly, 2021.  Tray after brown wax application. Photo by Diane M. Lilly, 2021.  Closeup of tray before sanding before final finish. Photo by Diane M. Lilly, 2021.  Tray after sanding and varnish. Photo by Diane M. Lilly, 2021. Now it was time for the finishing touches…Two coats of varnish was applied to the finished tray, then large felt pads were attached to the bottom to keep it up off the counter. I made a trip to my local Home Depot and bought decorative handles and a different color of screws (I didn’t like the silver ones that came with the handles), and a few days later the handles were attached.  Decorative handle attached to finished DIY tray. Photo by Diane M. Lilly, 2021. All that was left to do was gather my decor and create my vignette! Putting it all together… Even my hubby likes this new coffee bar…Truthfully I thought he’d be annoyed! As I was thinking about what I’d like on this tray, I made sure to address what this tray needed to do. What was its function? What functional items needed to be on the tray? And then how can I dress it up to make it aesthetically pleasing for my kitchen counter? I now have my handy wine area, with a few glasses that I can quickly grab, along with a decorative box for that extra bottle of wine. Also on the tray are the three copper canisters I rescued from a basement bin and cleaned up. Those canisters—that I tried to sell at a yard sale a few years before—now house my sugar, tea bags, and powdered creamer, which is so convenient in the mornings when I make coffee. I even put a little glass jar on the counter for my dried chamomile (which I grow in my yard) for when I want to make chamomile tea!  Finished counter coffee bar setup. Photo by Diane M. Lilly, 2021.  Closeup of wine section of tray. Photo by Diane M. Lilly, 2021.  Closeup of copper canisters on tray. Photo by Diane M. Lilly, 2021. This was a tough projects in some ways, but it was rewarding…and now I have a beautiful—and functional—coffee bar to dress up what used to be a very disgusting looking area of my kitchen! So what do you think? Do you have a coffee bar in your kitchen? If not, did this inspire you to create one? If you’ve already created a coffee bar, feel free to share you comments and experiences below! I’d love to hear about them! If you’d like to hear about my new blog posts, merchandise sales, new items, social media or there events, please feel free to sign up for my monthly newsletter (coming soon) here. And you can follow me on my social media links below! This article may contain a few items or commercial mentions, but I only used them for demonstration purposes only. I am not endorsing any particular product or receiving any monetary gain for this blog. Related blog posts you may want to read: My top thrift shop finds this year How to replace a clock mechanism How to frame small canvas art How to rewire thrift buy lamps DIY Fall/Winter decorative branch box Comparing DIY upholstery cleaning methods DIY refurbishment of a dining room cabinet |
Author
Some of the posts on this site contain affiliate links. This means if you click on the link and purchase the item, I will receive an affiliate commission. 
Categories
All
Archives
April 2024
|